


L
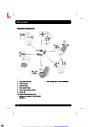
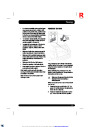
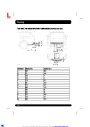
Tyrerepairkit
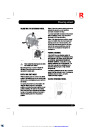
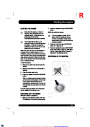
Note: Screwing the bottle onto the receiver
will pierce the bottle's seal. Once the
receiver has been fitted, a ratchet prevents
it from being removed.
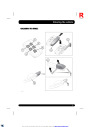
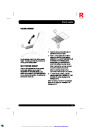
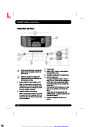
13. Remove the inflation hose from the tyre
valve, by unscrewing it as quickly as
possible in an anti-clockwise direction.
14.
Replace the inflation hose protective cap
and the tyre valve cap.
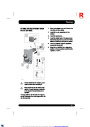
5.
6.
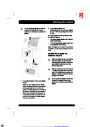
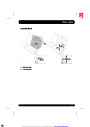
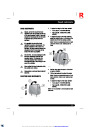
Remove the valve cap from the damaged
tyre.
15.
Make sure that the tyre repair kit (including
the bottle and receiver caps) is placed
securely in the vehicle. You will need to use
the kit to check the tyre pressure after a
maximum of 10 km (6 miles), so make sure
it is easily accessible.
Remove the protective cap from the inflation
hose. Connect the inflation hose to the tyre
valve ensuring that the hose is screwed on
firmly.
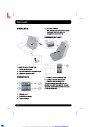
7.
Ensuring that the compressor switch is in
the Off (0) position, insert the power cable
connector into an auxiliary power socket,
see 88, AUXILIARY POWER SOCKETS.
Then switch on the engine. See 105,
STARTING THE ENGINE.
16. Immediately drive the vehicle for a
maximum of 10 km (6 miles). This will allow
the sealant to coat the inner surface of the
tyre and form a seal at the puncture.
CHECKING THE TYRE PRESSURE
AFTER A REPAIR
8.
9.
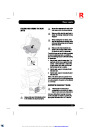
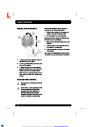
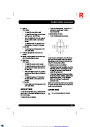
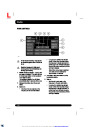
Switch on the compressor by positioning
the switch to the (l) position.
Inflate the tyre to a minimum of 1.8 bar (26
psi, 180 kPa) and a maximum of 3.5 bar
When driving the vehicle, if you
experience vibrations, abnormal
steering, or noises, reduce speed
immediately. Drive with extreme
caution and reduced speed, to the first
safe place to stop the vehicle. Visually
examine the tyre and check its
pressure. If there are any signs of
damage or deformity to the tyre, or the
tyre pressure is below 1.3 bar (19 psi,
130 kPa), do not continue driving.
(51
psi, 350 kPa).
Note: When pumping the sealant through
the tyre valve, the pressure may rise up to
6
drop again after approximately 30 seconds.
bar (87 psi, 600 kPa). The pressure will
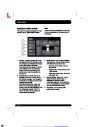
10.
During the inflation, switch the compressor
off briefly, to check the tyre pressure using
the gauge mounted on the compressor.
Note: It should not take longer than 10
minutes to inflate the tyre. If, after a
maximum of 10 minutes, the tyre has not
yet reached minimum pressure, the tyre
should not be used.
Consult a tyre repair centre or your
Dealer/Authorised Repairer, for advice
concerning the replacement of a tyre
after using a tyre repair kit.
11.
12.
Once the tyre has been inflated to the
required pressure, switch off the
compressor. If desired, the engine may be
turned off after the compressor has been
turned off.
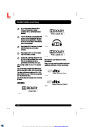
1.
Drive the vehicle for a maximum of 2 miles
km) then stop in a safe place. Carry out
a visual examination of the tyre’s condition.
(3
2. Remove the repair kit from the vehicle.
Remove the power connector from the
auxiliary power socket.
3. Screw the inflation hose connector firmly
onto the tyre valve.
248
XML to PDF by RenderX XEP XSL-FO Formatter, visit us at http://www.renderx.com/
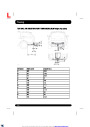
| Categories | Land Rover, Range Rover |
|---|---|
| Tags | Land Rover |
| Model Year | 2014, 2015 |
| Download File |
|
| Document Type | Owners Manual |
| Language | English |
| Product Name | Range Rover Handbook |
| Product Brand | Land Rover |
| Applicable to Country | Bulgaria, International |
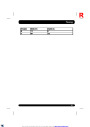
| Document File Type | |
| Publisher | landrover.com |
| Wikipedia's Page | http://en.wikipedia.org/wiki/Land_Rover |
| Copyright | Attribution Non-commercial |
(1 votes, average: 3 out of 3)
Automotive readers have rated 2014-2015 Land Rover Range Rover Handbook Manual 3.0 out of 3.0 based on 1 product reviews. I stopped to buy fuel. On shifting to D to move, my range rover could not move, but low gear light continued to blink. The low gear button remained stiff. What is wrong?