


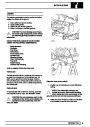


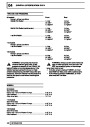


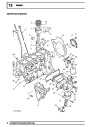

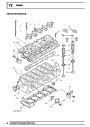


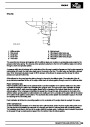

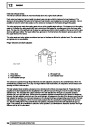

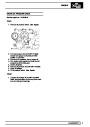


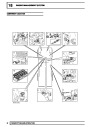

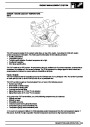


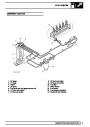


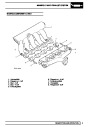


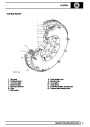


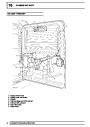


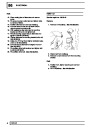


EMISSION CONTROL
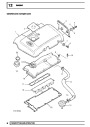
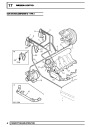
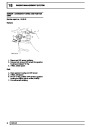
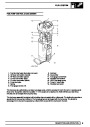
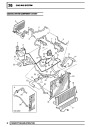
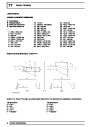
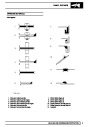
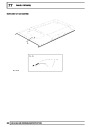
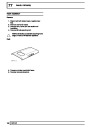
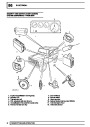
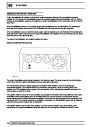
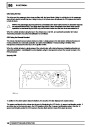
VALVE - EGR - NON EU3 MODELS
Service repair no - 17.45.01
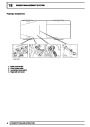
Remove
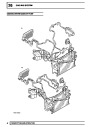
Refit
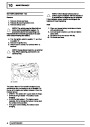
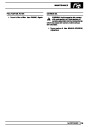
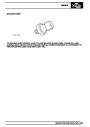
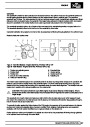
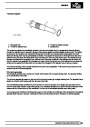
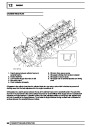
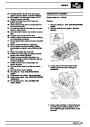
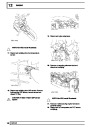
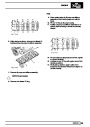
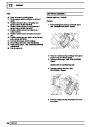
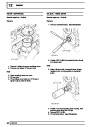
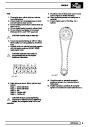
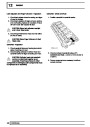
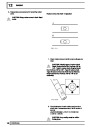
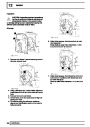
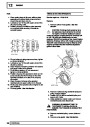
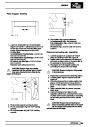
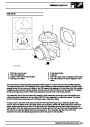
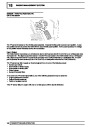
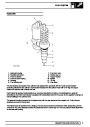
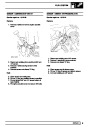
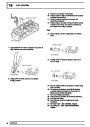
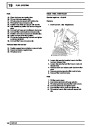
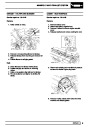
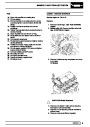
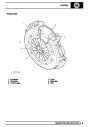
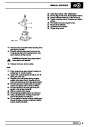
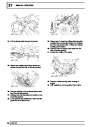
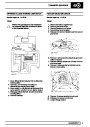
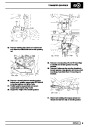
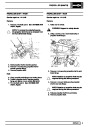
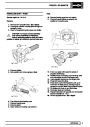
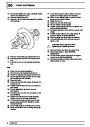
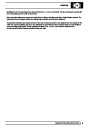
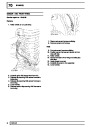
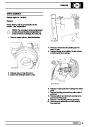
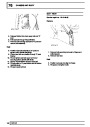
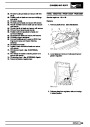
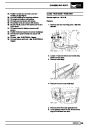
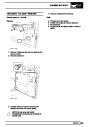
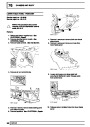
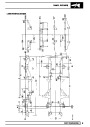
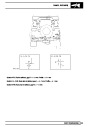
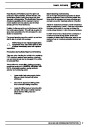
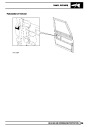
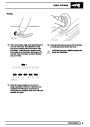
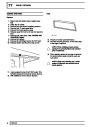
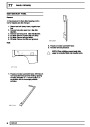
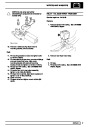
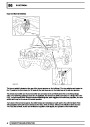
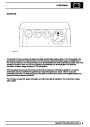
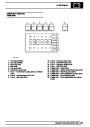
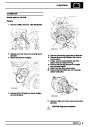
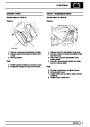
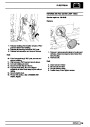
13. Clean EGR valve and mating face on pipe.
14.
Position pipe to EGR valve, fit retaining clip and
finger tighten bolt.
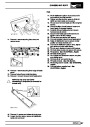
15.
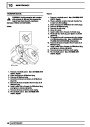
Clean inlet manifold face.
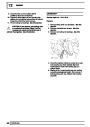
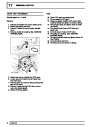
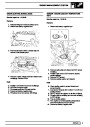
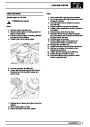
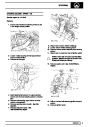
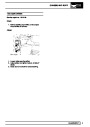
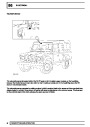
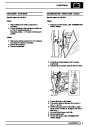
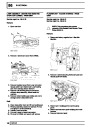
1.
2.
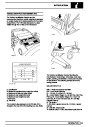
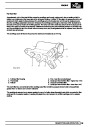
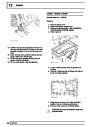
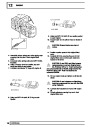
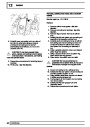
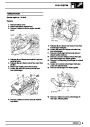
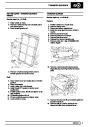
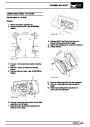
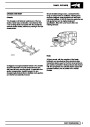
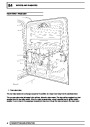
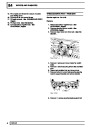
Disconnect battery negative lead.
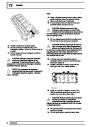
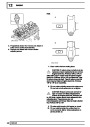
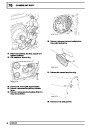
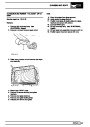
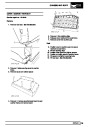
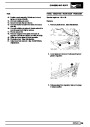
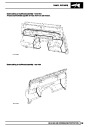
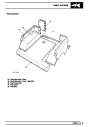
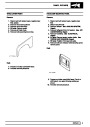
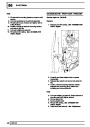
Remove 3 bolts and remove engine acoustic
cover.
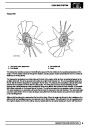
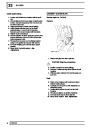
Remove cooling fan. See COOLING SYSTEM,
Repair.
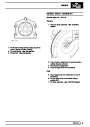
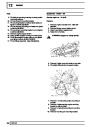
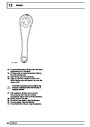
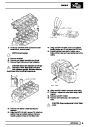
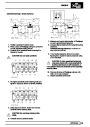
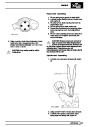
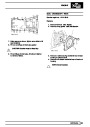
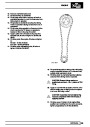
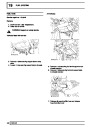
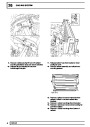
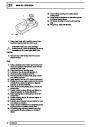
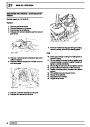
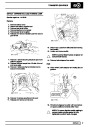
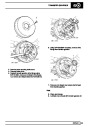
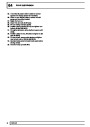
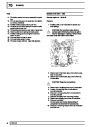
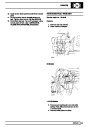
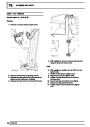
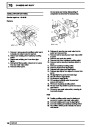
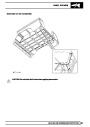
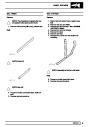
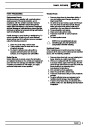
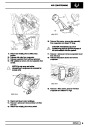
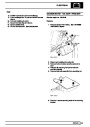
16. Position EGR valve to inlet manifold using new
gasket and tighten bolts to 10 Nm (7lbf.ft).
17. Position air intake hose and tighten clip screw.
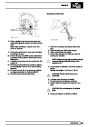
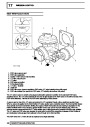
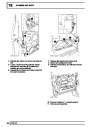
18. Position EGR pipe bracket, fit bolts and finger
tighten.
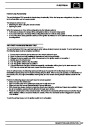
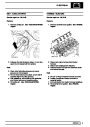
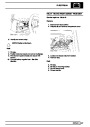
3.
4.
5.
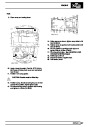
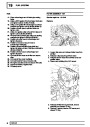
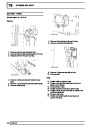
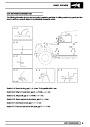
Remove battery cover.
Disconnect battery negative lead.
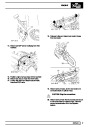
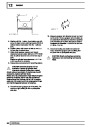
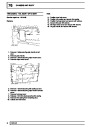
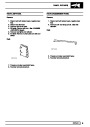
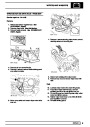
19. Position EGR valve pipe to exhaust manifold and
finger tighten allen screws
20.
21.
Tighten EGR valve clip to 5 Nm (3 lbf.ft).
Tighten EGR pipe bracket bolts to 10 Nm (7
lbf.ft).
22.
23.
24.
Tighten 2 Allen screws to 10 Nm (7 lbf.ft).
Connect vacuum hose to EGR valve.
Fit cooling fan. See COOLING SYSTEM,
Repair.
25.
26.
27.
Fit engine acoustic cover.
Reconnect battery negative lead.
Fit battery cover.
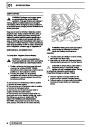
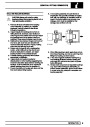
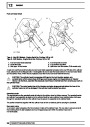
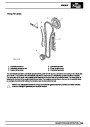
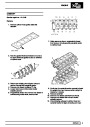
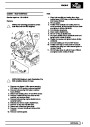
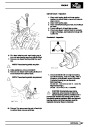
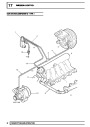
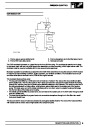
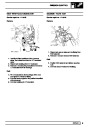
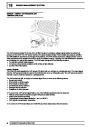
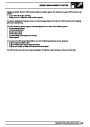
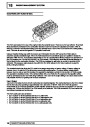
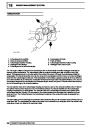
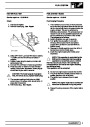
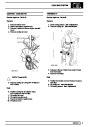
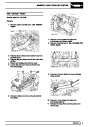
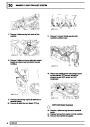
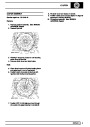
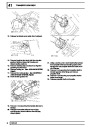
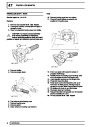
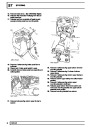
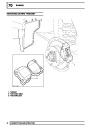
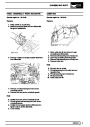
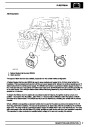
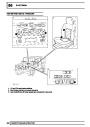
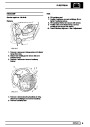
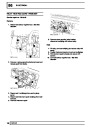
6.
7.
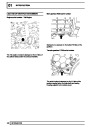
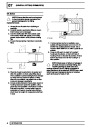
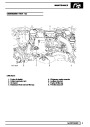
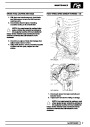
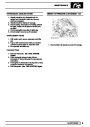
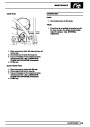
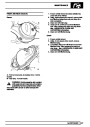
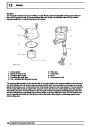
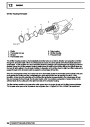
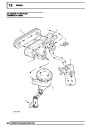
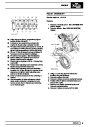
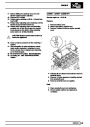
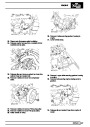
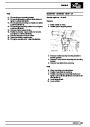
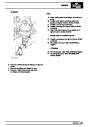
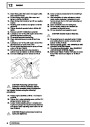
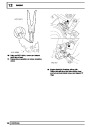
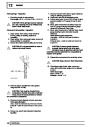
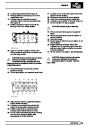
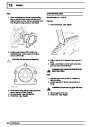
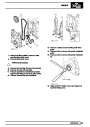
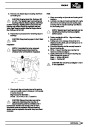
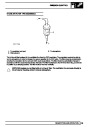
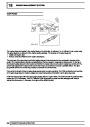
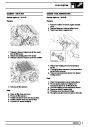
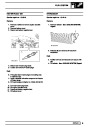
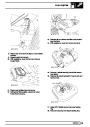
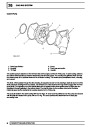
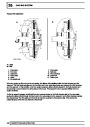
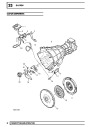
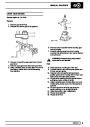
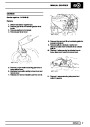
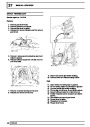
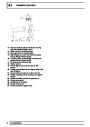
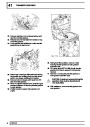
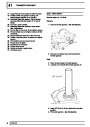
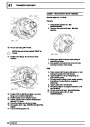
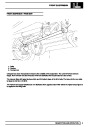
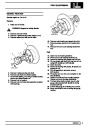
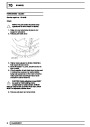
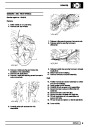
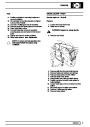
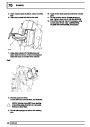
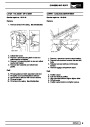
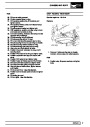
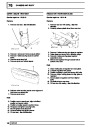
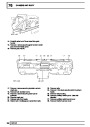
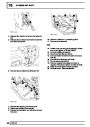
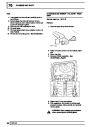
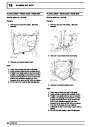
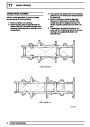
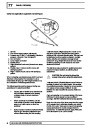
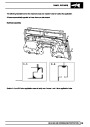
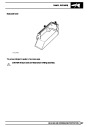
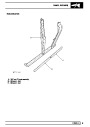
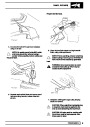
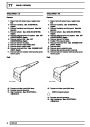
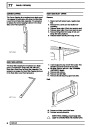
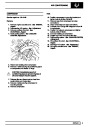
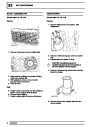
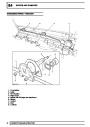
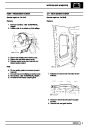
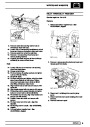
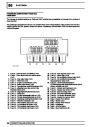
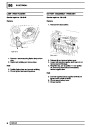
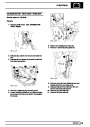
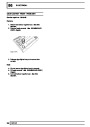
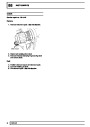
Disconnect vacuum hose from EGR valve
Loosen clip screw and release air intake from
EGR valve.
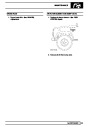
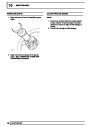
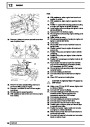
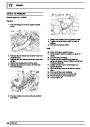
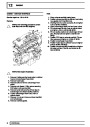
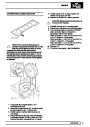
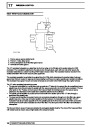
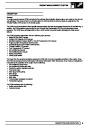
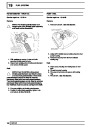
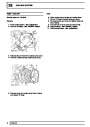
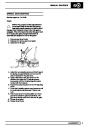
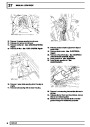
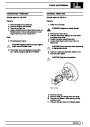
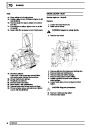
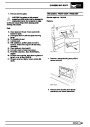
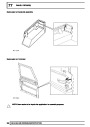
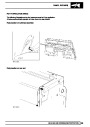
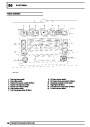
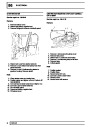
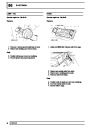
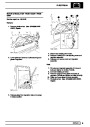
8.
9.
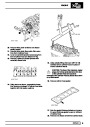
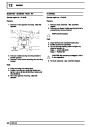
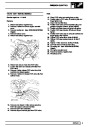
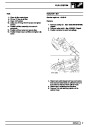
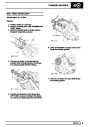
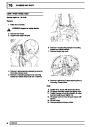
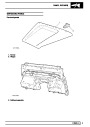
Remove 4 bolts, release EGR valve from inlet
manifold and discard gasket.
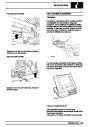
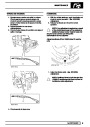
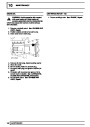
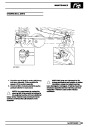
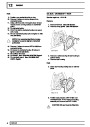
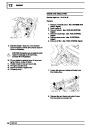
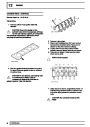
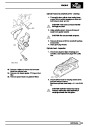
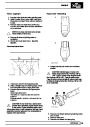
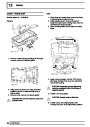
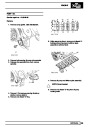
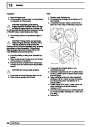
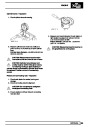
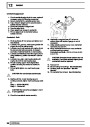
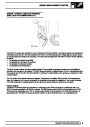
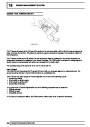
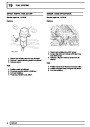
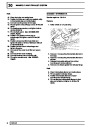
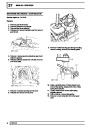
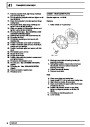
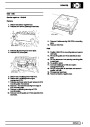
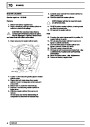
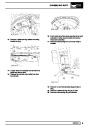
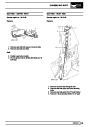
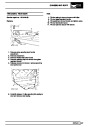
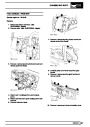
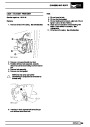
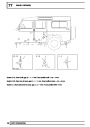
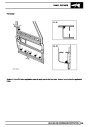
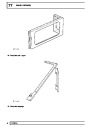
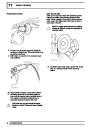
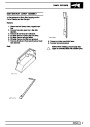
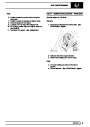
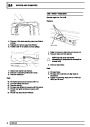
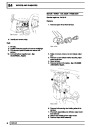
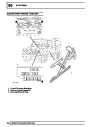
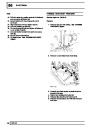
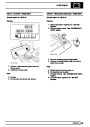
Remove 2 bolts and release EGR valve clip from
cylinder head.
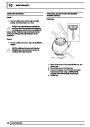
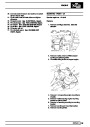
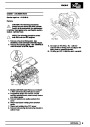
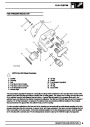
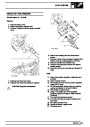
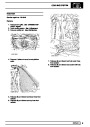
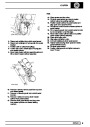
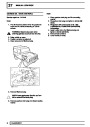
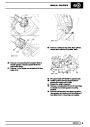
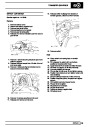
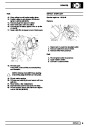
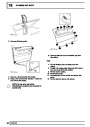
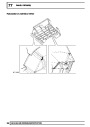
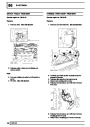
10.
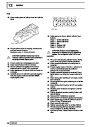
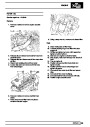
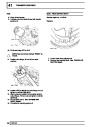
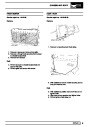
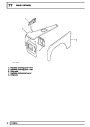
Remove and discard 2 Allen screws securing
EGR valve pipe to exhaust manifold.
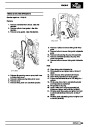
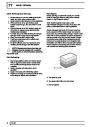
Remove EGR valve assembly.
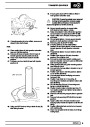
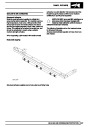
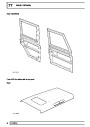
11.
12.
Remove clip and remove pipe from EGR valve.
REPAIR
1
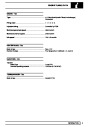
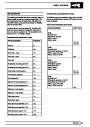
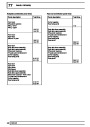
| Categories | Land Rover, Land Rover Defender |
|---|---|
| Tags | Land Rover |
| Model Year | 1999, 2000, 2001, 2002 |
| Download File |
|
| Document Type | Workshop Manual |
| Language | English |
| Product Name | Defender |
| Product Brand | Land Rover |
| Document File Type | |
| Publisher | landrover.com |
| Wikipedia's Page | http://en.wikipedia.org/wiki/Land_Rover |
| Copyright | Attribution Non-commercial |
(0 votes, average: 0 out of 5)