


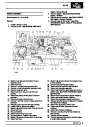


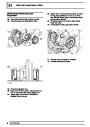


12
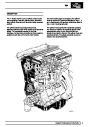
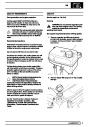
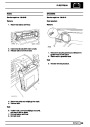
ENGINE
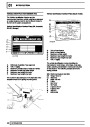
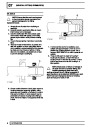
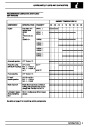
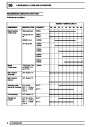
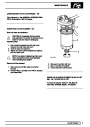
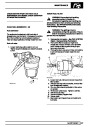
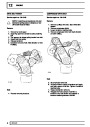
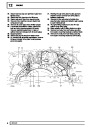
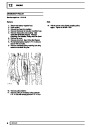
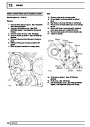
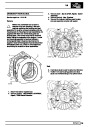
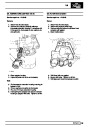
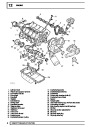
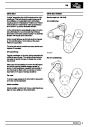
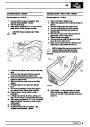
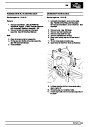
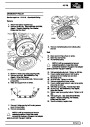
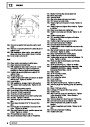
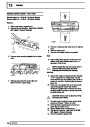
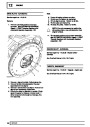
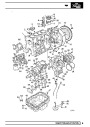
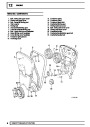
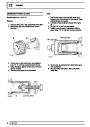
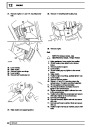
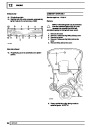
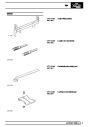
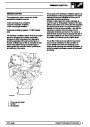
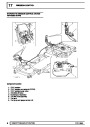
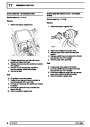
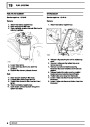
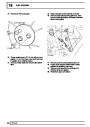
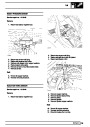
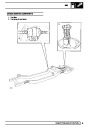
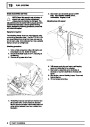
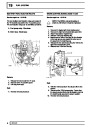
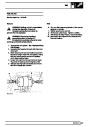
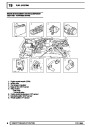
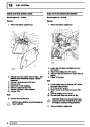
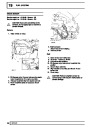
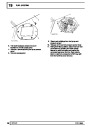
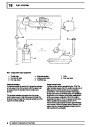
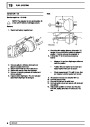
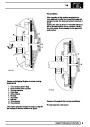
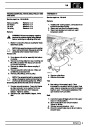
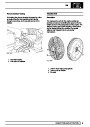
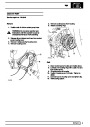
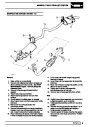
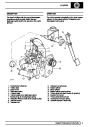
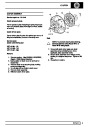
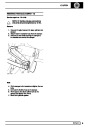
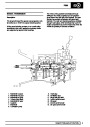
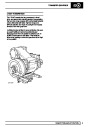
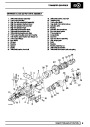
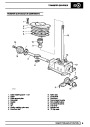
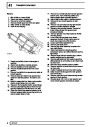
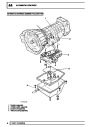
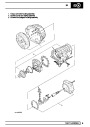
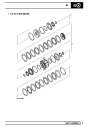
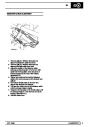
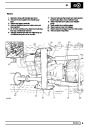
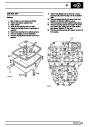
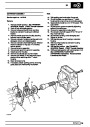
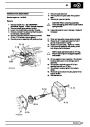
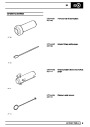
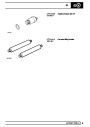
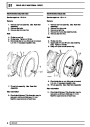
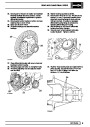
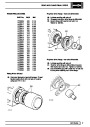
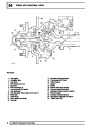
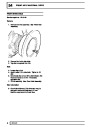
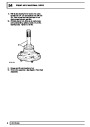
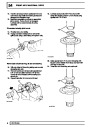
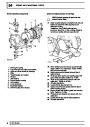
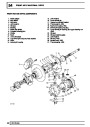
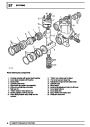
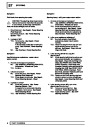
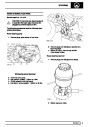
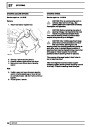
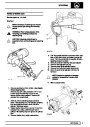
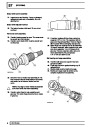
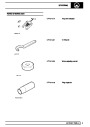
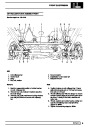
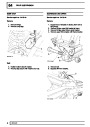
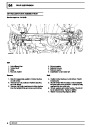
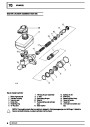
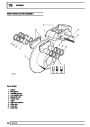
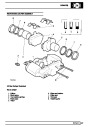
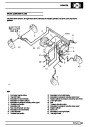
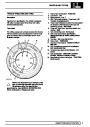
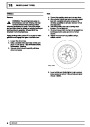
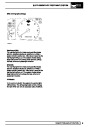
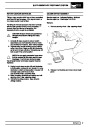
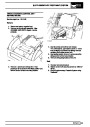
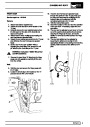
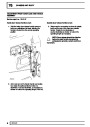
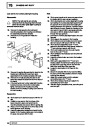
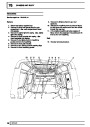
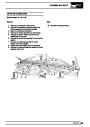
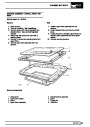
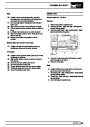
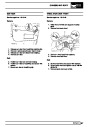
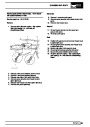
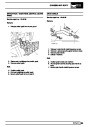
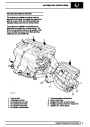
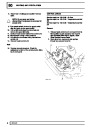
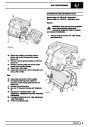
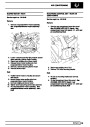
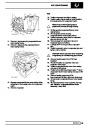
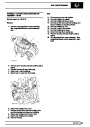
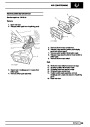
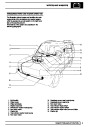
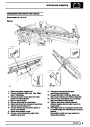
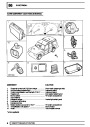
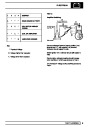
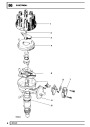
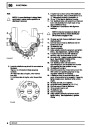
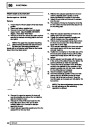
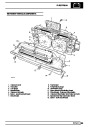
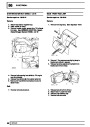
CRANKSHAFT PULLEY ASSEMBLY
Service repair no - 12.21.01
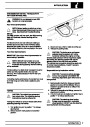
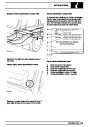
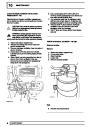
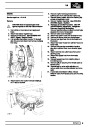
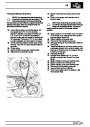
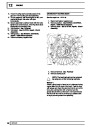
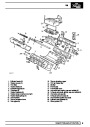
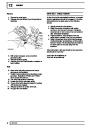
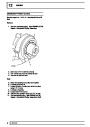
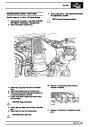
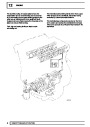
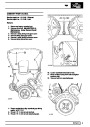
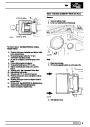
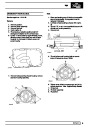
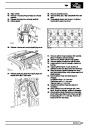
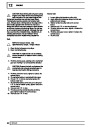
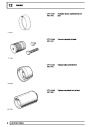
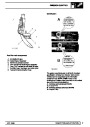
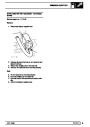
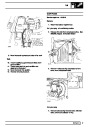
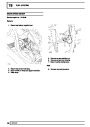
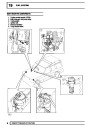
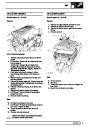
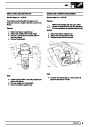
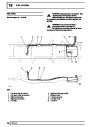
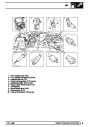
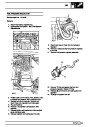
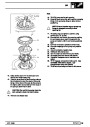
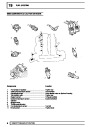
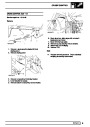
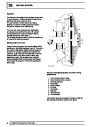
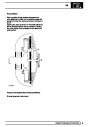
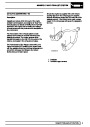
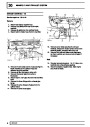
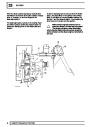
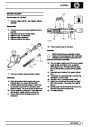
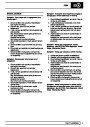
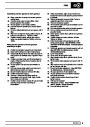
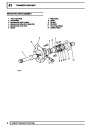
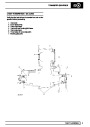
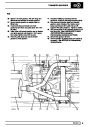
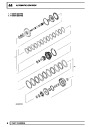
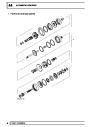
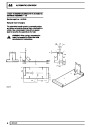
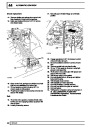
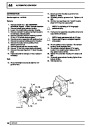
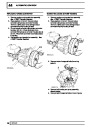
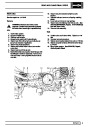
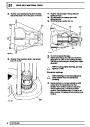
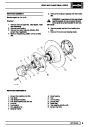
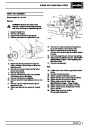
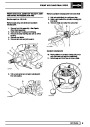
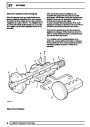
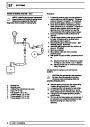
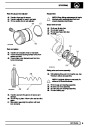
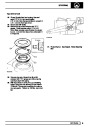
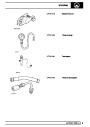
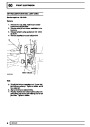
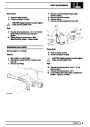
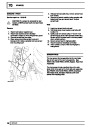
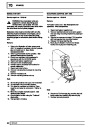
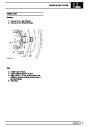
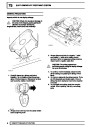
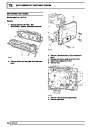
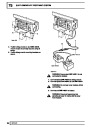
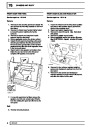
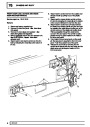
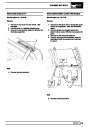
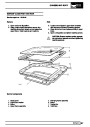
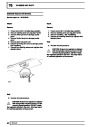
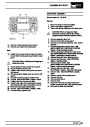
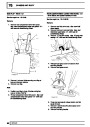
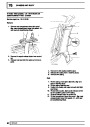
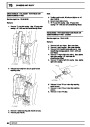
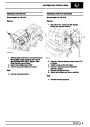
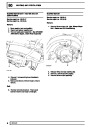
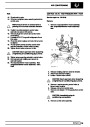
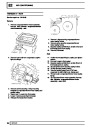
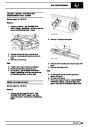
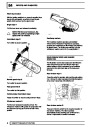
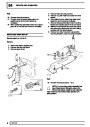
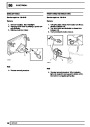
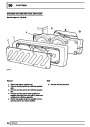
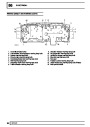
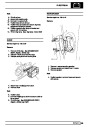
FRONT COVER OIL SEAL - RENEW
Service repair no - 12.21.14
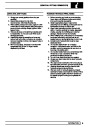
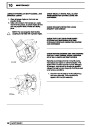
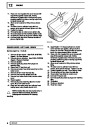
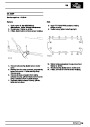
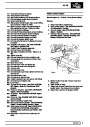
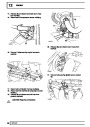
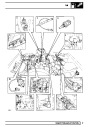
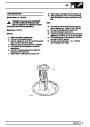
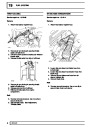
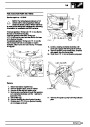
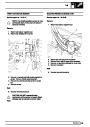
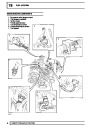
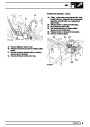
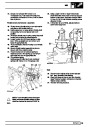
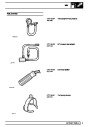
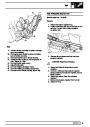
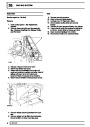
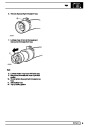
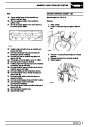
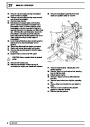
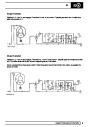
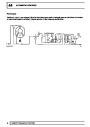
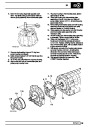
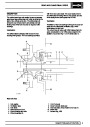
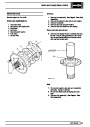
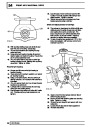
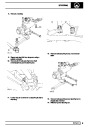
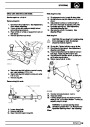
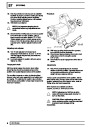
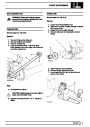
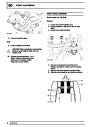
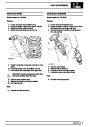
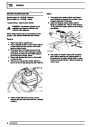
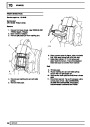
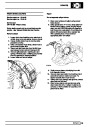
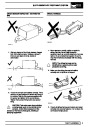
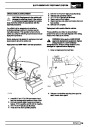
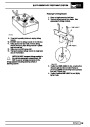
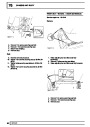
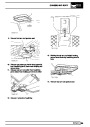
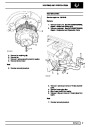
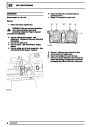
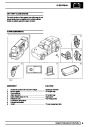
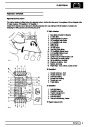
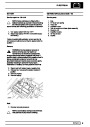
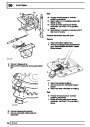
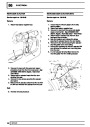
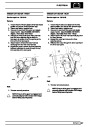
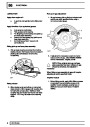
1.
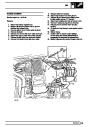
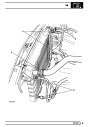
Remove viscous coupling. See COOLING
SYSTEM, Repair, Viscous Coupling, Fan
Blades, Pulley and Fan Cowl
Remove drive belt. See Drive Belt
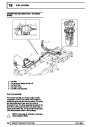
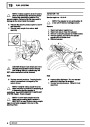
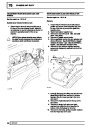
Raise vehicle on ramp [hoist].
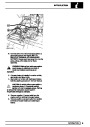
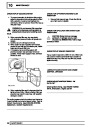
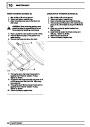
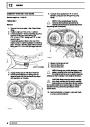
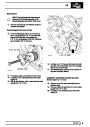
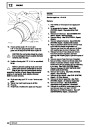
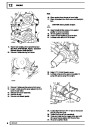
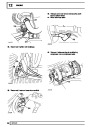
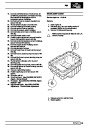
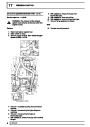
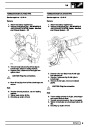
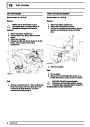
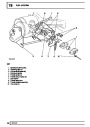
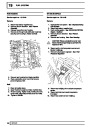
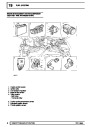
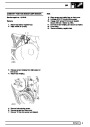
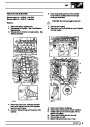
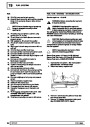
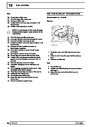
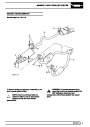
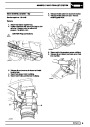
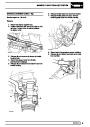
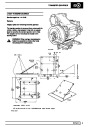
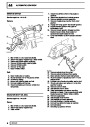
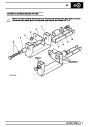
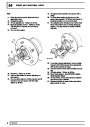
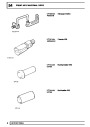
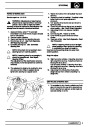
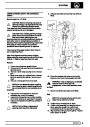
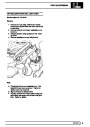
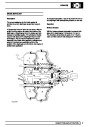
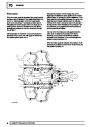
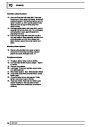
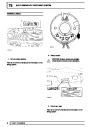
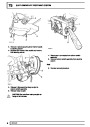
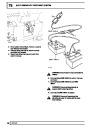
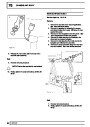
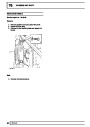
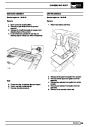
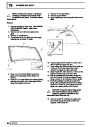
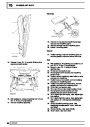
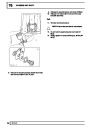
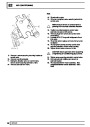
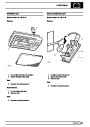
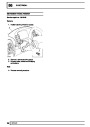
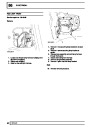
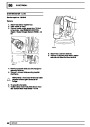
1. Remove crankshaft pulley. See Crankshaft
Pulley Assembly. Do not remove pulleys.
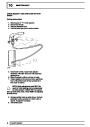
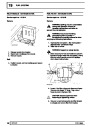
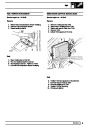
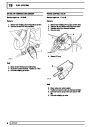
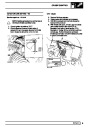
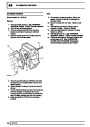
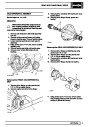
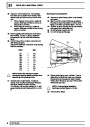
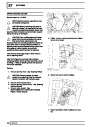
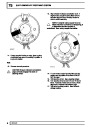
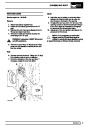
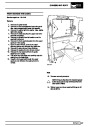
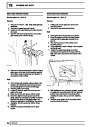
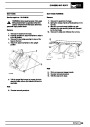
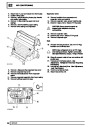
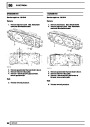
2. Remove eight screws and remove mud
excluder.
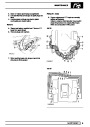
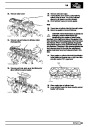
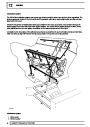
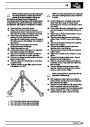
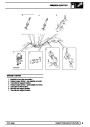
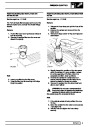
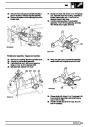
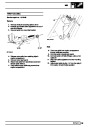
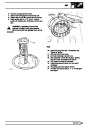
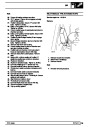
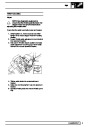
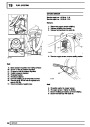
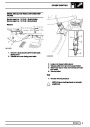
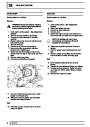
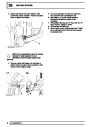
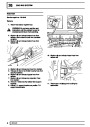
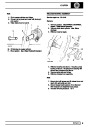
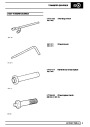
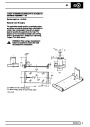
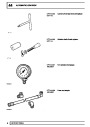
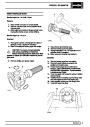
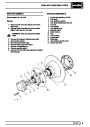
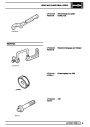
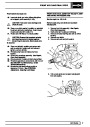
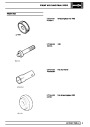
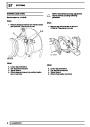
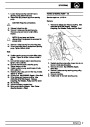
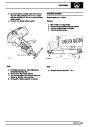
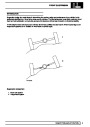
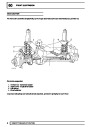
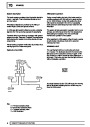
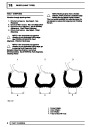
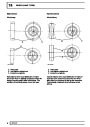
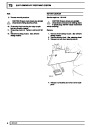
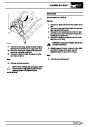
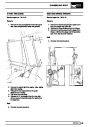
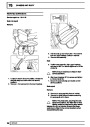
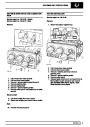
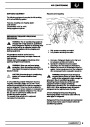
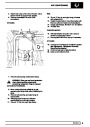
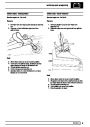
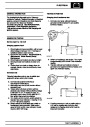
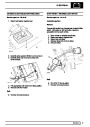
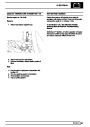
3. Fit button of 18G1328 to crankshaft, fit extractor
to seal.
4. Turn centre bolt of extractor to remove seal.
5. Remove seal from extractor.
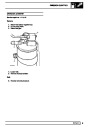
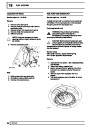
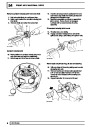
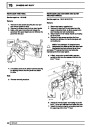
6. Clean seal seating.
7. Lubricate outside diameter of seal.
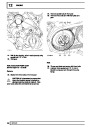
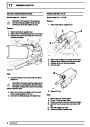
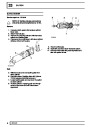
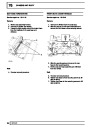
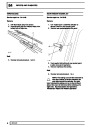
8. Locate seal in front cover.
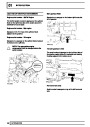
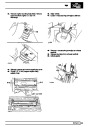
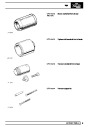
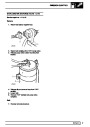
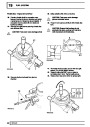
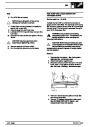
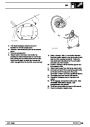
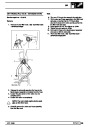
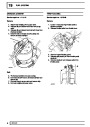
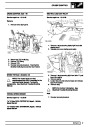
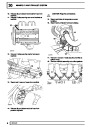
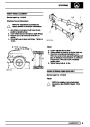
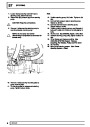
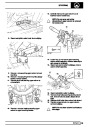
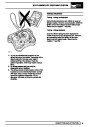
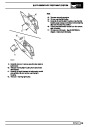
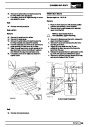
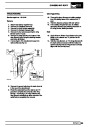
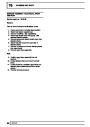
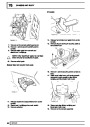
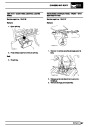
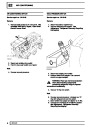
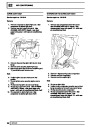
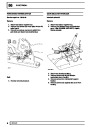
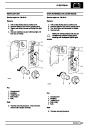
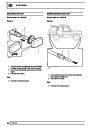
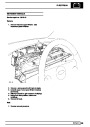
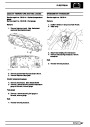
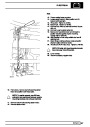
9. Fit adaptor 18G1291/5 to 18G1291/4.
10. Fit tool to seal.
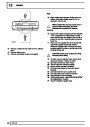
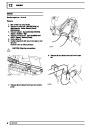
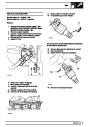
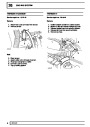
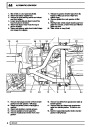
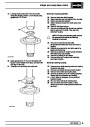
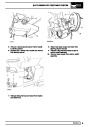
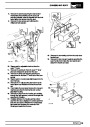
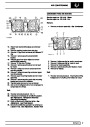
11. Fit and tighten centre bolt to crankshaft, tighten
centre locknut to seat seal.
12. Slacken locknut and remove tool.
13. Lubricate seal lip.
14. Fit mud excluder and tighten screws.
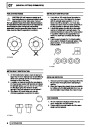
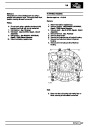
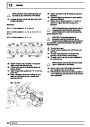
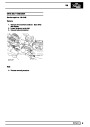
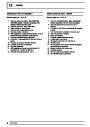
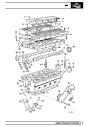
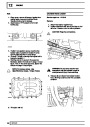
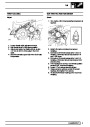
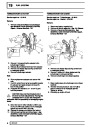
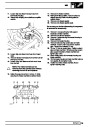
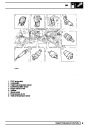
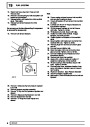
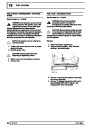
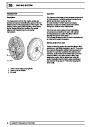
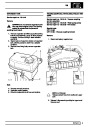
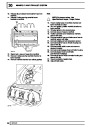
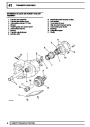
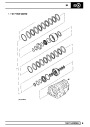
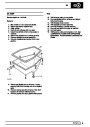
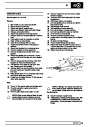
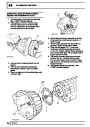
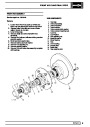
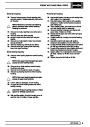
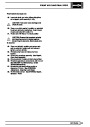
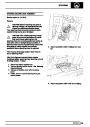
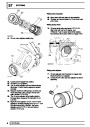
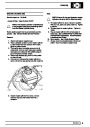
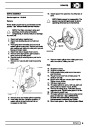
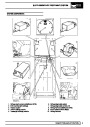
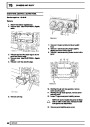
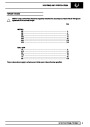
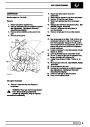
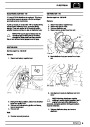
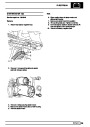
2.
3.
4.
5.
6.
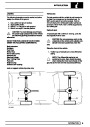
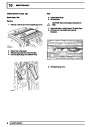
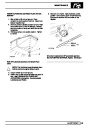
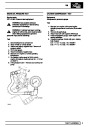
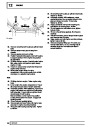
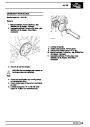
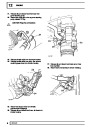
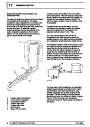
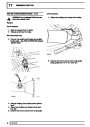
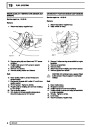
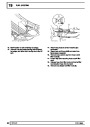
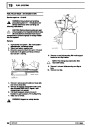
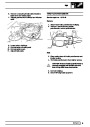
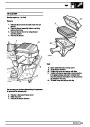
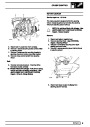
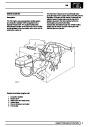
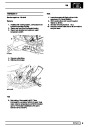
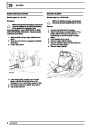
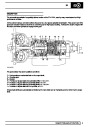
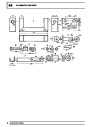
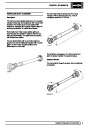
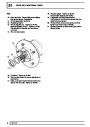
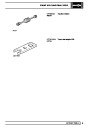
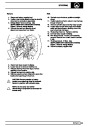
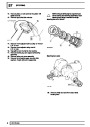
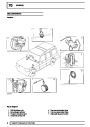
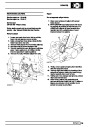
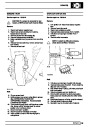
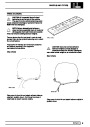
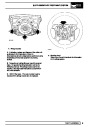
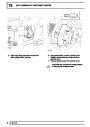
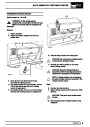
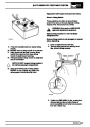
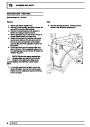
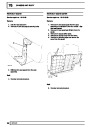
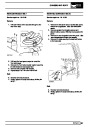
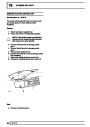
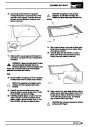
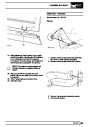
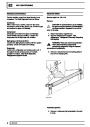
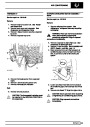
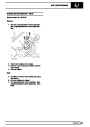
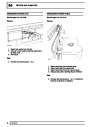
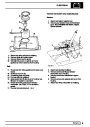
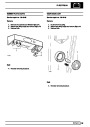
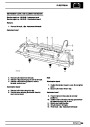
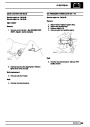
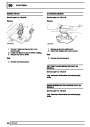
Remove bell housing bottom cover.
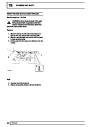
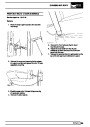
Remove engine undertray.
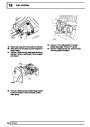
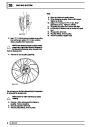
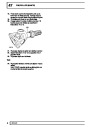
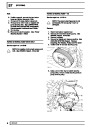
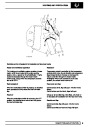
With assistance to stop flywheel rotation, remove
crankshaft pulley assembly retaining bolt.
Remove crankshaft pulley assembly.
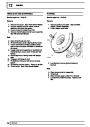
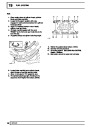
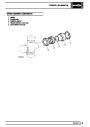
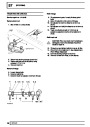
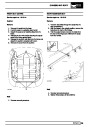
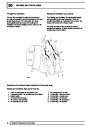
If required: Place assembly in vice and remove
pulley.
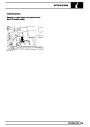
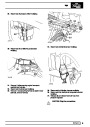
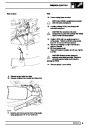
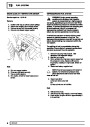
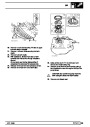
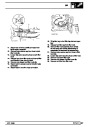
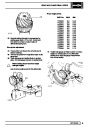
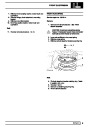
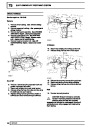
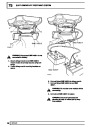
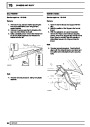
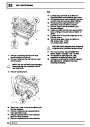
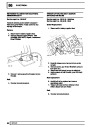
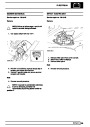
Fit pulley to torsional vibration damper.
Lubricate seal face of assembly.
Fit pulley assembly.
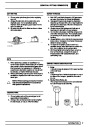
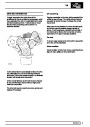
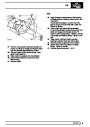
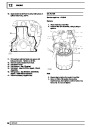
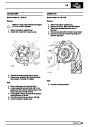
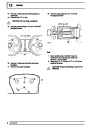
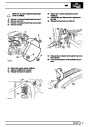
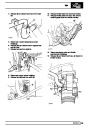
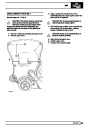
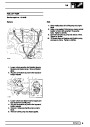
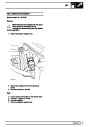
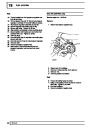
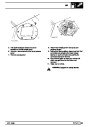
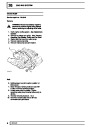
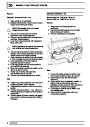
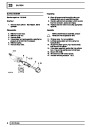
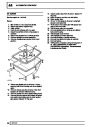
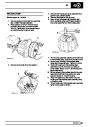
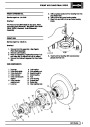
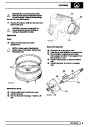
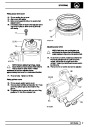
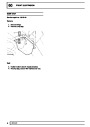
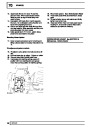
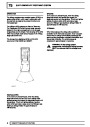
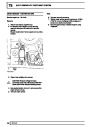
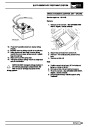
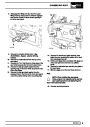
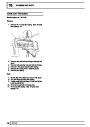
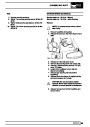
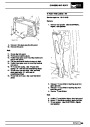
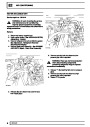
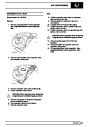
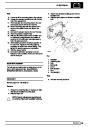
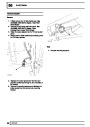
7.
8.
9.
10.
11.
12.
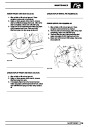
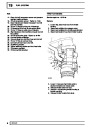
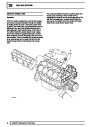
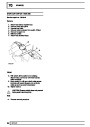
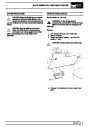
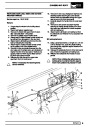
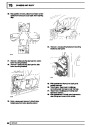
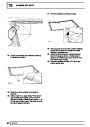
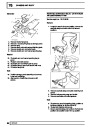
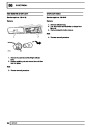
With assistance to stop flywheel rotation, fit
retaining bolt. Tighten to 280 Nm.
Reverse removal procedure. 1 to 5.
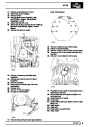
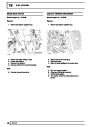
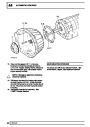
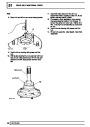
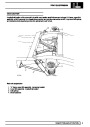
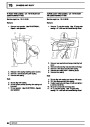
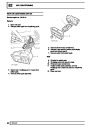
13.
15.
Fit crankshaft pulley assembly.
8
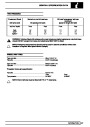
REPAIR
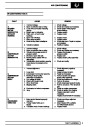
| Categories | Range Rover |
|---|---|
| Tags | Land Rover |
| Model Year | 1998 |
| Download File |
|
| Document Type | Workshop Manual |
| Language | English |
| Product Brand | Land Rover |
| Document File Type | |
| Publisher | landrover.com |
| Wikipedia's Page | http://en.wikipedia.org/wiki/Land_Rover |
| Copyright | Attribution Non-commercial |
(0 votes, average: 0 out of 5)