


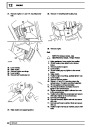


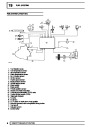


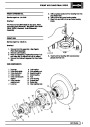


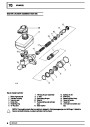


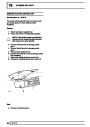


17
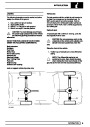
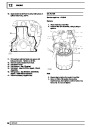
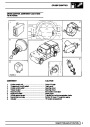
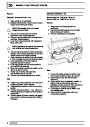
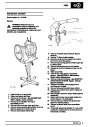
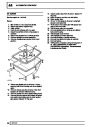
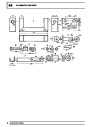
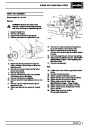
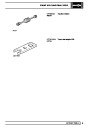
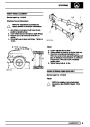
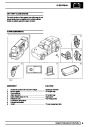
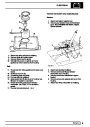
EMISSION CONTROL
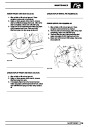
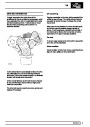
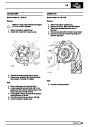
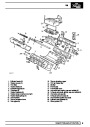
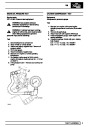
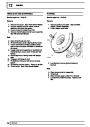
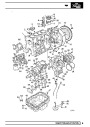
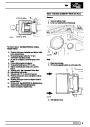
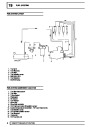
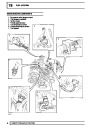
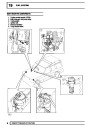
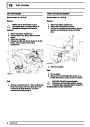
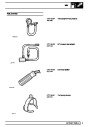
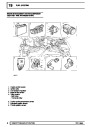
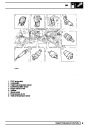
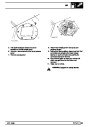
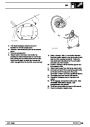
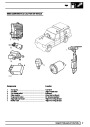
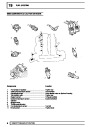
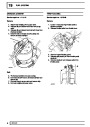
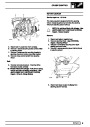
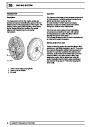
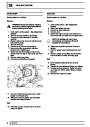
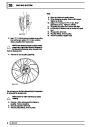
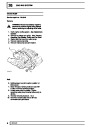
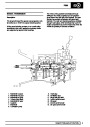
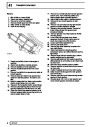
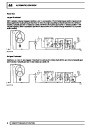
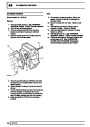
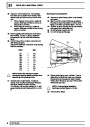
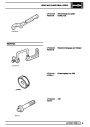
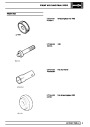
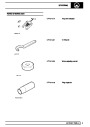
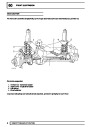
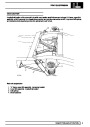
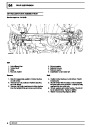
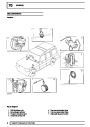
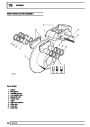
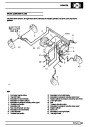
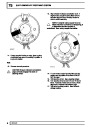
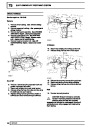
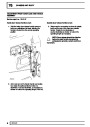
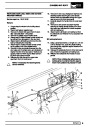
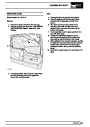
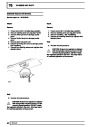
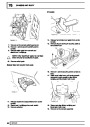
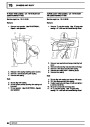
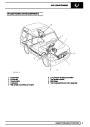
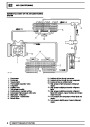
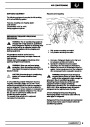
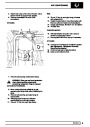
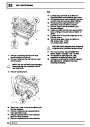
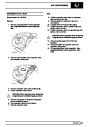
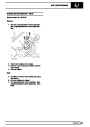
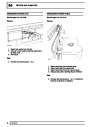
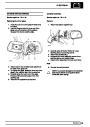
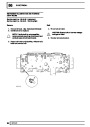
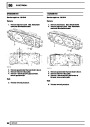
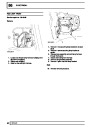
HEATED OXYGEN SENSOR (HO2S)
Service repair no - 19.26.16
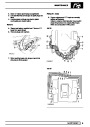
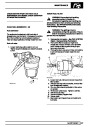
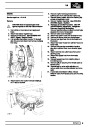
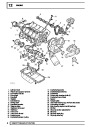
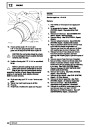
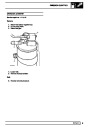
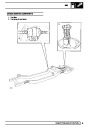
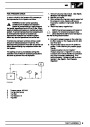
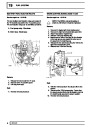
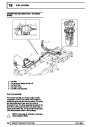
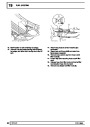
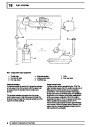
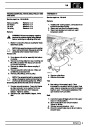
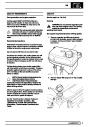
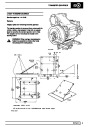
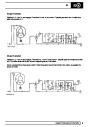
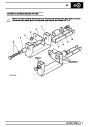
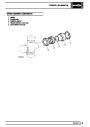
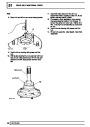
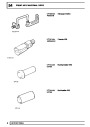
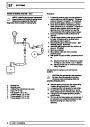
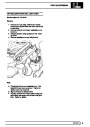
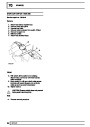
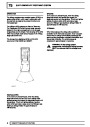
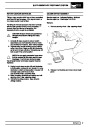
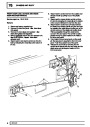
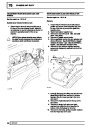
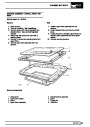
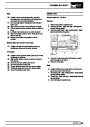
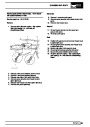
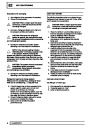
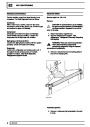
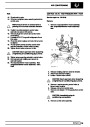
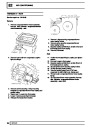
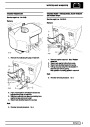
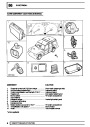
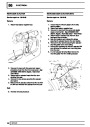
PURGE CONTROL VALVE
Service repair no - 17.15.39
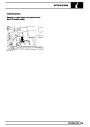
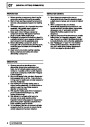
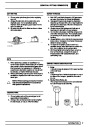
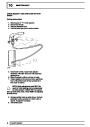
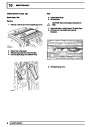
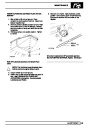
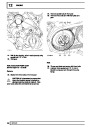
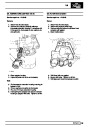
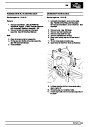
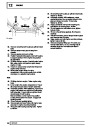
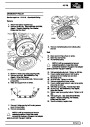
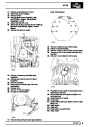
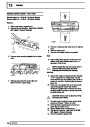
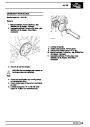
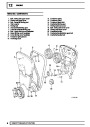
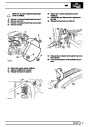
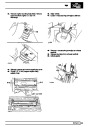
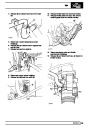
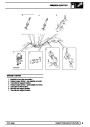
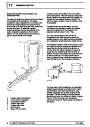
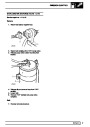
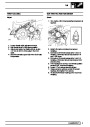
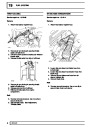
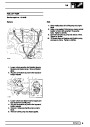
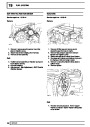
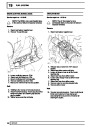
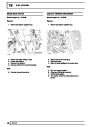
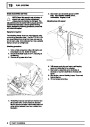
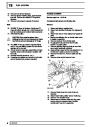
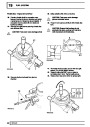
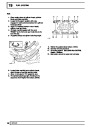
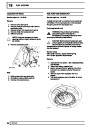
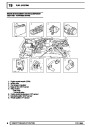
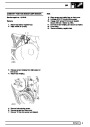
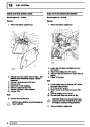
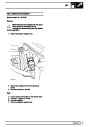
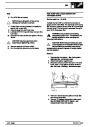
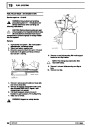
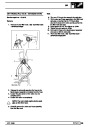
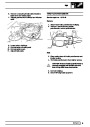
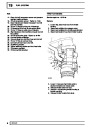
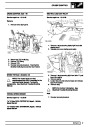
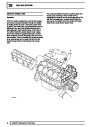
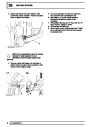
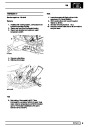
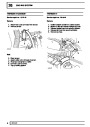
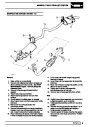
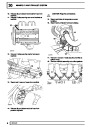
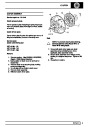
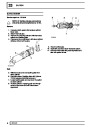
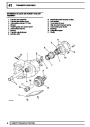
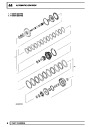
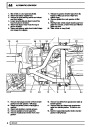
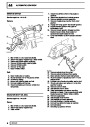
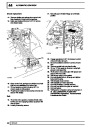
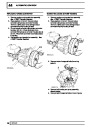
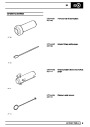
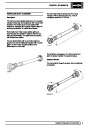
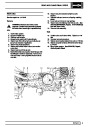
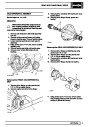
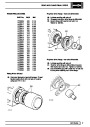
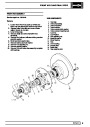
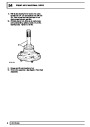
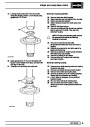
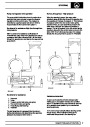
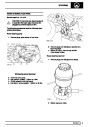
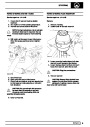
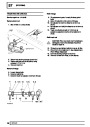
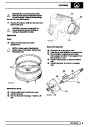
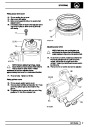
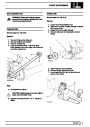
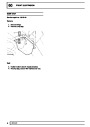
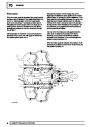
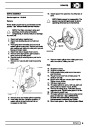
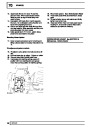
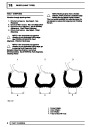
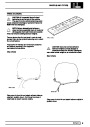
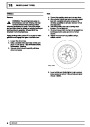
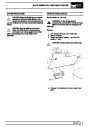
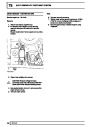
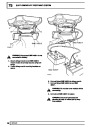
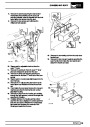
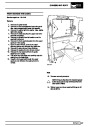
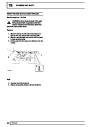
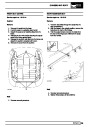
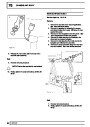
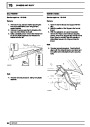
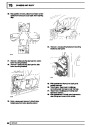
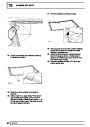
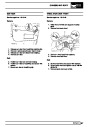
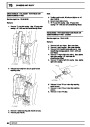
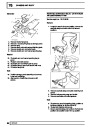
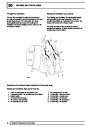
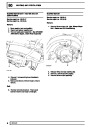
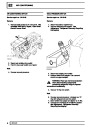
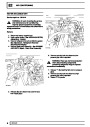
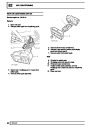
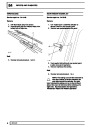
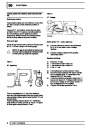
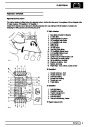
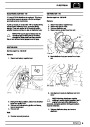
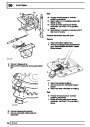
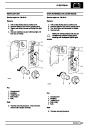
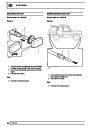
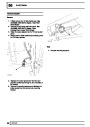
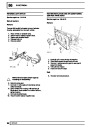
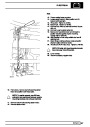
Remove
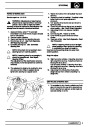
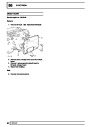
CAUTION: The removal of the sensors
from the exhaust system must only be
carried out when the engine is cold.
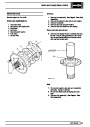
1. Disconnect battery negative lead.
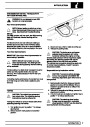
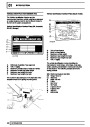
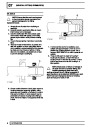
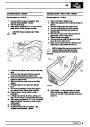
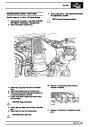
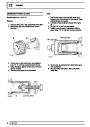
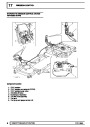
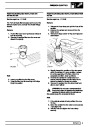
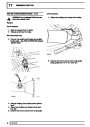
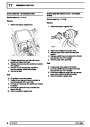
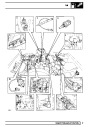
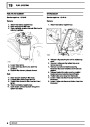
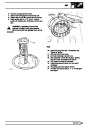
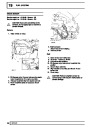
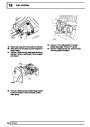
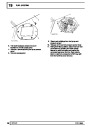
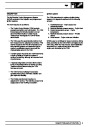
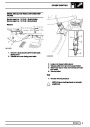
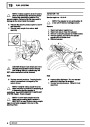
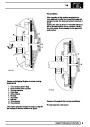
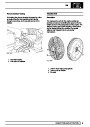
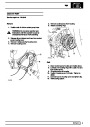
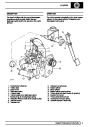
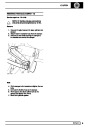
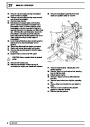
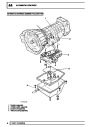
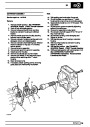
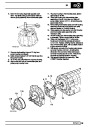
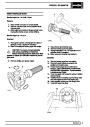
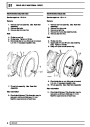
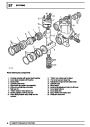
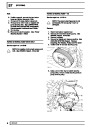
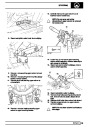
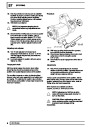
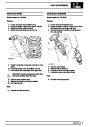
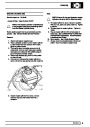
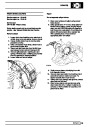
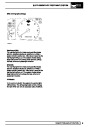
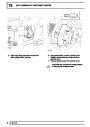
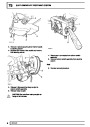
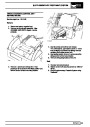
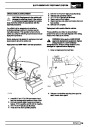
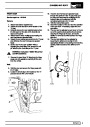
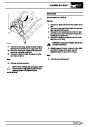
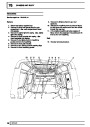
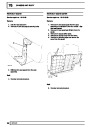
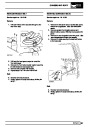
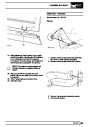
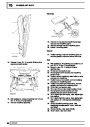
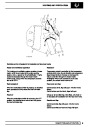
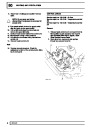
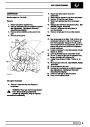
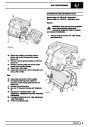
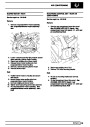
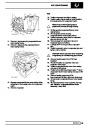
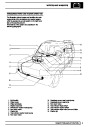
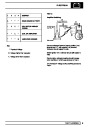
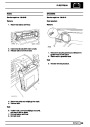
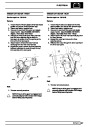
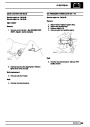
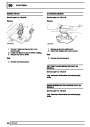
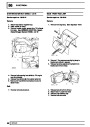
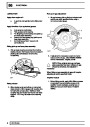
Remove
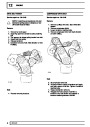
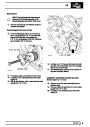
1.
2.
3.
Disconnect battery negative lead.
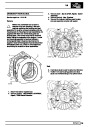
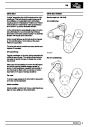
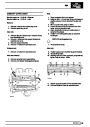
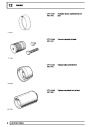
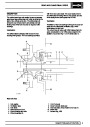
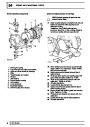
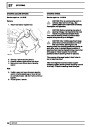
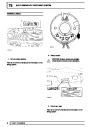
Disconnect the electrical plugs from the sensors.
Unscrew and remove the sensors from the two
exhaust downpipes.
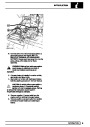
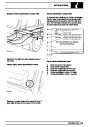
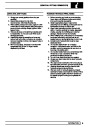
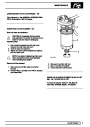
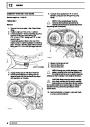
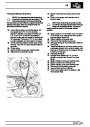
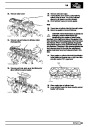
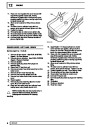
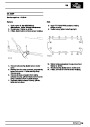
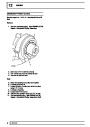
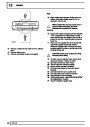
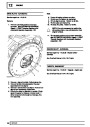
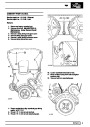
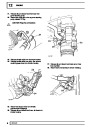
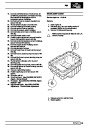
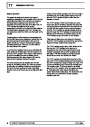
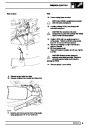
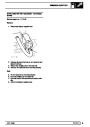
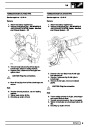
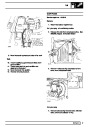
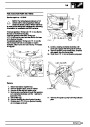
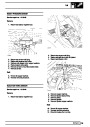
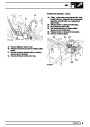
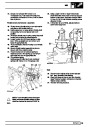
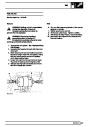
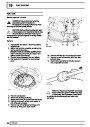
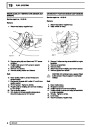
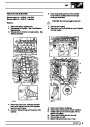
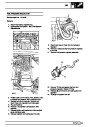
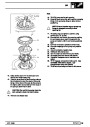
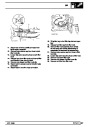
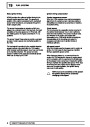
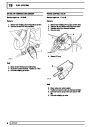
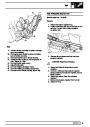
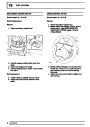
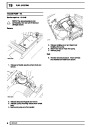
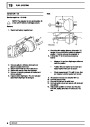
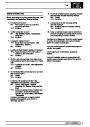
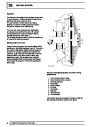
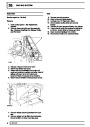
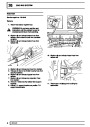
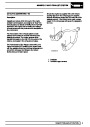
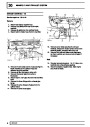
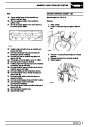
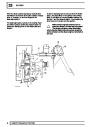
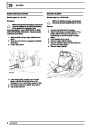
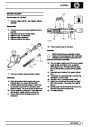
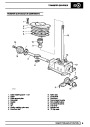
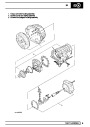
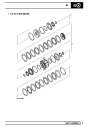
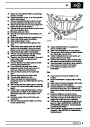
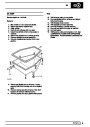
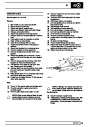
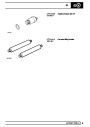
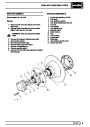
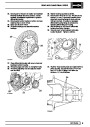
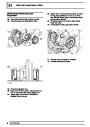
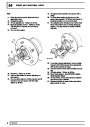
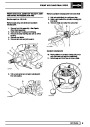
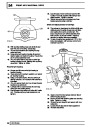
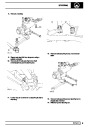
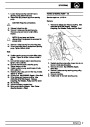
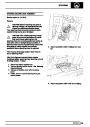
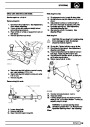
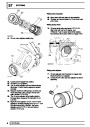
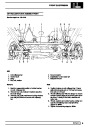
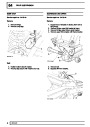
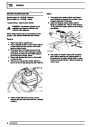
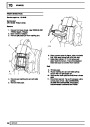
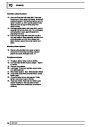
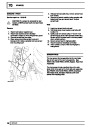
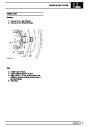
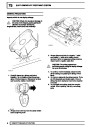
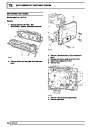
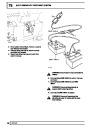
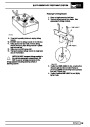
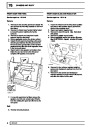
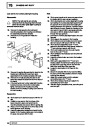
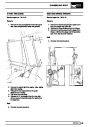
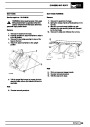
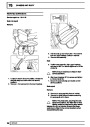
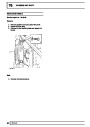
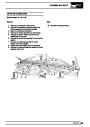
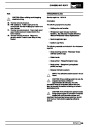
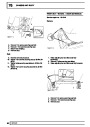
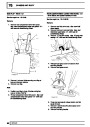
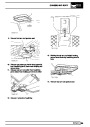
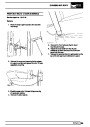
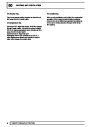
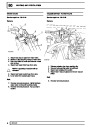
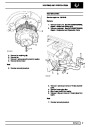
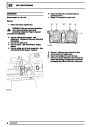
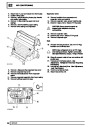
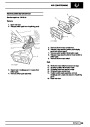
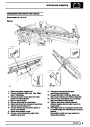
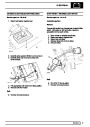
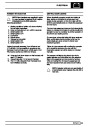
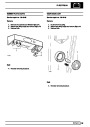
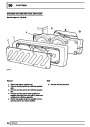
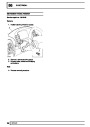
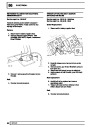
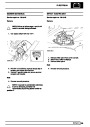
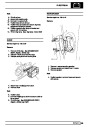
2.
3.
4.
5.
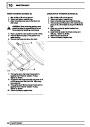
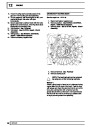
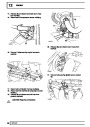
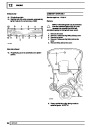
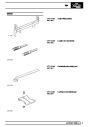
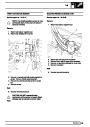
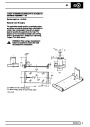
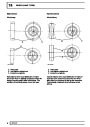
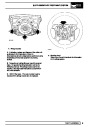
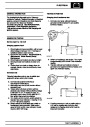
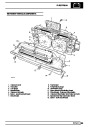
Disconnect multiplug from purge control valve.
Release clip and disconnect hose from valve.
Release valve from charcoal canister.
Remove valve.
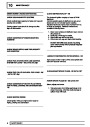
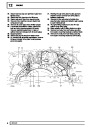
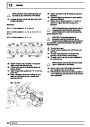
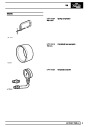
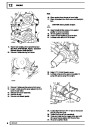
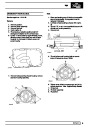
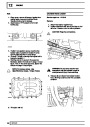
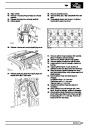
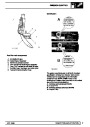
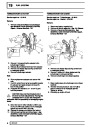
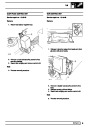
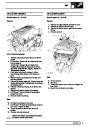
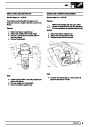
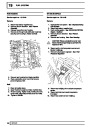
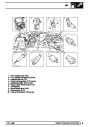
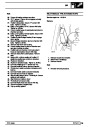
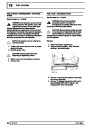
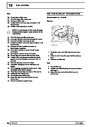
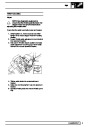
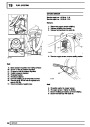
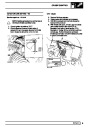
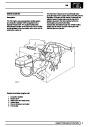
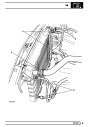
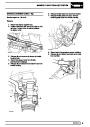
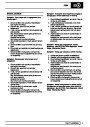
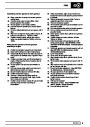
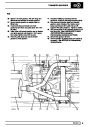
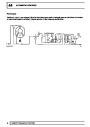
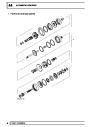
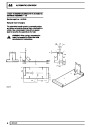
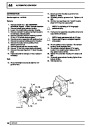
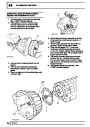
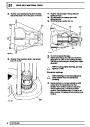
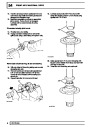
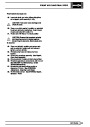
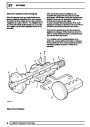
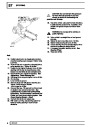
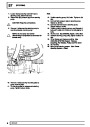
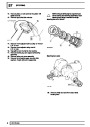
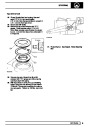
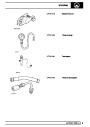
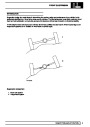
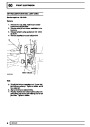
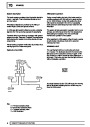
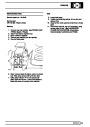
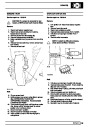
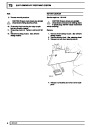
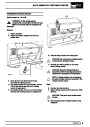
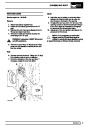
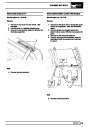
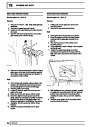
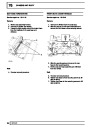
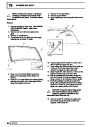
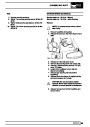
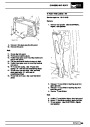
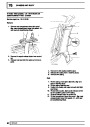
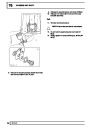
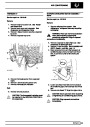
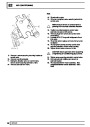
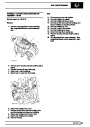
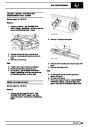
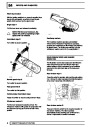
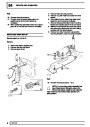
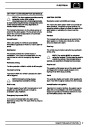
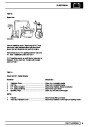
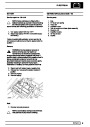
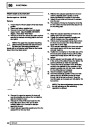
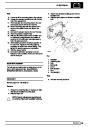
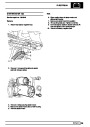
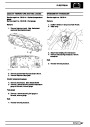
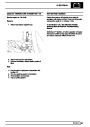
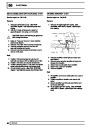
Refit
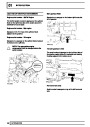
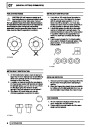
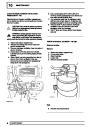
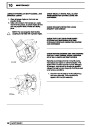
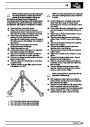
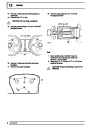
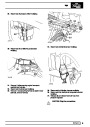
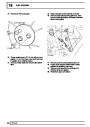
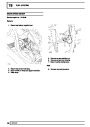
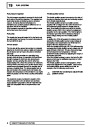
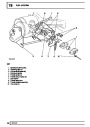
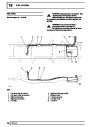
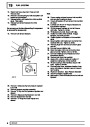
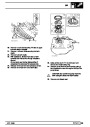
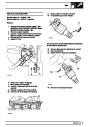
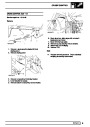
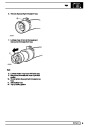
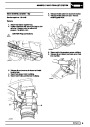
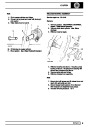
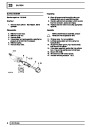
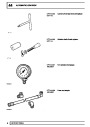
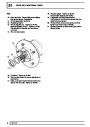
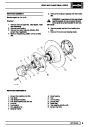
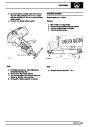
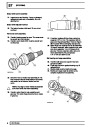
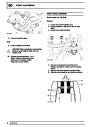
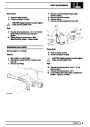
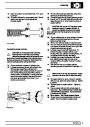
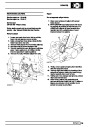
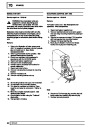
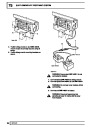
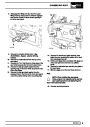
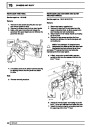
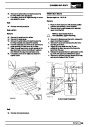
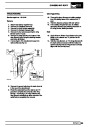
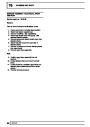
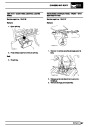
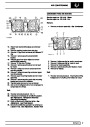
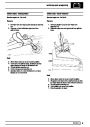
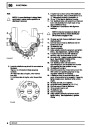
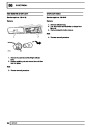
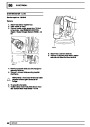
4.
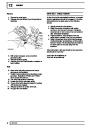
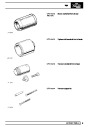
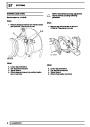
Coat the threads of the sensors with anti-seize
compound.
CAUTION: To ensure that the efficiency of
the sensor is not impaired, DO NOT allow
anti-seize compound to come into contact
with the sensor nose.
6.
Discard ’O’ ring.
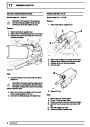
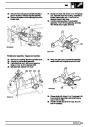
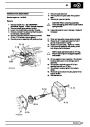
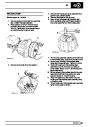
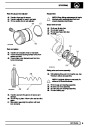
5.
6.
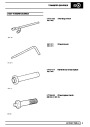
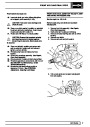
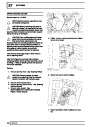
Screw in the sensor and tighten to the correct
torque using special tool LST134.
Connect the electrical plugs and battery lead.
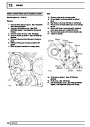
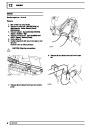
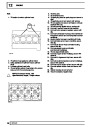
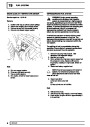
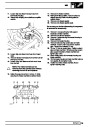
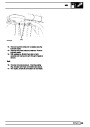
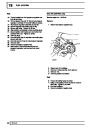
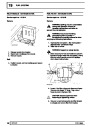
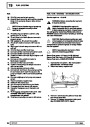
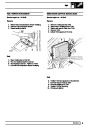
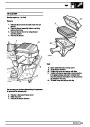
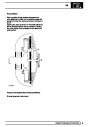
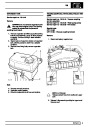
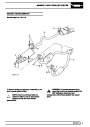
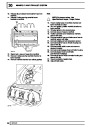
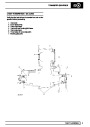
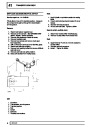
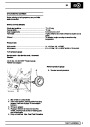
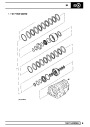
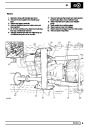
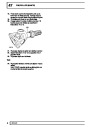
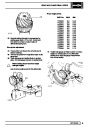
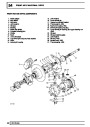
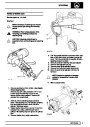
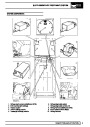
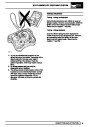
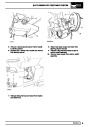
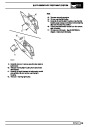
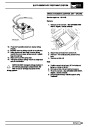
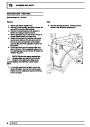
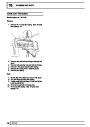
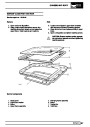
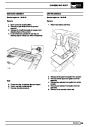
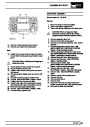
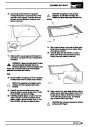
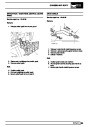
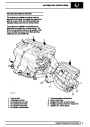
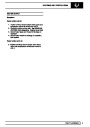
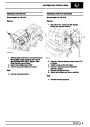
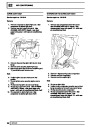
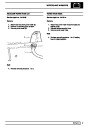
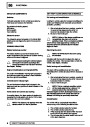
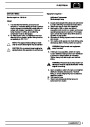
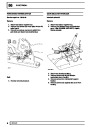
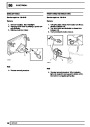
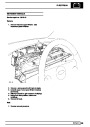
Refit
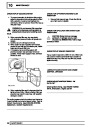
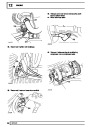
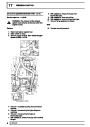
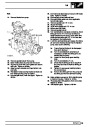
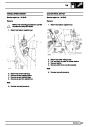
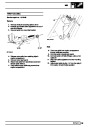
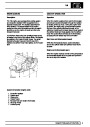
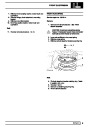
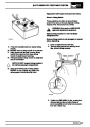
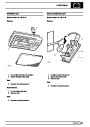
7.
8.
9.
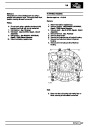
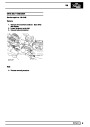
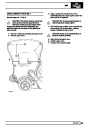
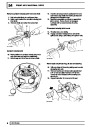
Clean valve and valve location.
Fit new ’O’ ring to purge valve.
Position and secure valve to charcoal canister.
Connect hose to purge valve and secure with
clip.
10.
11.
12.
Connect multiplug to valve.
Reconnect battery negative lead.
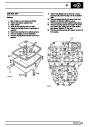
2
REPAIR
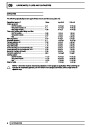
| Categories | Range Rover |
|---|---|
| Tags | Land Rover |
| Model Year | 1998 |
| Download File |
|
| Document Type | Workshop Manual |
| Language | English |
| Product Brand | Land Rover |
| Document File Type | |
| Publisher | landrover.com |
| Wikipedia's Page | http://en.wikipedia.org/wiki/Land_Rover |
| Copyright | Attribution Non-commercial |
(0 votes, average: 0 out of 5)