


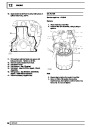


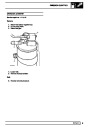


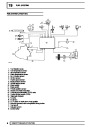


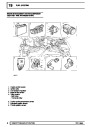


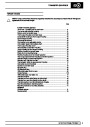
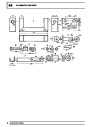


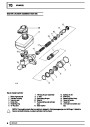


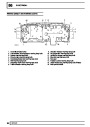

AIR CONDITIONING
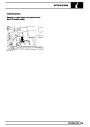
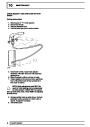
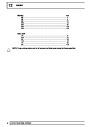
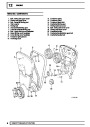
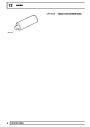
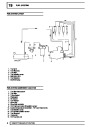
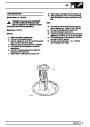
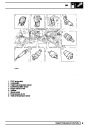
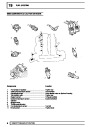
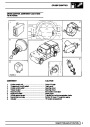
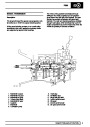
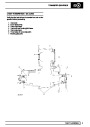
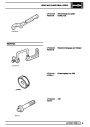
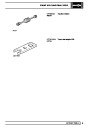
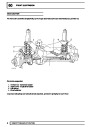
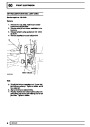
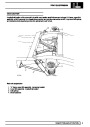
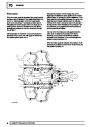
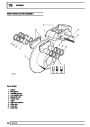
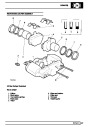
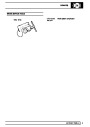
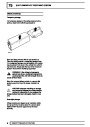
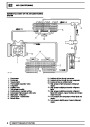
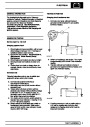
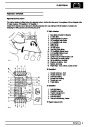
AIR DUCT - CENTRE - WITH REAR AIR
CONDITIONING FITTED - 5 DOOR
Service repair no - 82.26.18
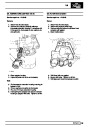
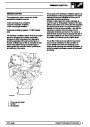
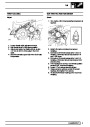
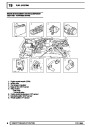
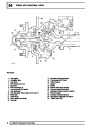
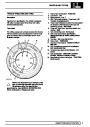
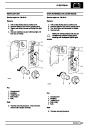
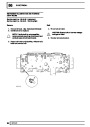
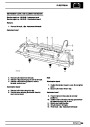
Remove
1.
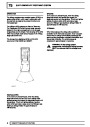
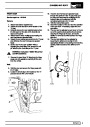
Remove headlining. See CHASSIS AND
BODY, Repair, headlining - with sun roof and
rear air conditioning fitted - 5 door
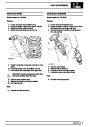
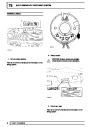
2.
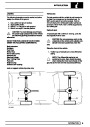
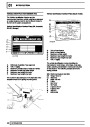
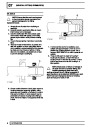
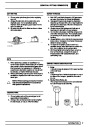
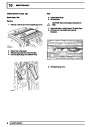
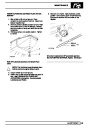
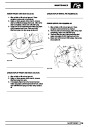
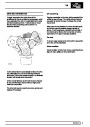
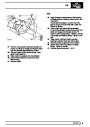
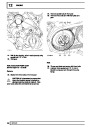
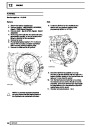
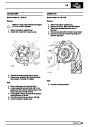
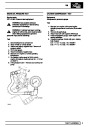
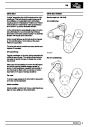
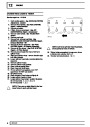
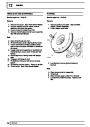
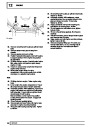
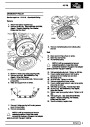
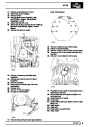
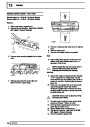
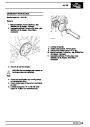
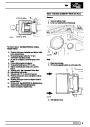
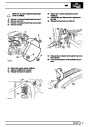
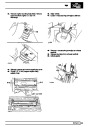
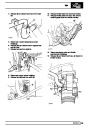
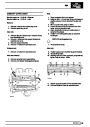
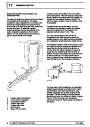
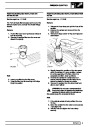
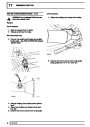
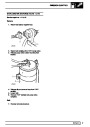
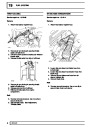
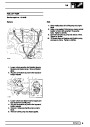
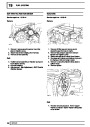
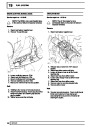
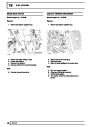
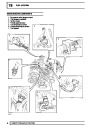
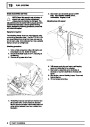
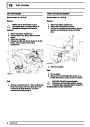
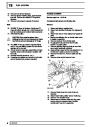
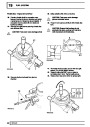
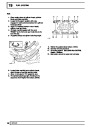
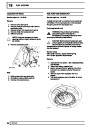
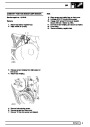
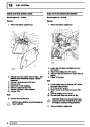
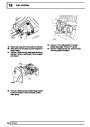
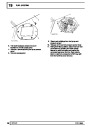
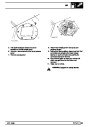
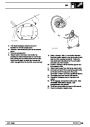
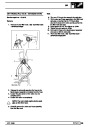
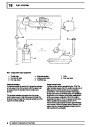
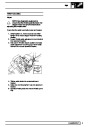
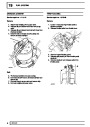
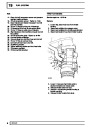
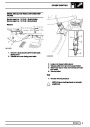
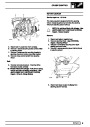
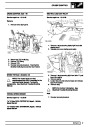
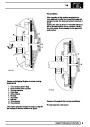
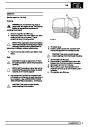
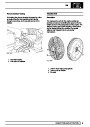
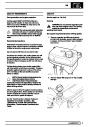
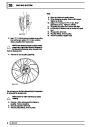
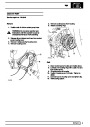
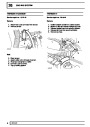
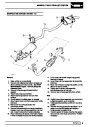
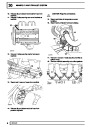
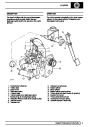
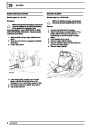
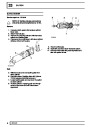
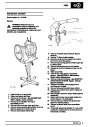
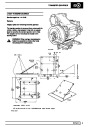
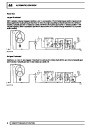
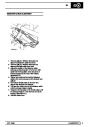
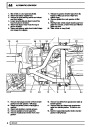
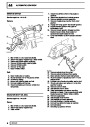
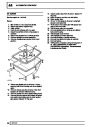
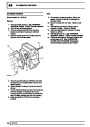
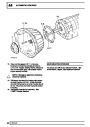
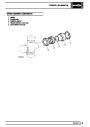
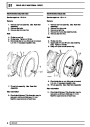
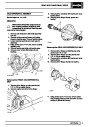
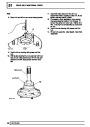
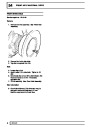
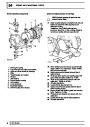
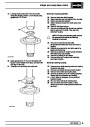
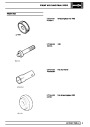
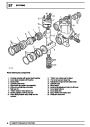
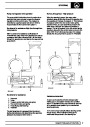
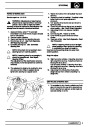
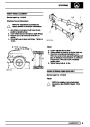
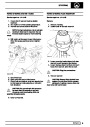
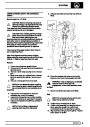
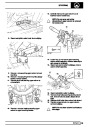
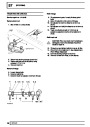
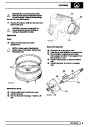
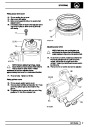
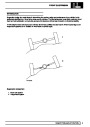
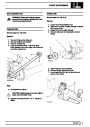
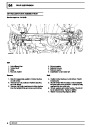
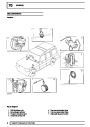
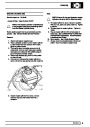
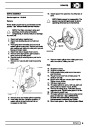
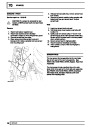
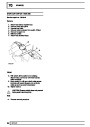
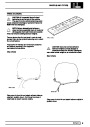
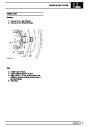
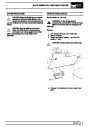
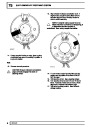
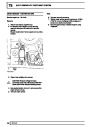
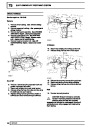
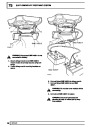
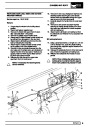
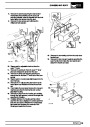
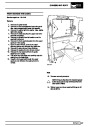
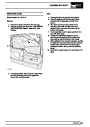
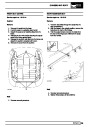
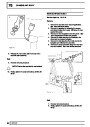
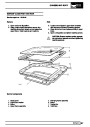
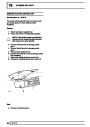
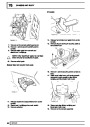
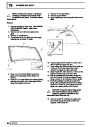
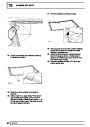
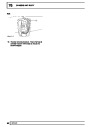
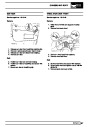
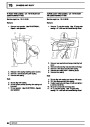
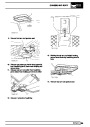
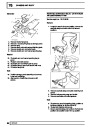
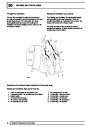
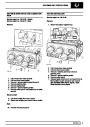
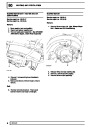
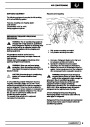
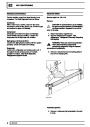
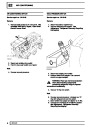
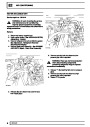
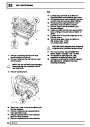
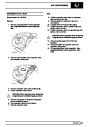
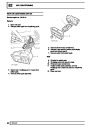
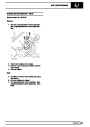
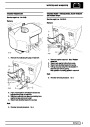
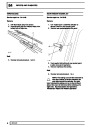
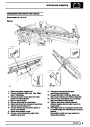
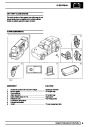
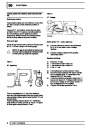
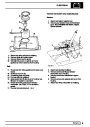
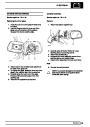
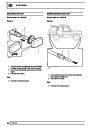
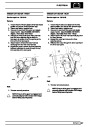
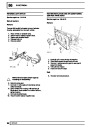
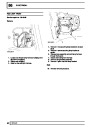
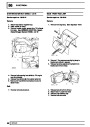
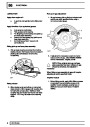
Remove 2 vents from trim panel.
2.
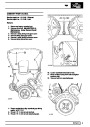
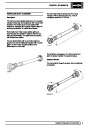
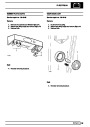
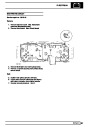
3.
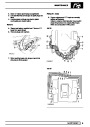
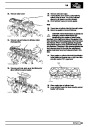
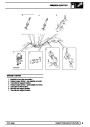
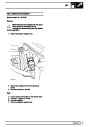
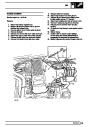
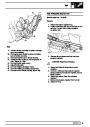
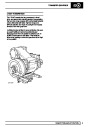
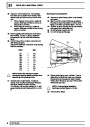
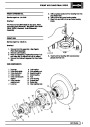
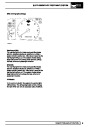
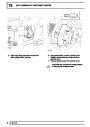
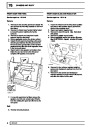
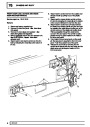
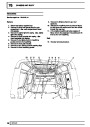
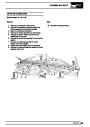
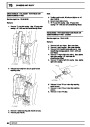
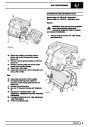
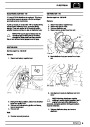
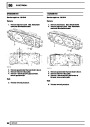
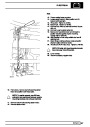
Release harness clip from centre air duct.
Remove 5 screws securing centre air duct to
body.
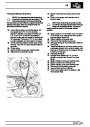
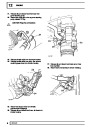
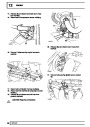
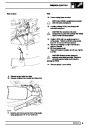
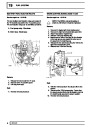
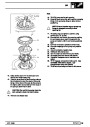
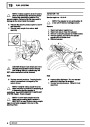
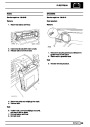
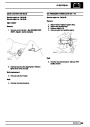
4.
Remove centre air duct.
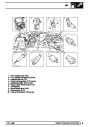
Refit
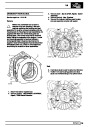
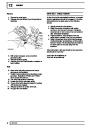
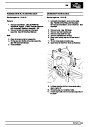
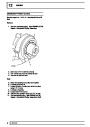
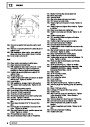
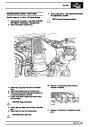
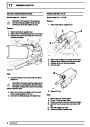
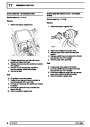
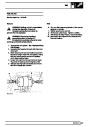
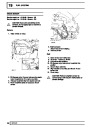
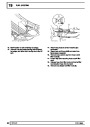
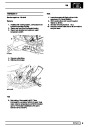
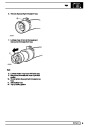
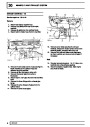
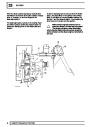
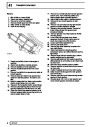
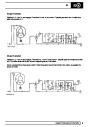
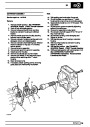
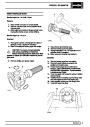
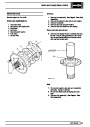
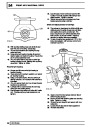
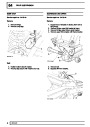
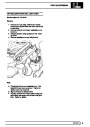
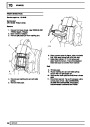
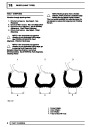
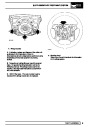
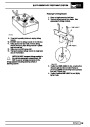
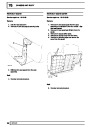
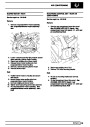
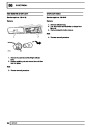
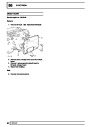
3.
4.
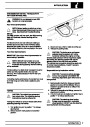
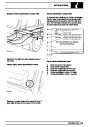
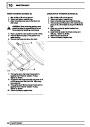
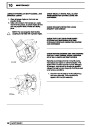
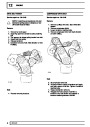
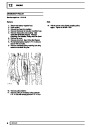
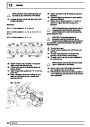
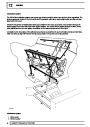
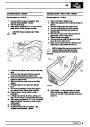
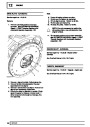
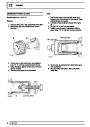
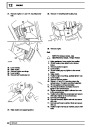
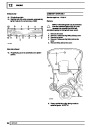
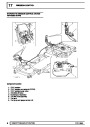
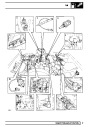
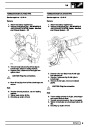
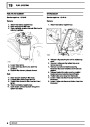
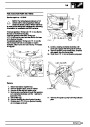
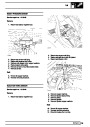
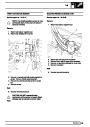
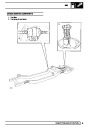
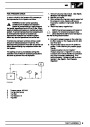
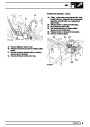
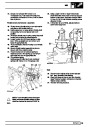
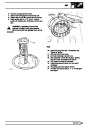
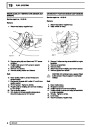
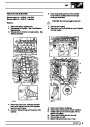
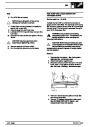
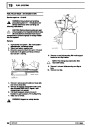
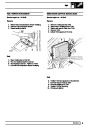
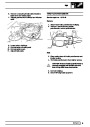
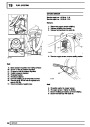
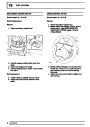
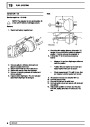
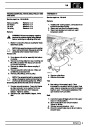
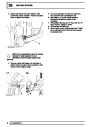
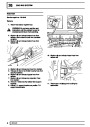
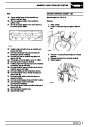
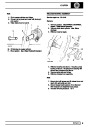
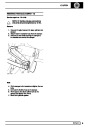
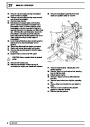
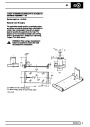
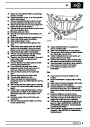
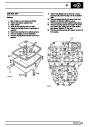
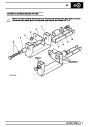
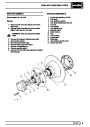
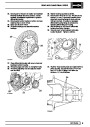
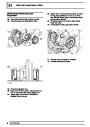
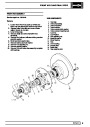
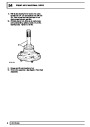
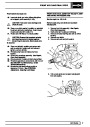
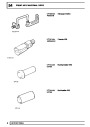
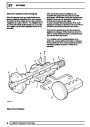
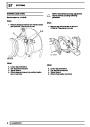
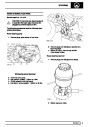
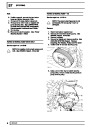
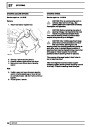
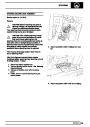
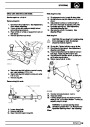
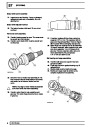
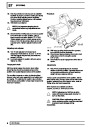
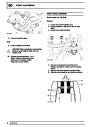
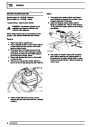
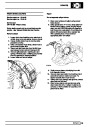
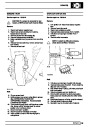
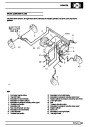
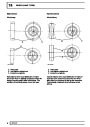
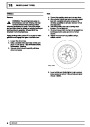
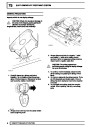
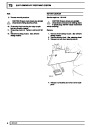
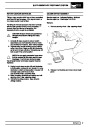
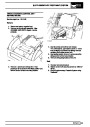
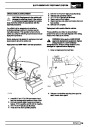
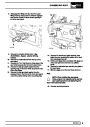
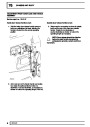
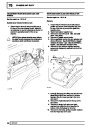
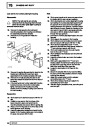
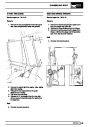
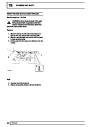
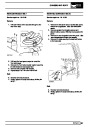
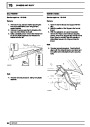
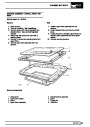
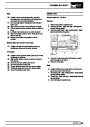
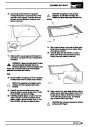
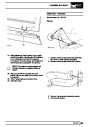
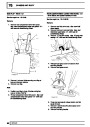
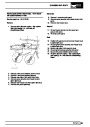
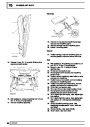
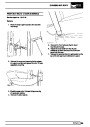
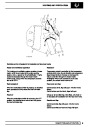
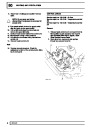
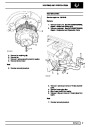
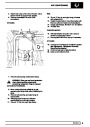
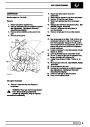
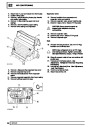
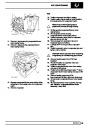
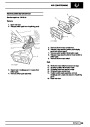
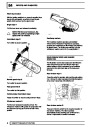
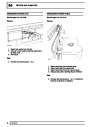
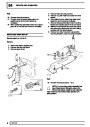
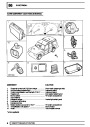
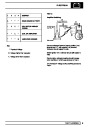
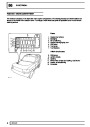
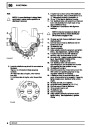
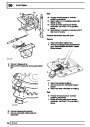
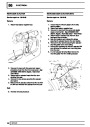
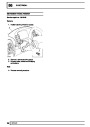
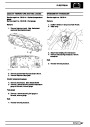
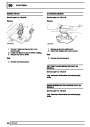
Remove screw securing rear header duct to trim
panel.
Remove rear header duct.
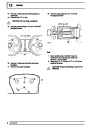
5.
6.
7.
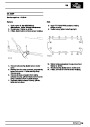
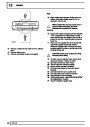
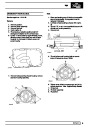
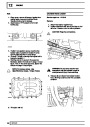
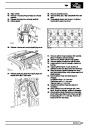
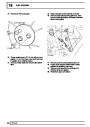
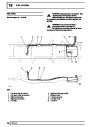
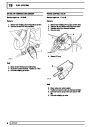
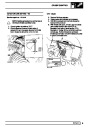
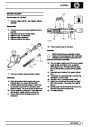
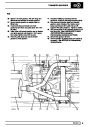
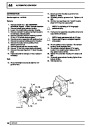
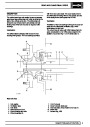
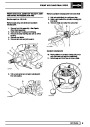
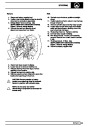
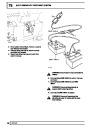
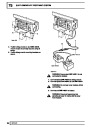
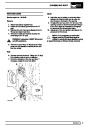
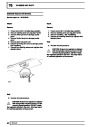
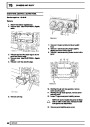
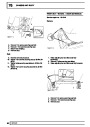
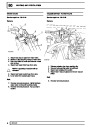
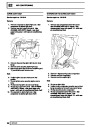
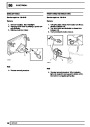
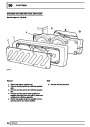
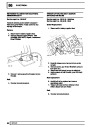
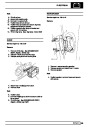
Position centre duct, fit screws and tighten.
Secure harness clip to centre air duct.
Fit headlining. See CHASSIS AND BODY,
Repair, headlining - with sun roof and rear
air conditioning fitted - 5 door; Refit
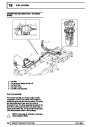
Refit
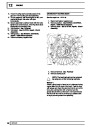
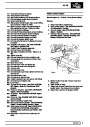
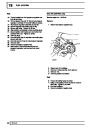
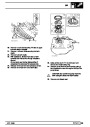
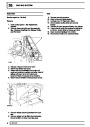
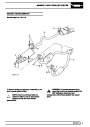
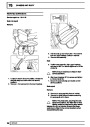
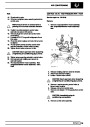
5.
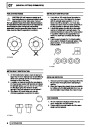
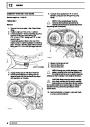
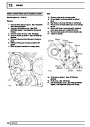
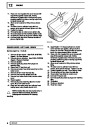
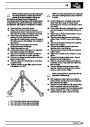
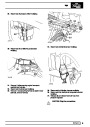
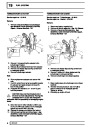
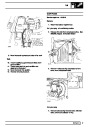
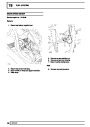
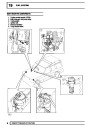
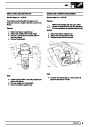
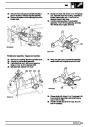
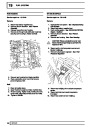
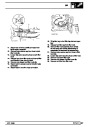
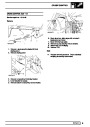
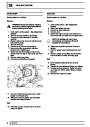
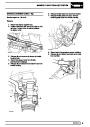
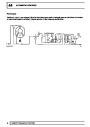
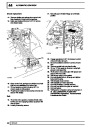
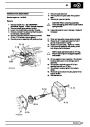
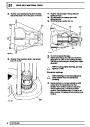
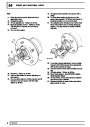
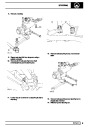
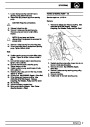
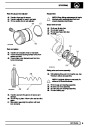
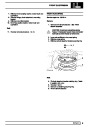
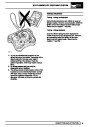
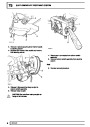
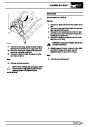
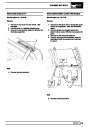
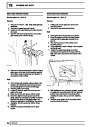
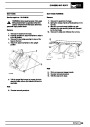
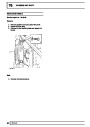
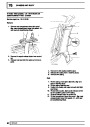
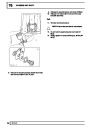
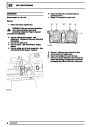
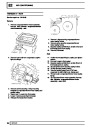
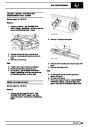
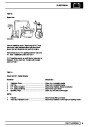
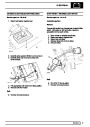
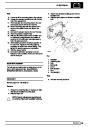
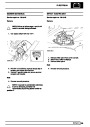
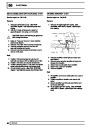
Fit rear header duct to new trim panel and
secure with screw.
6.
7.
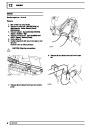
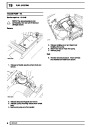
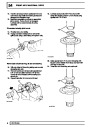
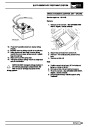
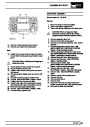
Fit vents to trim panel.
Fit rear door upper trim panel. See CHASSIS
AND BODY, Repair, rear door upper trim
panel - with rear air conditionin fitted; Refit
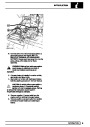
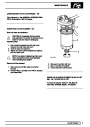
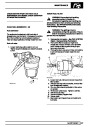
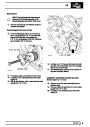
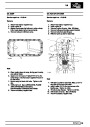
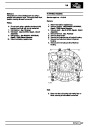
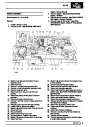
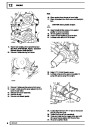
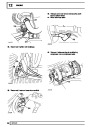
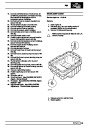
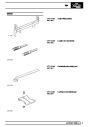
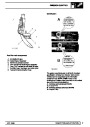
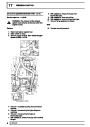
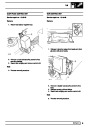
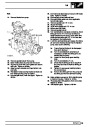
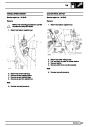
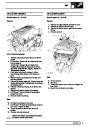
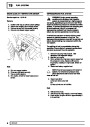
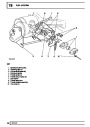
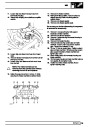
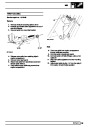
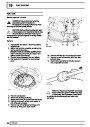
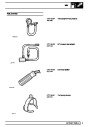
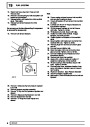
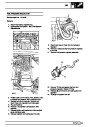
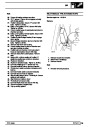
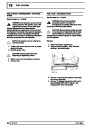
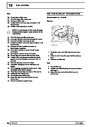
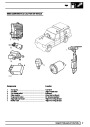
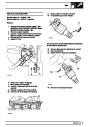
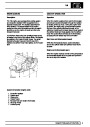
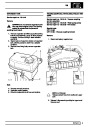
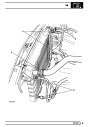
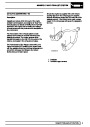
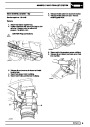
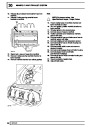
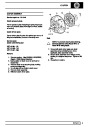
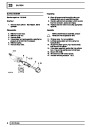
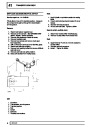
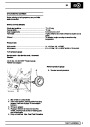
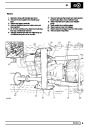
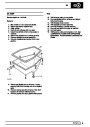
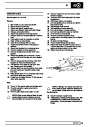
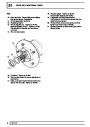
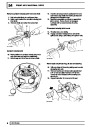
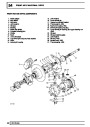
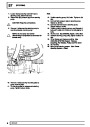
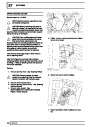
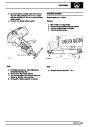
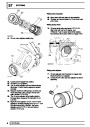
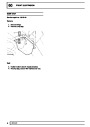
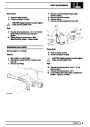
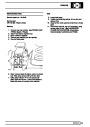
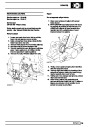
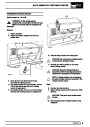
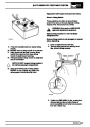
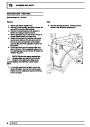
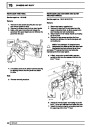
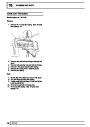
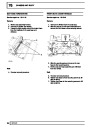
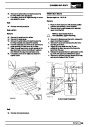
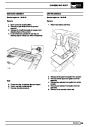
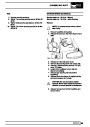
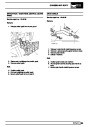
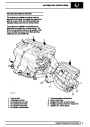
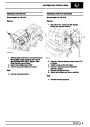
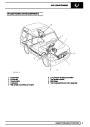
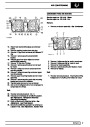
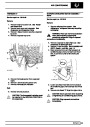
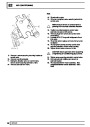
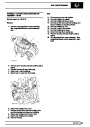
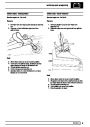
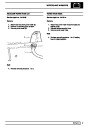
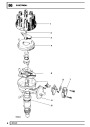
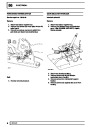
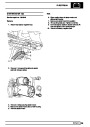
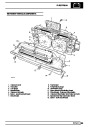
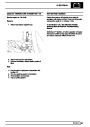
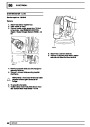
UPPER TAIL DOOR AIR DUCT
Service repair no - 82.26.19
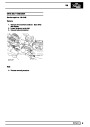
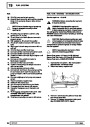
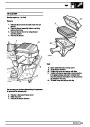
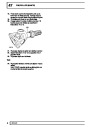
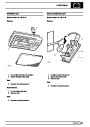
Remove
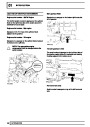
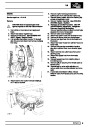
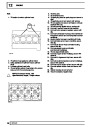
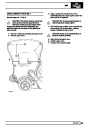
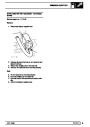
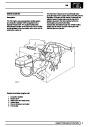
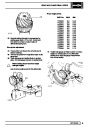
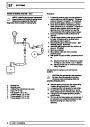
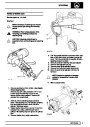
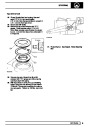
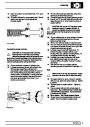
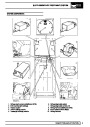
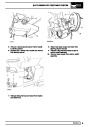
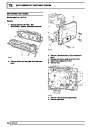
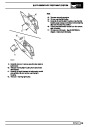
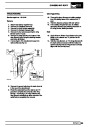
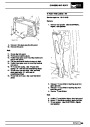
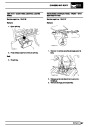
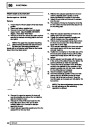
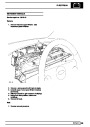
1.
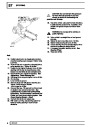
Remove rear door upper trim panel. See
CHASSIS AND BODY, Repair, rear door
upper trim panel - with rear air conditioning
fitted
REPAIR
25
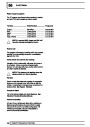
| Categories | Range Rover |
|---|---|
| Tags | Land Rover |
| Model Year | 1998 |
| Download File |
|
| Document Type | Workshop Manual |
| Language | English |
| Product Brand | Land Rover |
| Document File Type | |
| Publisher | landrover.com |
| Wikipedia's Page | http://en.wikipedia.org/wiki/Land_Rover |
| Copyright | Attribution Non-commercial |
(0 votes, average: 0 out of 5)