


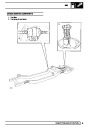


82
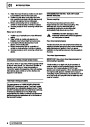
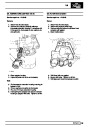
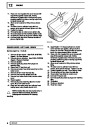
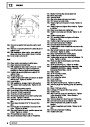
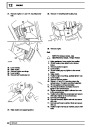
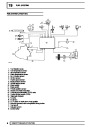
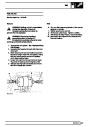
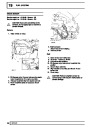
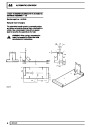
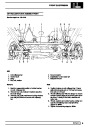
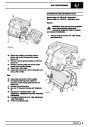
AIR CONDITIONING
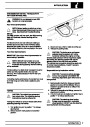
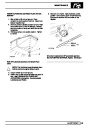
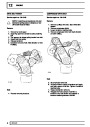
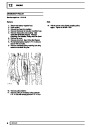
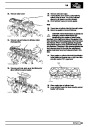
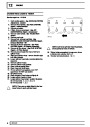
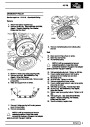
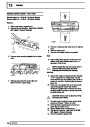
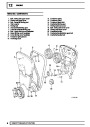
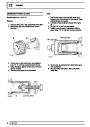
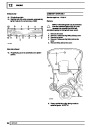
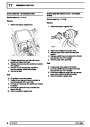
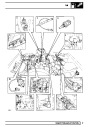
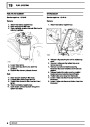
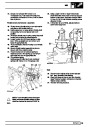
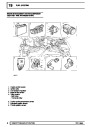
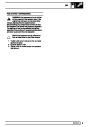
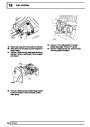
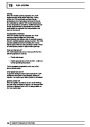
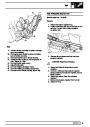
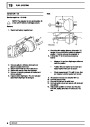
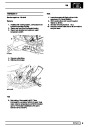
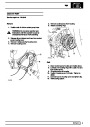
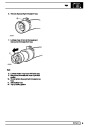
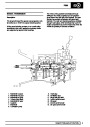
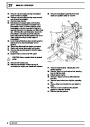
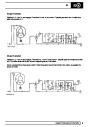
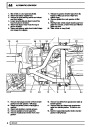
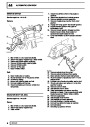
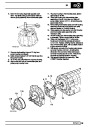
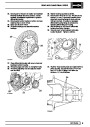
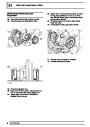
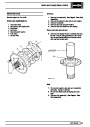
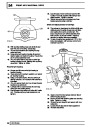
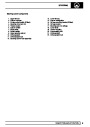
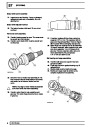
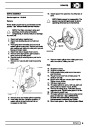
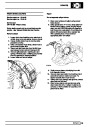
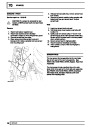
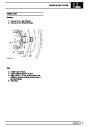
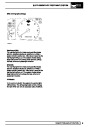
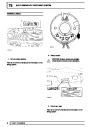
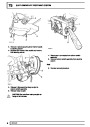
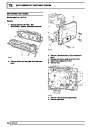
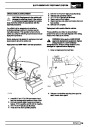
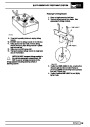
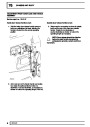
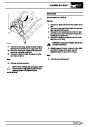
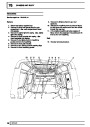
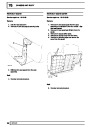
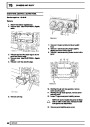
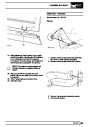
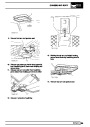
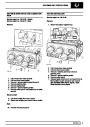
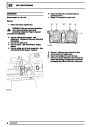
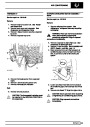
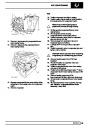
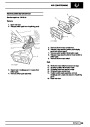
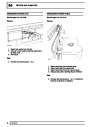
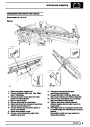
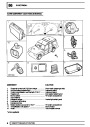
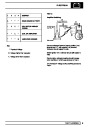
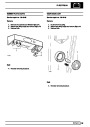
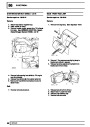
2.
3.
4.
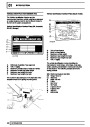
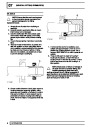
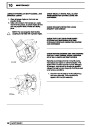
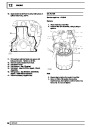
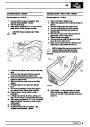
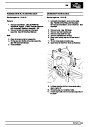
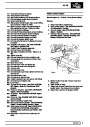
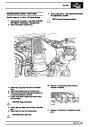
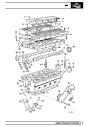
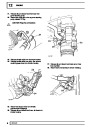
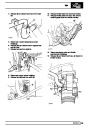
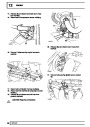
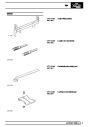
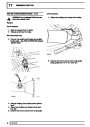
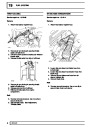
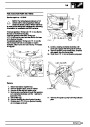
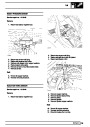
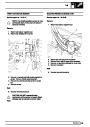
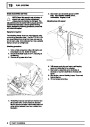
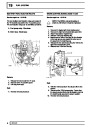
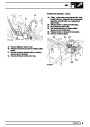
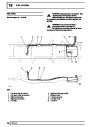
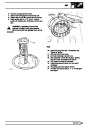
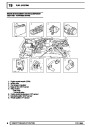
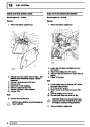
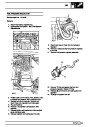
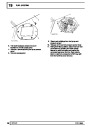
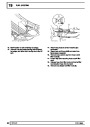
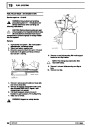
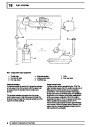
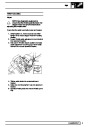
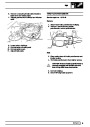
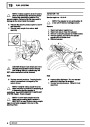
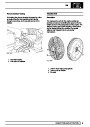
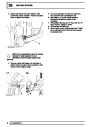
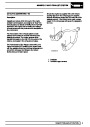
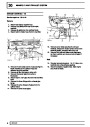
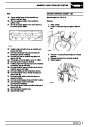
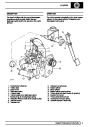
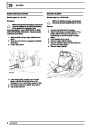
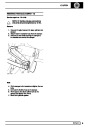
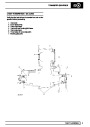
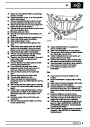
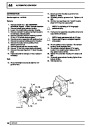
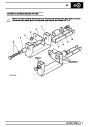
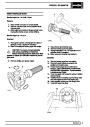
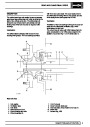
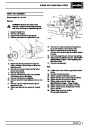
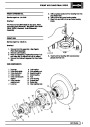
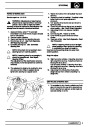
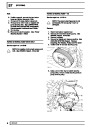
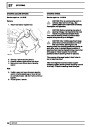
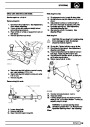
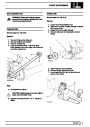
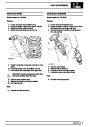
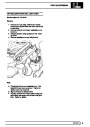
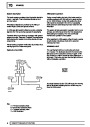
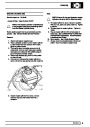
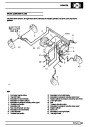
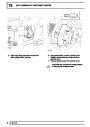
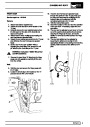
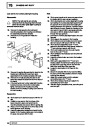
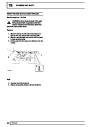
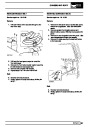
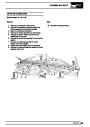
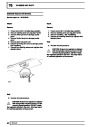
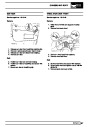
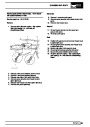
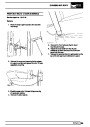
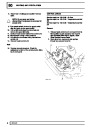
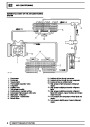
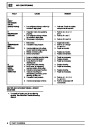
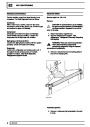
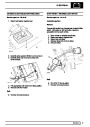
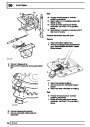
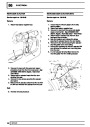
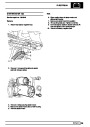
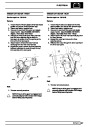
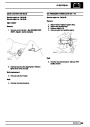
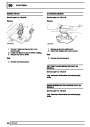
Disconnect 2 Lucar connectors from thermostat.
Position wiring aside.
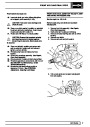
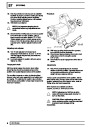
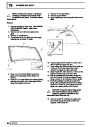
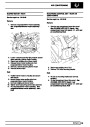
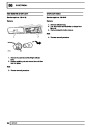
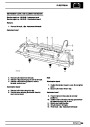
Remove 2 screws securing heater pipe bracket
and position pipes aside.
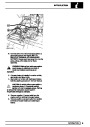
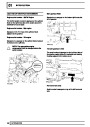
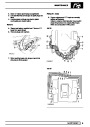
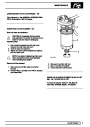
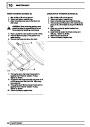
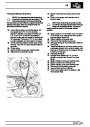
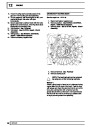
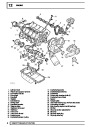
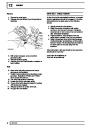
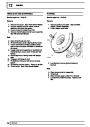
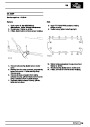
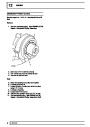
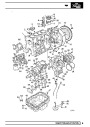
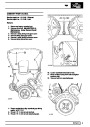
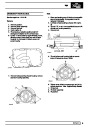
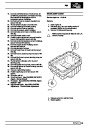
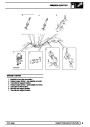
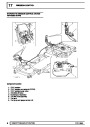
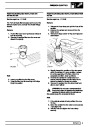
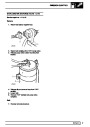
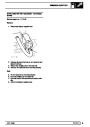
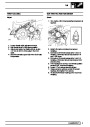
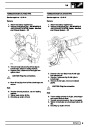
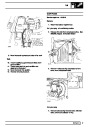
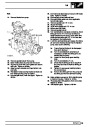
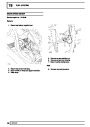
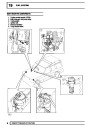
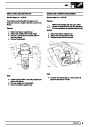
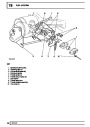
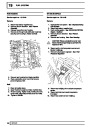
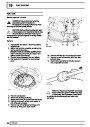
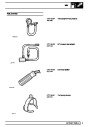
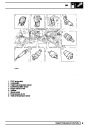
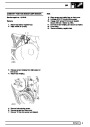
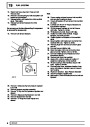
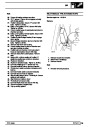
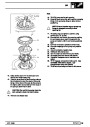
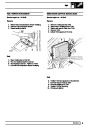
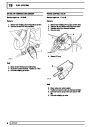
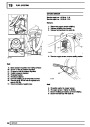
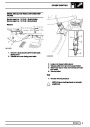
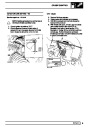
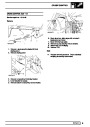
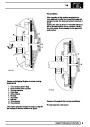
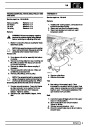
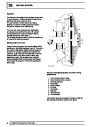
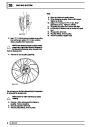
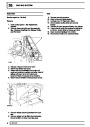
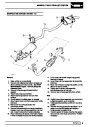
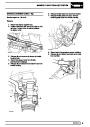
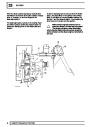
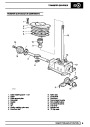
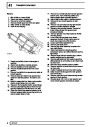
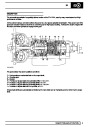
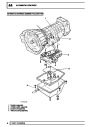
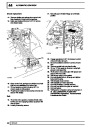
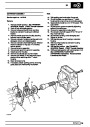
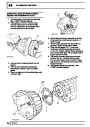
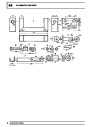
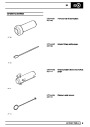
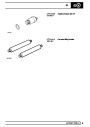
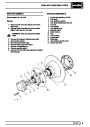
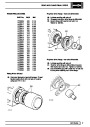
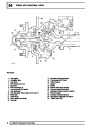
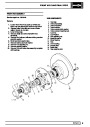
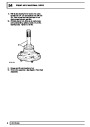
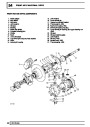
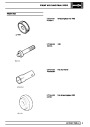
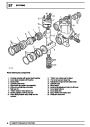
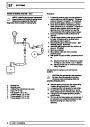
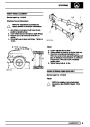
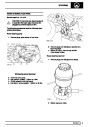
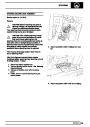
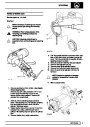
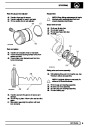
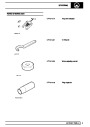
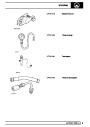
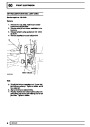
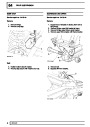
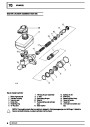
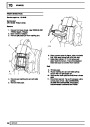
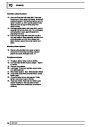
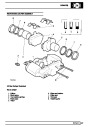
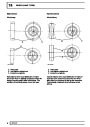
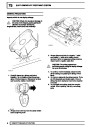
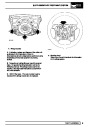
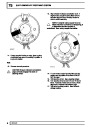
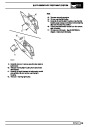
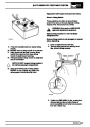
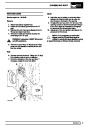
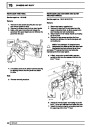
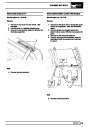
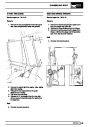
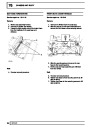
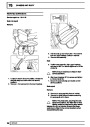
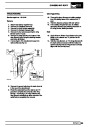
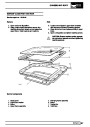
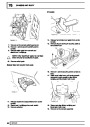
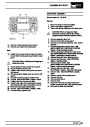
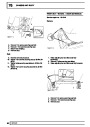
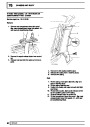
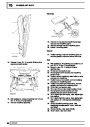
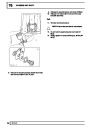
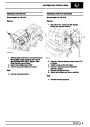
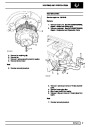
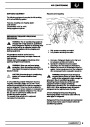
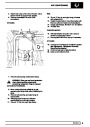
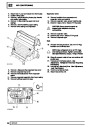
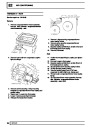
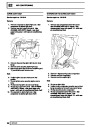
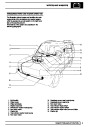
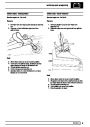
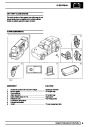
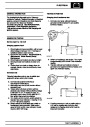
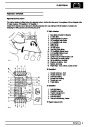
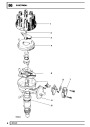
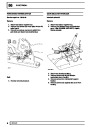
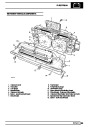
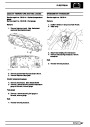
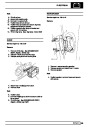
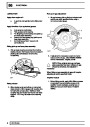
Expansion valve
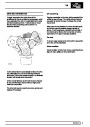
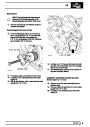
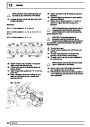
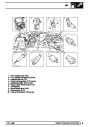
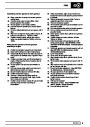
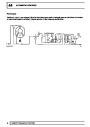
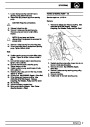
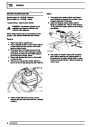
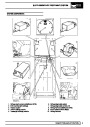
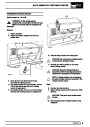
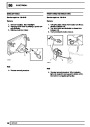
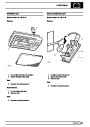
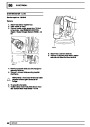
13. Remove insulation from evaporator and
expansion valve connections.
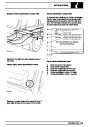
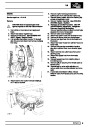
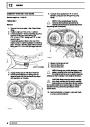
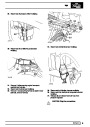
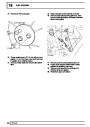
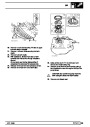
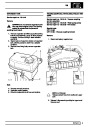
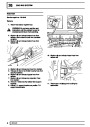
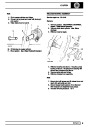
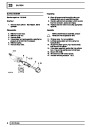
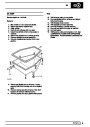
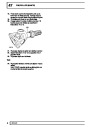
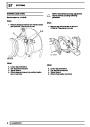
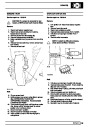
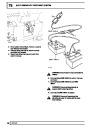
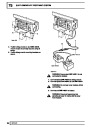
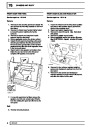
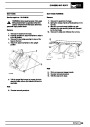
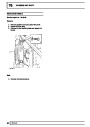
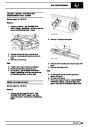
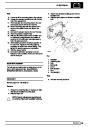
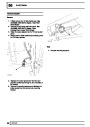
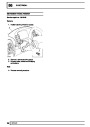
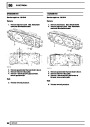
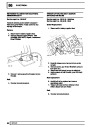
5.
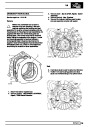
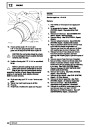
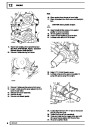
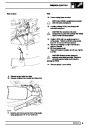
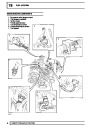
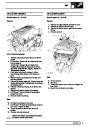
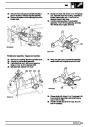
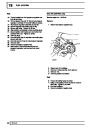
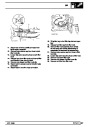
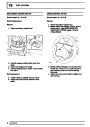
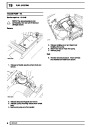
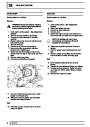
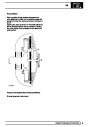
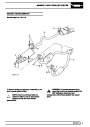
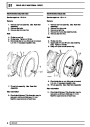
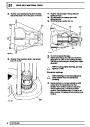
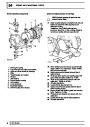
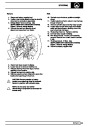
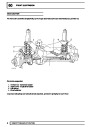
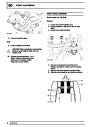
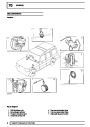
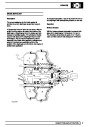
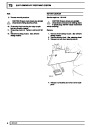
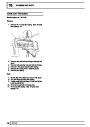
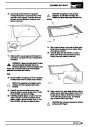
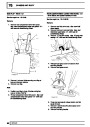
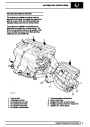
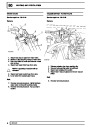
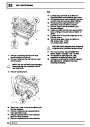
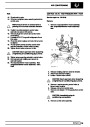
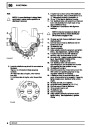
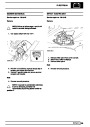
Remove 10 clips retaining upper and lower
casings.
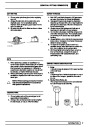
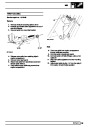
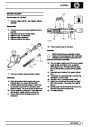
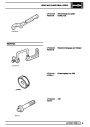
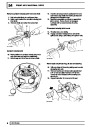
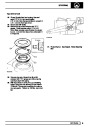
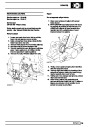
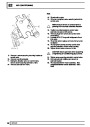
14. Remove expansion valve sensor retaining clip.
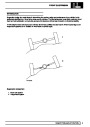
15. Unscrew 2 pipe unions. Discard ’O’ ring seals.
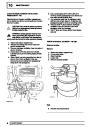
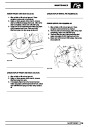
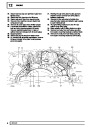
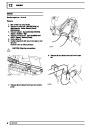
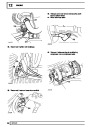
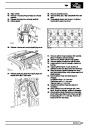
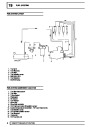
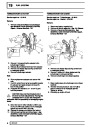
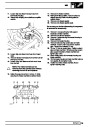
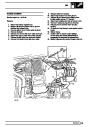
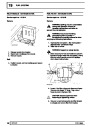
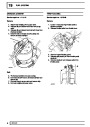
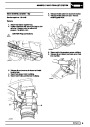
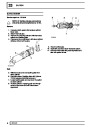
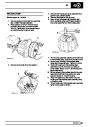
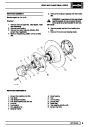
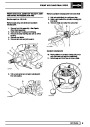
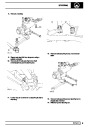
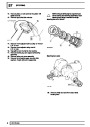
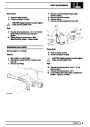
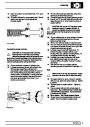
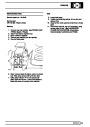
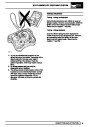
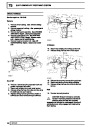
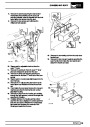
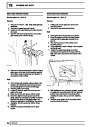
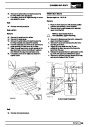
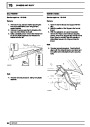
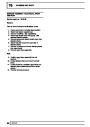
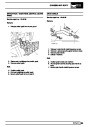
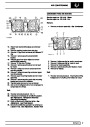
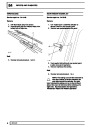
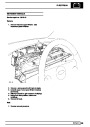
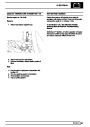
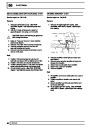
6.
7.
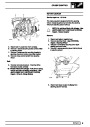
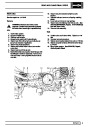
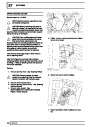
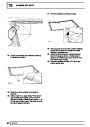
Remove 5 screws retaining upper casing.
Remove lower casing and evaporator.
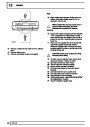
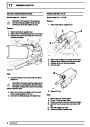
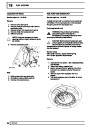
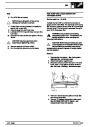
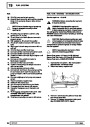
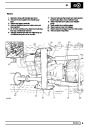
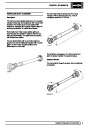
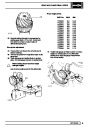
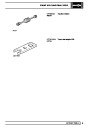
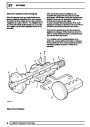
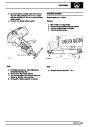
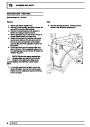
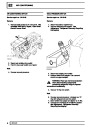
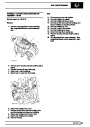
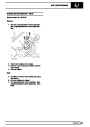
CAUTION: Use a second wrench to
support pipe adapters and plug
connections.
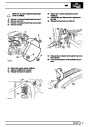
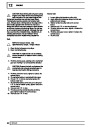
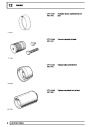
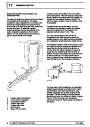
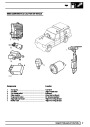
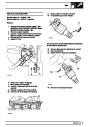
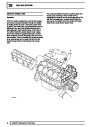
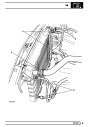
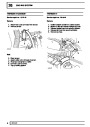
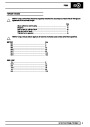
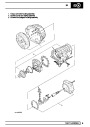
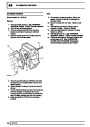
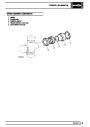
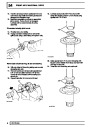
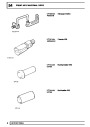
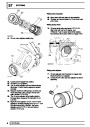
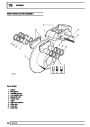
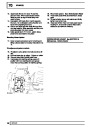
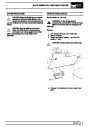
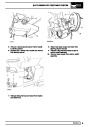
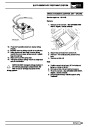
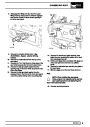
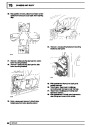
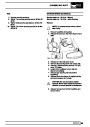
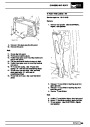
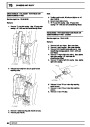
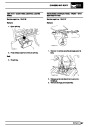
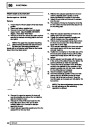
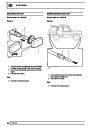
16.
17.
18.
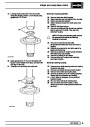
Remove expansion valve.
Unscrew pipe union. Discard ’O’ ring seal.
Remove evaporator pipe.
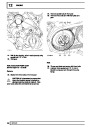
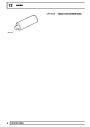
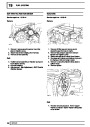
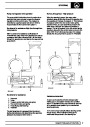
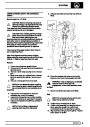
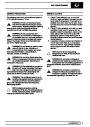
Refit
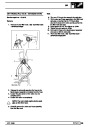
19.
Reverse removal procedure. Use new ’O’ rings,
insulation and bulkhead seal.
NOTE: Use refrigerant oil on all ’O’ rings
and mating surfaces. Tighten connection
See Specifications, torque, Torque Values
20.
21.
Wrap all exposed metal at hose connections with
prestite tape.
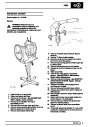
Evacuate and recharge system. See
Adjustment, Refrigerant Recovery Recycling
Recharging
22.
Leak test any disturbed joints. See Adjustment,
Leak Test System
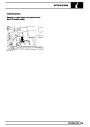
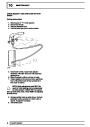
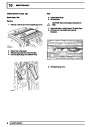
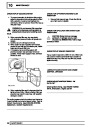
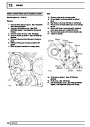
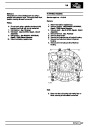
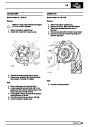
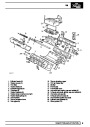
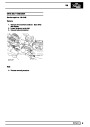
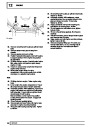
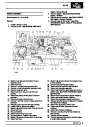
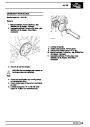
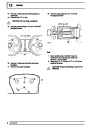
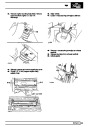
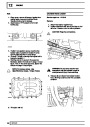
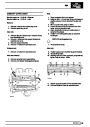
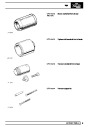
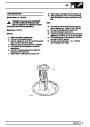
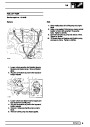
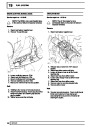
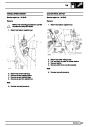
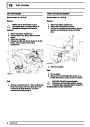
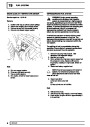
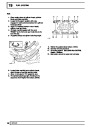
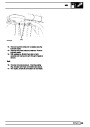
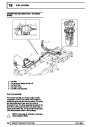
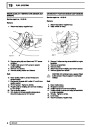
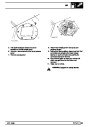
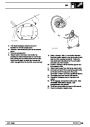
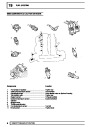
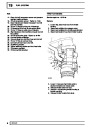
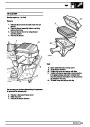
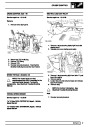
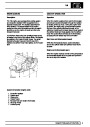
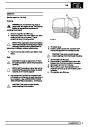
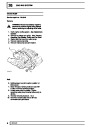
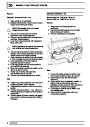
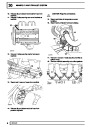
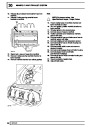
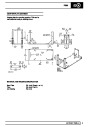
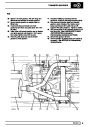
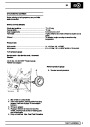
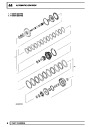
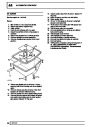
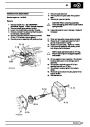
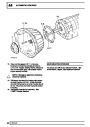
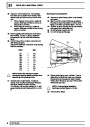
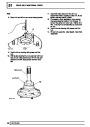
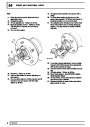
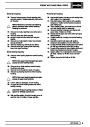
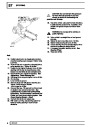
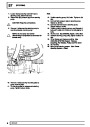
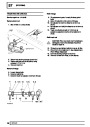
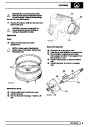
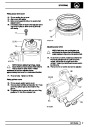
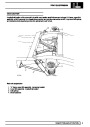
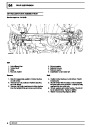
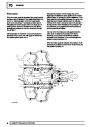
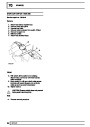
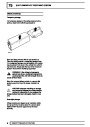
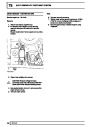
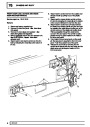
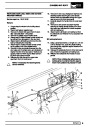
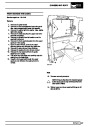
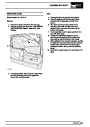
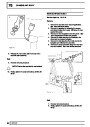
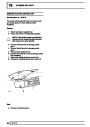
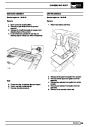
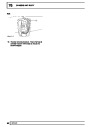
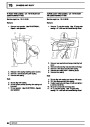
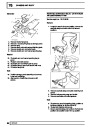
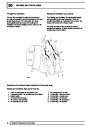
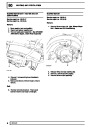
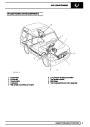
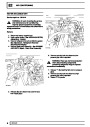
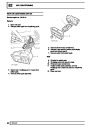
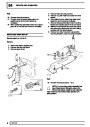
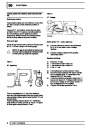
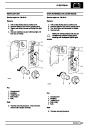
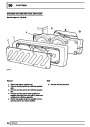
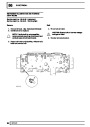
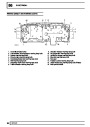
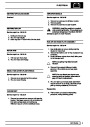
8.
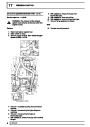
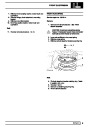
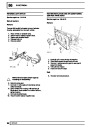
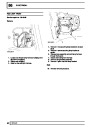
9.
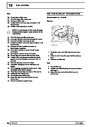
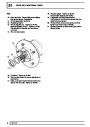
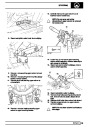
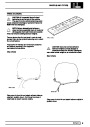
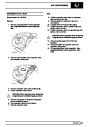
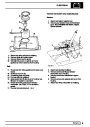
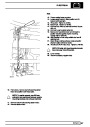
Remove 4 clips securing evaporator top cover.
Remove evaporator top cover.
23. Perform a functional check.
24. Disconnect service unit.
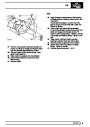
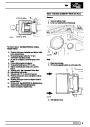
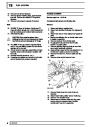
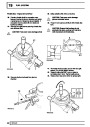
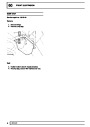
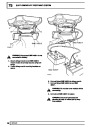
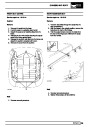
10.
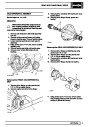
Remove thermostat sensor from evaporator
matrix.
11.
12.
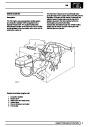
Remove evaporator assembly from lower casing.
Remove bulkhead seal from case.
10
REPAIR
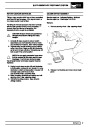
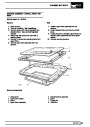
| Categories | Range Rover |
|---|---|
| Tags | Land Rover |
| Model Year | 1998 |
| Download File |
|
| Document Type | Workshop Manual |
| Language | English |
| Product Brand | Land Rover |
| Document File Type | |
| Publisher | landrover.com |
| Wikipedia's Page | http://en.wikipedia.org/wiki/Land_Rover |
| Copyright | Attribution Non-commercial |
(0 votes, average: 0 out of 5)