


19
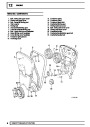
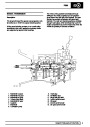
FUEL SYSTEM
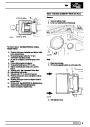
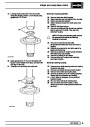
Refit
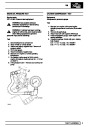
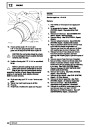
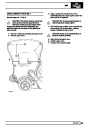
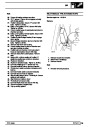
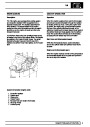
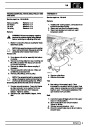
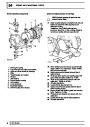
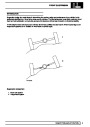
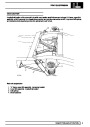
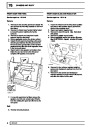
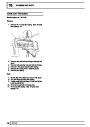
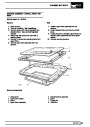
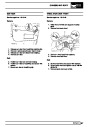
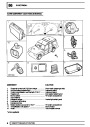
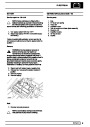
FUEL TANK - DRAINING - ADVANCED EVAPS
Service repair no - 19.55.02
29.
30.
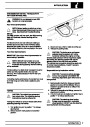
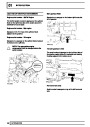
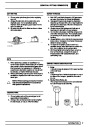
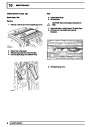
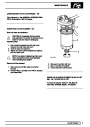
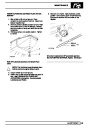
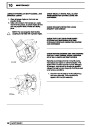
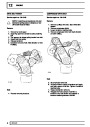
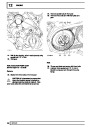
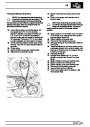
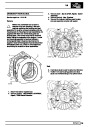
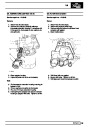
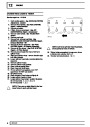
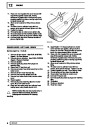
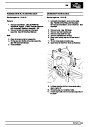
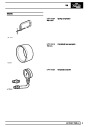
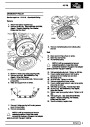
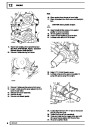
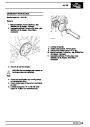
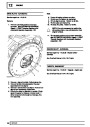
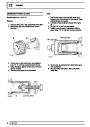
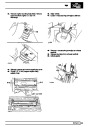
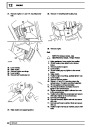
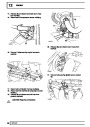
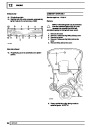
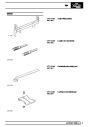
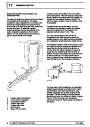
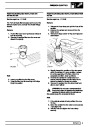
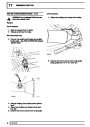
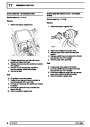
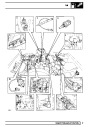
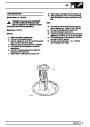
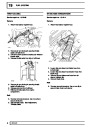
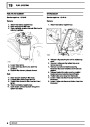
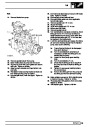
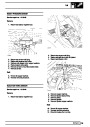
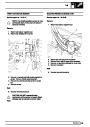
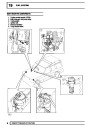
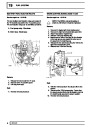
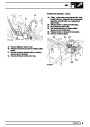
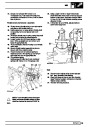
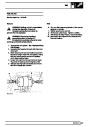
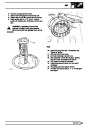
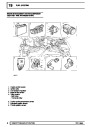
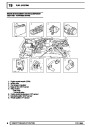
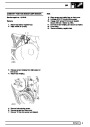
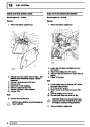
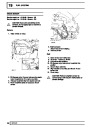
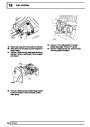
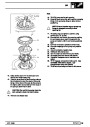
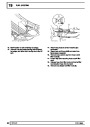
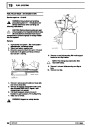
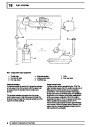
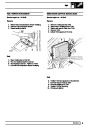
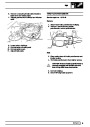
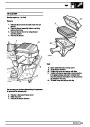
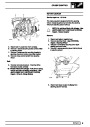
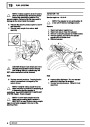
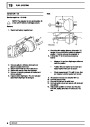
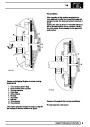
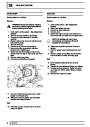
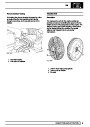
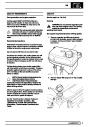
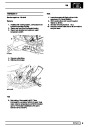
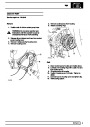
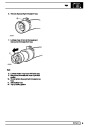
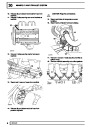
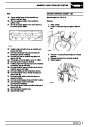
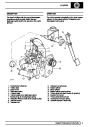
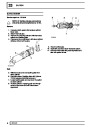
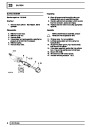
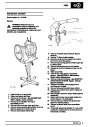
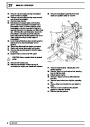
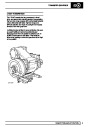
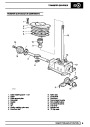
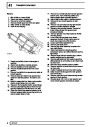
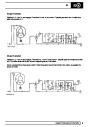
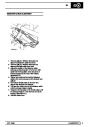
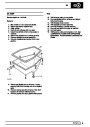
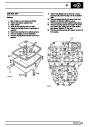
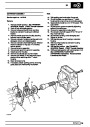
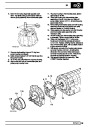
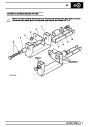
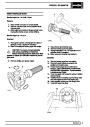
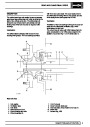
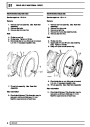
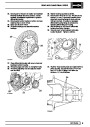
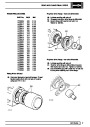
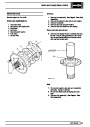
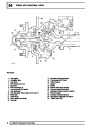
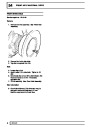
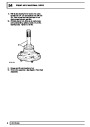
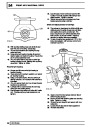
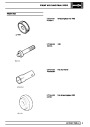
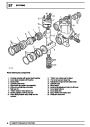
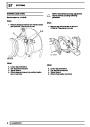
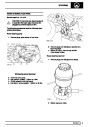
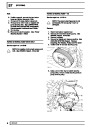
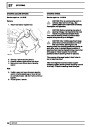
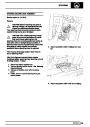
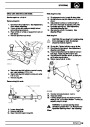
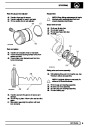
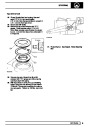
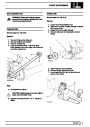
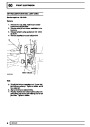
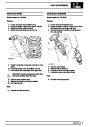
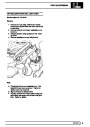
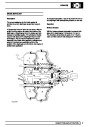
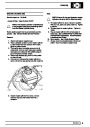
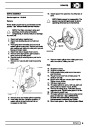
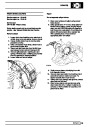
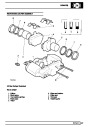
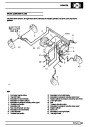
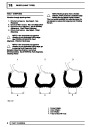
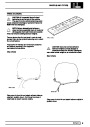
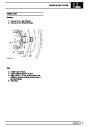
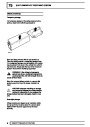
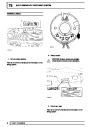
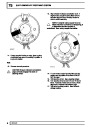
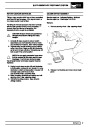
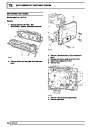
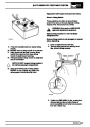
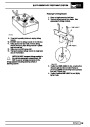
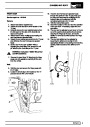
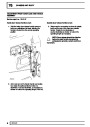
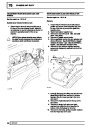
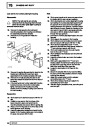
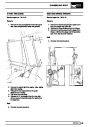
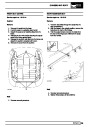
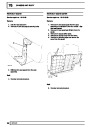
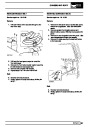
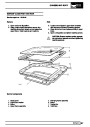
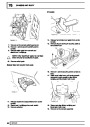
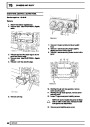
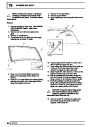
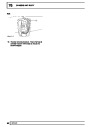
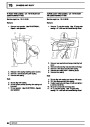
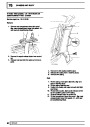
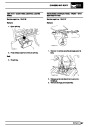
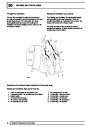
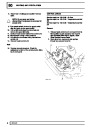
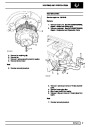
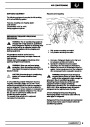
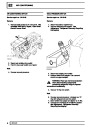
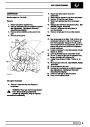
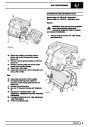
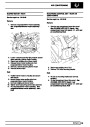
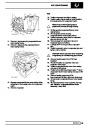
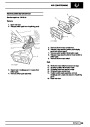
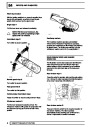
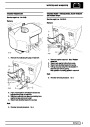
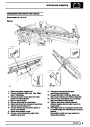
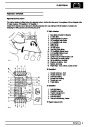
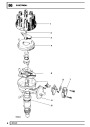
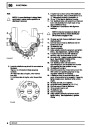
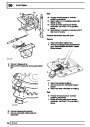
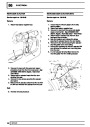
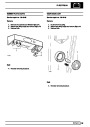
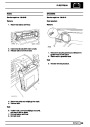
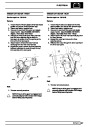
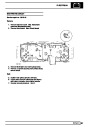
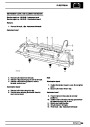
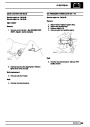
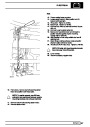
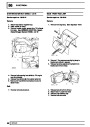
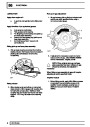
Fit NEW pump seal to tank opening.
Carefully lower pump into tank opening, pressing
firmly on the pump top flange to allow correct
positioning.
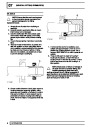
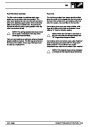
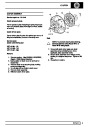
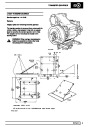
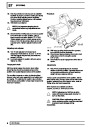
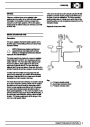
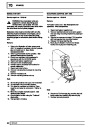
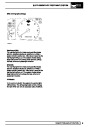
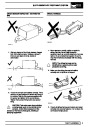
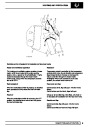
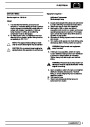
WARNING: Before removing the fuel tank
it must be drained.
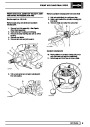
NOTE: Ensure location tag on pump top
flange is engaged correctly to tank
opening lip.
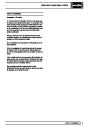
WARNING: Petrol/gasoline vapour is
highly flammable and in confined spaces
is also explosive and toxic. Always have a
fire extinguisher containing FOAM, CO2, GAS or
POWDER close at hand when handling or draining
fuel. See Introduction
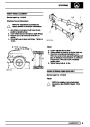
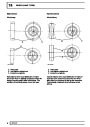
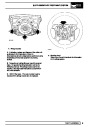
31.
32.
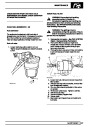
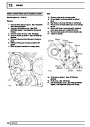
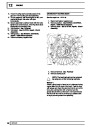
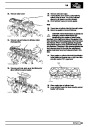
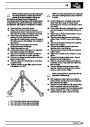
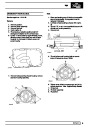
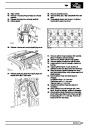
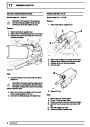
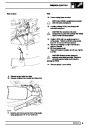
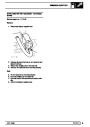
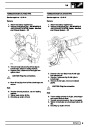
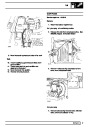
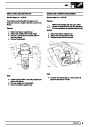
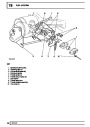
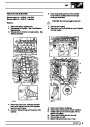
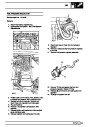
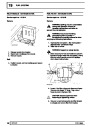
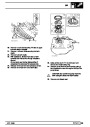
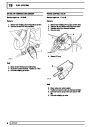
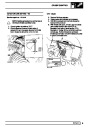
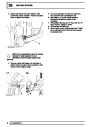
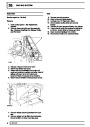
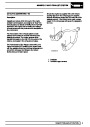
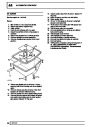
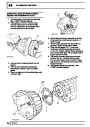
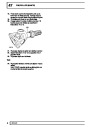
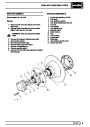
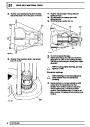
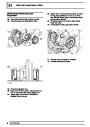
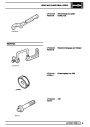
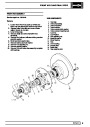
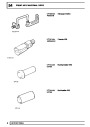
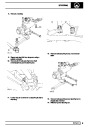
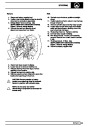
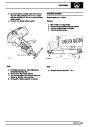
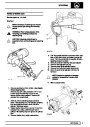
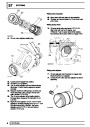
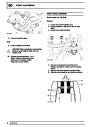
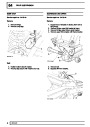
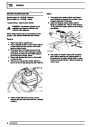
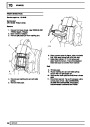
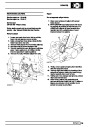
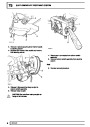
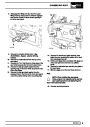
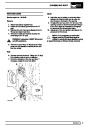
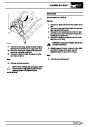
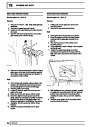
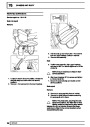
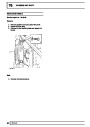
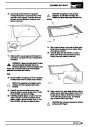
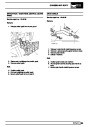
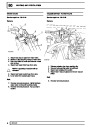
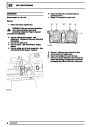
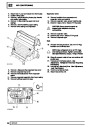
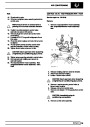
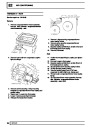
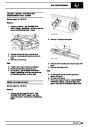
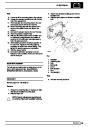
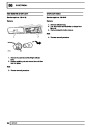
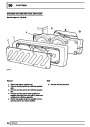
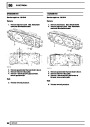
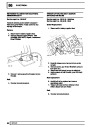
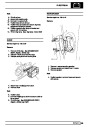
Fit locking ring and tighten to 35 Nm using
service tool LRT-19-009.
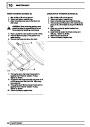
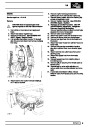
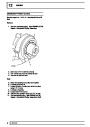
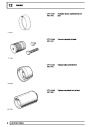
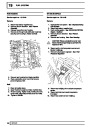
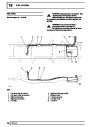
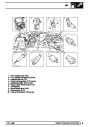
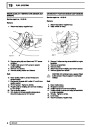
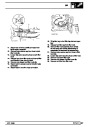
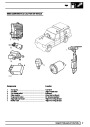
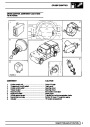
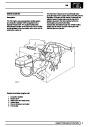
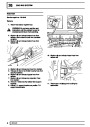
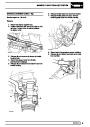
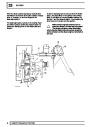
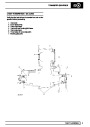
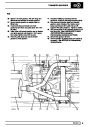
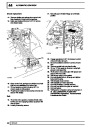
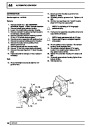
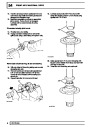
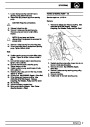
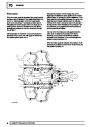
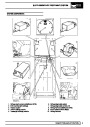
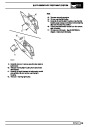
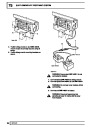
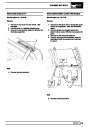
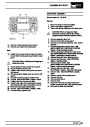
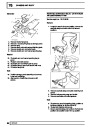
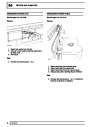
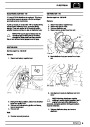
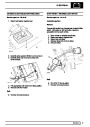
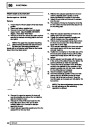
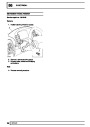
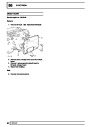
Fit vent hose to fuel tank clips and connect to
pressure sensor.
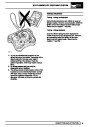
CAUTION: Before disconnecting any part
of fuel system, it is imperative that all dust,
dirt and debris is removed from around
components to prevent ingress of foreign matter
into fuel system.
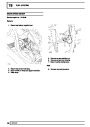
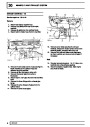
33.
34.
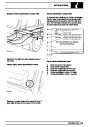
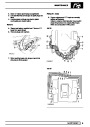
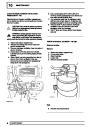
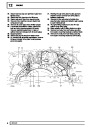
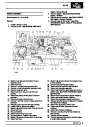
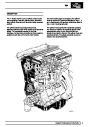
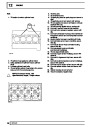
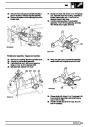
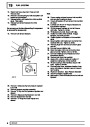
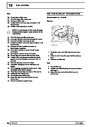
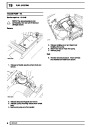
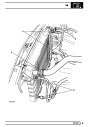
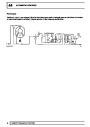
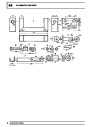
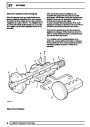
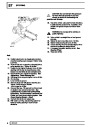
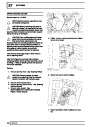
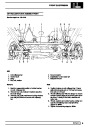
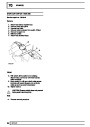
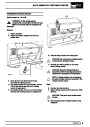
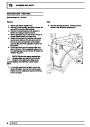
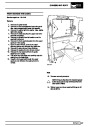
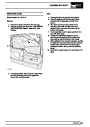
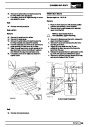
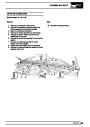
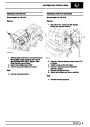
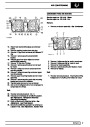
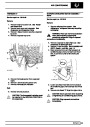
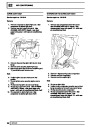
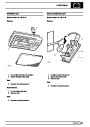
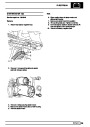
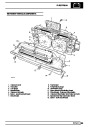
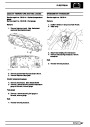
With assistance, fit fuel tank into position.
Fit fuel tank cradle and secure with nuts and
bolts.
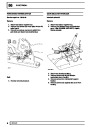
Align upper fuel tank strap and secure with nut
and bolt.
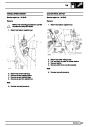
35.
36.
37.
38.
39.
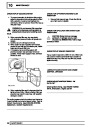
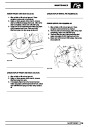
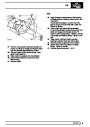
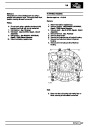
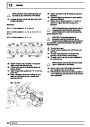
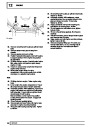
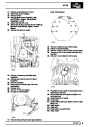
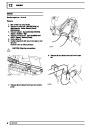
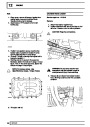
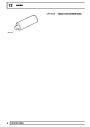
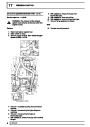
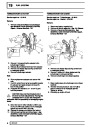
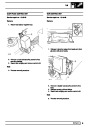
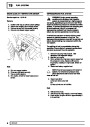
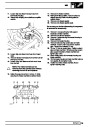
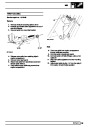
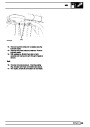
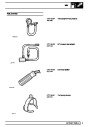
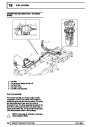
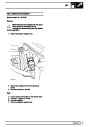
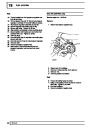
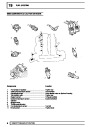
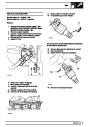
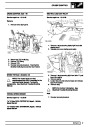
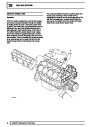
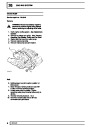
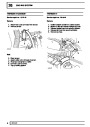
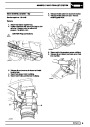
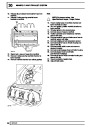
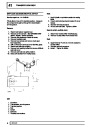
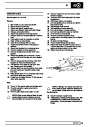
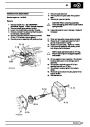
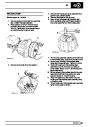
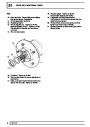
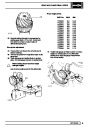
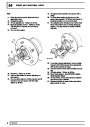
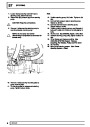
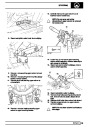
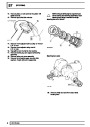
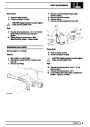
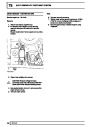
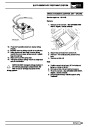
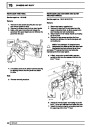
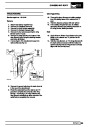
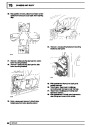
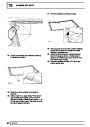
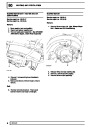
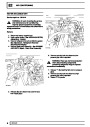
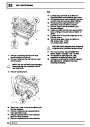
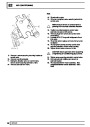
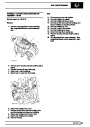
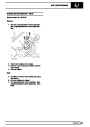
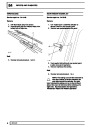
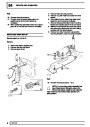
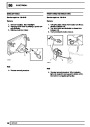
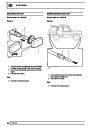
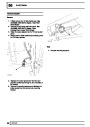
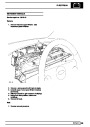
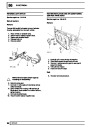
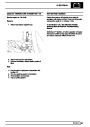
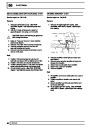
Fit NEW clip to fuel filler neck hose.
Connect fuel filler neck internal breather to tank.
Connect fuel filler neck hose to tank.
Position fuel filler neck hose clip and tighten until
head shears.
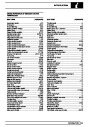
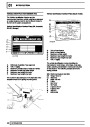
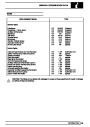
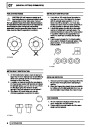
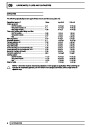
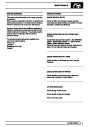
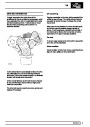
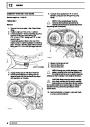
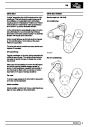
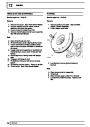
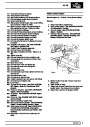
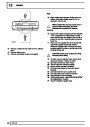
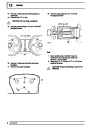
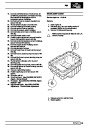
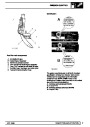
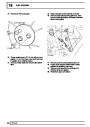
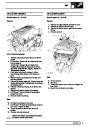
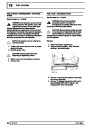
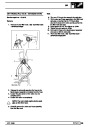
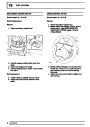
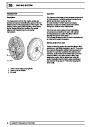
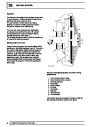
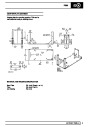
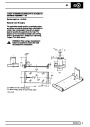
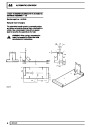
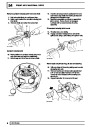
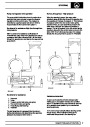
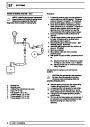
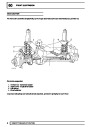
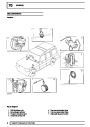
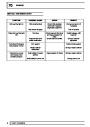
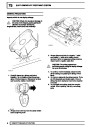
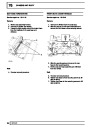
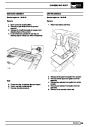
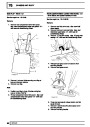
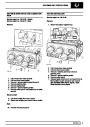
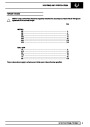
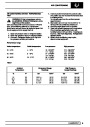
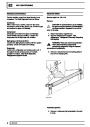
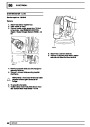
NOTE: Assuming the fuel tank is FULL
drain the following quantities:
Renew Fuel pump = 9 Litres (2.4 US Gallons)
Renew Fuel filler neck = 22 Litres (6 US Gallons)
Renew Fuel tank = COMPLETE DRAIN
40.
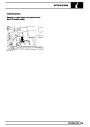
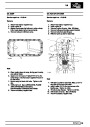
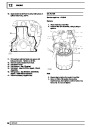
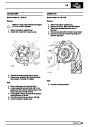
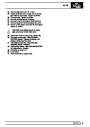
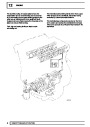
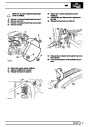
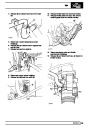
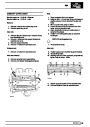
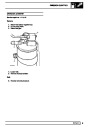
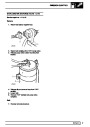
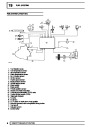
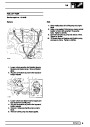
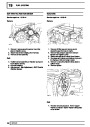
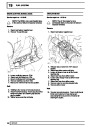
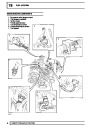
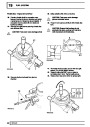
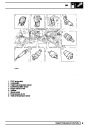
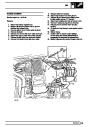
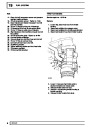
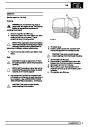
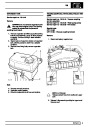
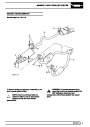
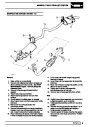
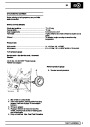
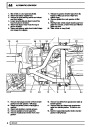
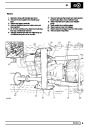
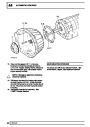
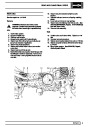
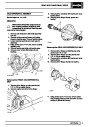
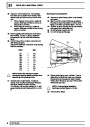
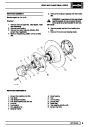
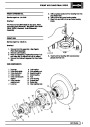
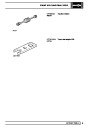
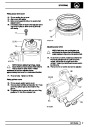
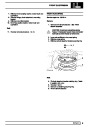
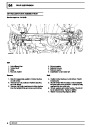
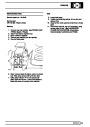
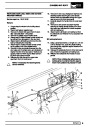
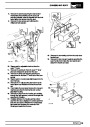
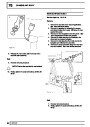
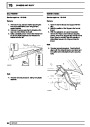
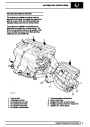
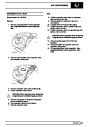
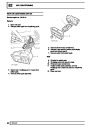
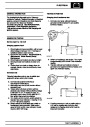
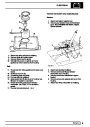
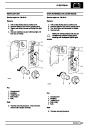
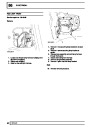
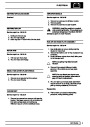
Connect vent line quickfit connector to
liquid/vapour separator.
41.
42.
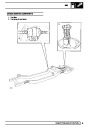
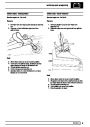
Connect vent line hose connection.
Position anti-roll [sway] bar straps and secure
with nuts and bolts.
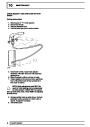
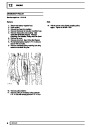
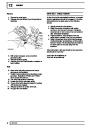
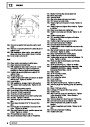
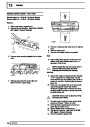
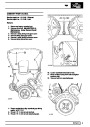
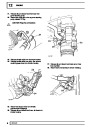
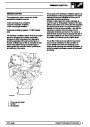
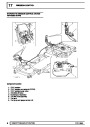
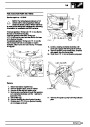
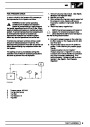
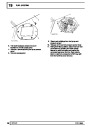
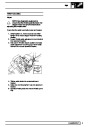
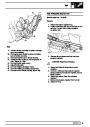
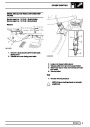
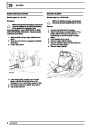
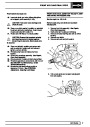
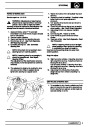
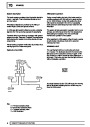
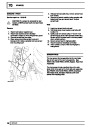
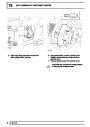
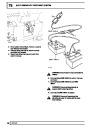
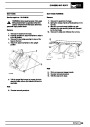
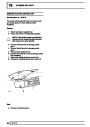
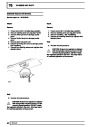
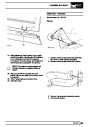
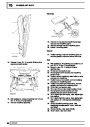
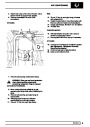
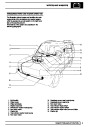
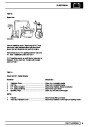
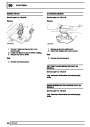
1. Depressurise fuel system. See fuel system -
depressurise - advanced evaps
2. Disconnect battery negative lead.
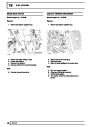
43.
44.
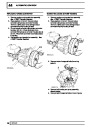
Remove stand(s) and lower vehicle.
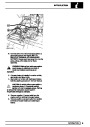
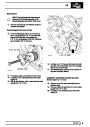
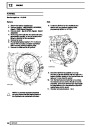
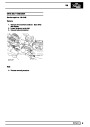
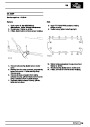
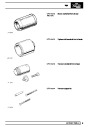
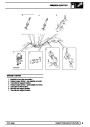
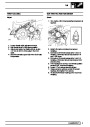
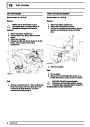
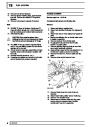
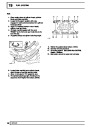
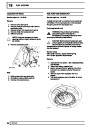
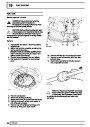
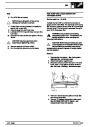
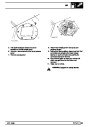
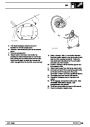
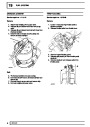
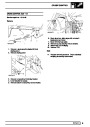
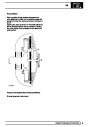
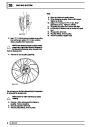
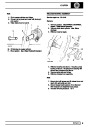
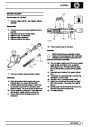
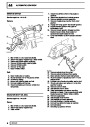
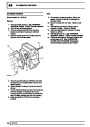
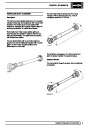
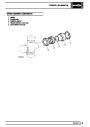
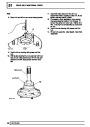
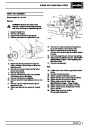
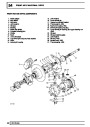
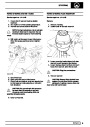
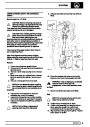
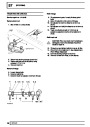
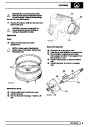
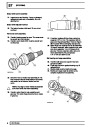
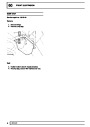
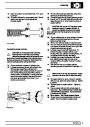
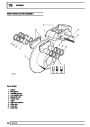
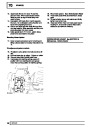
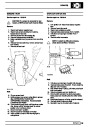
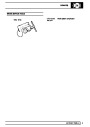
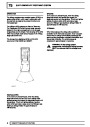
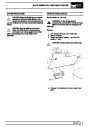
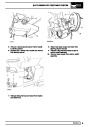
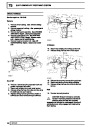
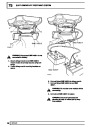
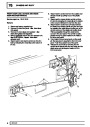
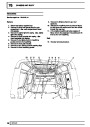
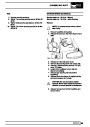
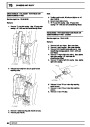
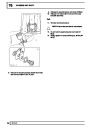
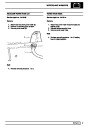
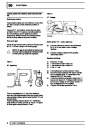
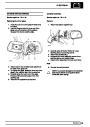
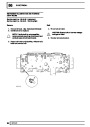
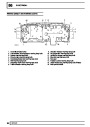
Connect both fuel lines to the pump by pushing
the connectors down each line square to the
pump connection until the connectors positively
latches.
45.
Connect multiplugs to fuel pump and pressure
sensor.
46.
47.
48.
49.
50.
Reconnect battery negative lead.
Refill tank with drained fuel.
Run the engine to check for any fuel leaks.
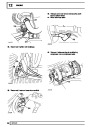
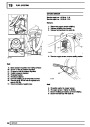
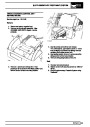
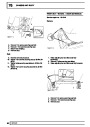
Fit access panel and secure with screws.
Reposition loadspace sound insulation and
carpet.
51.
52.
Fit RH luggage compartment side panel. See
CHASSIS AND BODY, Repair, rear
compartment trim panels
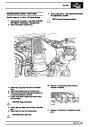
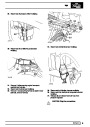
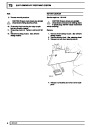
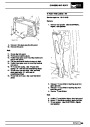
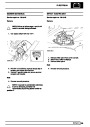
3.
4.
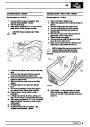
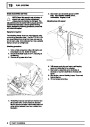
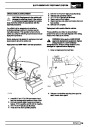
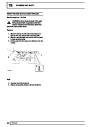
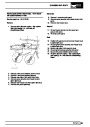
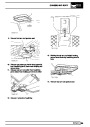
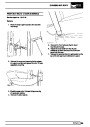
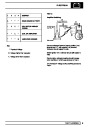
Remove 6 screws securing tail door tread strip
and remove tread strip.
Remove RH luggage compartment side panel.
See CHASSIS AND BODY, Repair,
Fit tail door tread strip and secure with screws.
24
REPAIR
ADD: 09/95
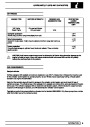
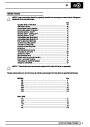
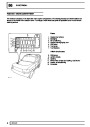
| Categories | Range Rover |
|---|---|
| Tags | Land Rover |
| Model Year | 1998 |
| Download File |
|
| Document Type | Workshop Manual |
| Language | English |
| Product Brand | Land Rover |
| Document File Type | |
| Publisher | landrover.com |
| Wikipedia's Page | http://en.wikipedia.org/wiki/Land_Rover |
| Copyright | Attribution Non-commercial |
(0 votes, average: 0 out of 5)