


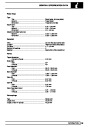


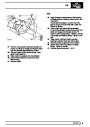


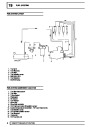


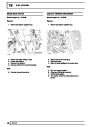


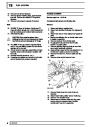


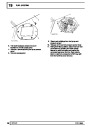
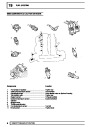


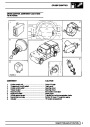


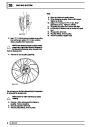
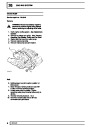

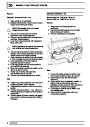

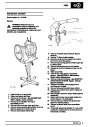
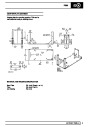
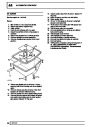
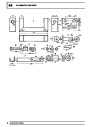


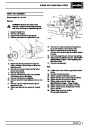
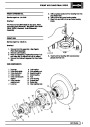


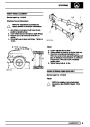


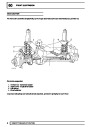


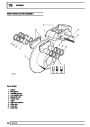

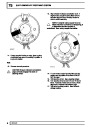


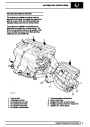


AIR CONDITIONING
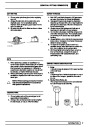
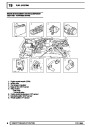
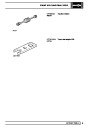
EXPANSION VALVE - REAR
Service repair no - 82.26.07
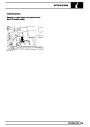
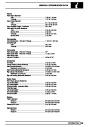
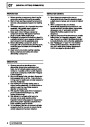
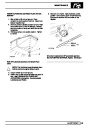
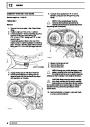
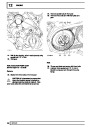
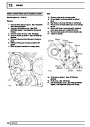
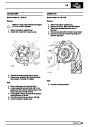
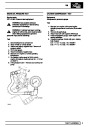
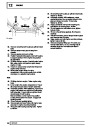
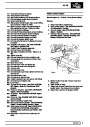
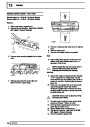
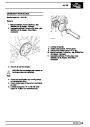
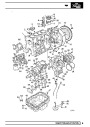
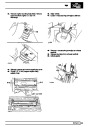
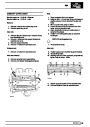
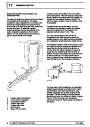
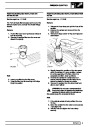
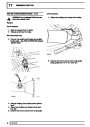
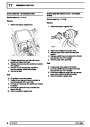
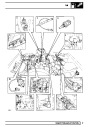
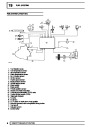
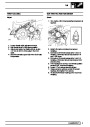
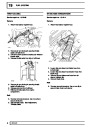
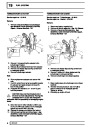
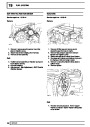
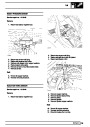
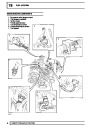
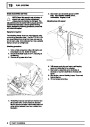
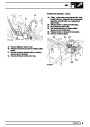
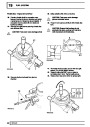
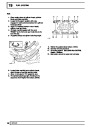
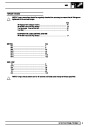
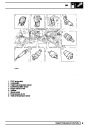
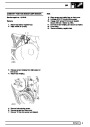
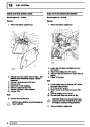
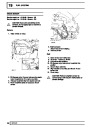
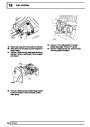
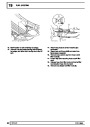
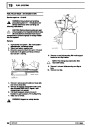
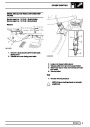
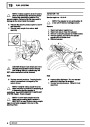
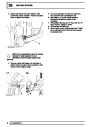
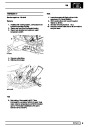
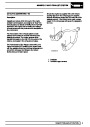
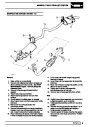
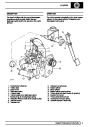
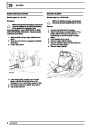
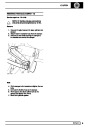
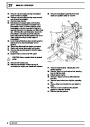
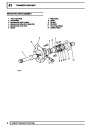
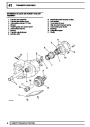
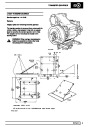
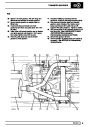
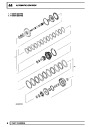
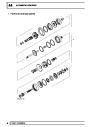
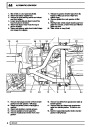
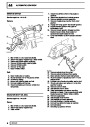
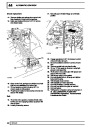
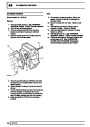
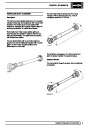
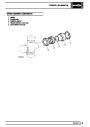
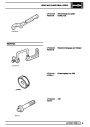
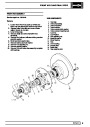
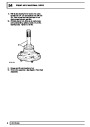
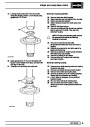
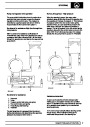
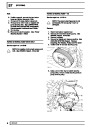
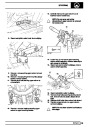
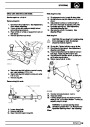
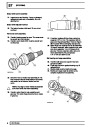
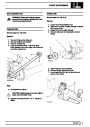
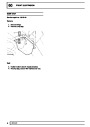
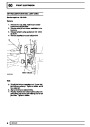
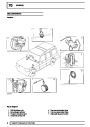
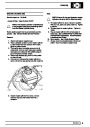
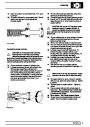
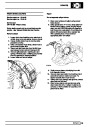
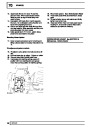
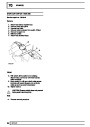
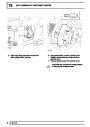
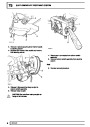
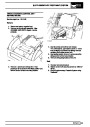
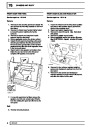
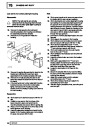
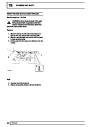
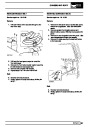
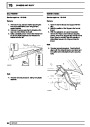
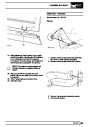
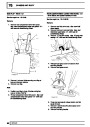
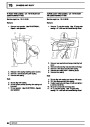
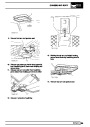
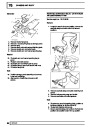
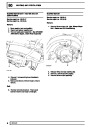
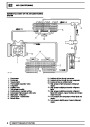
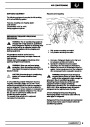
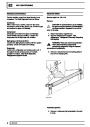
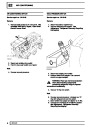
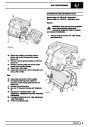
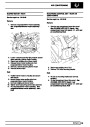
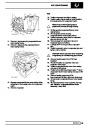
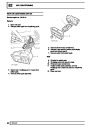
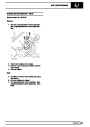
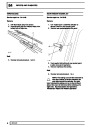
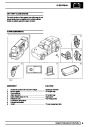
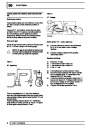
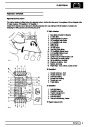
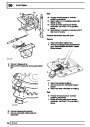
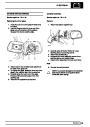
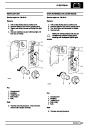
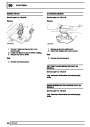
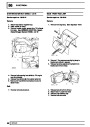
Remove
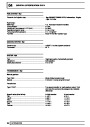
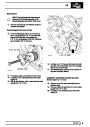
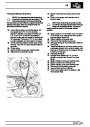
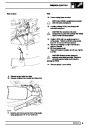
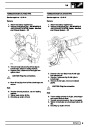
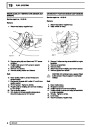
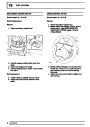
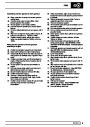
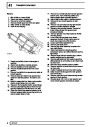
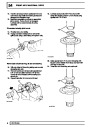
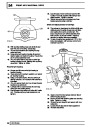
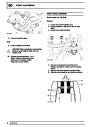
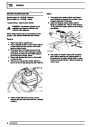
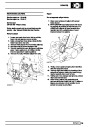
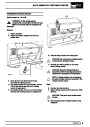
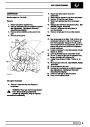
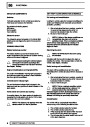
Refit
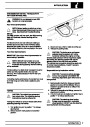
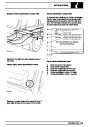
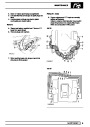
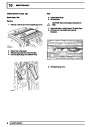
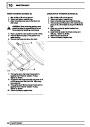
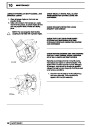
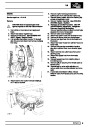
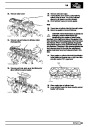
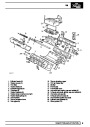
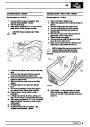
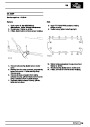
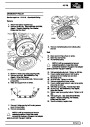
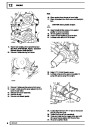
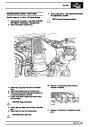
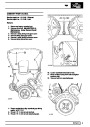
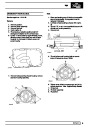
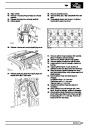
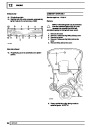
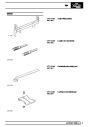
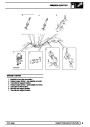
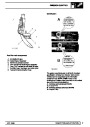
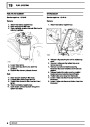
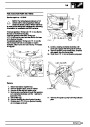
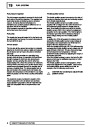
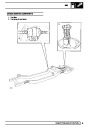
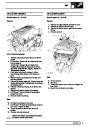
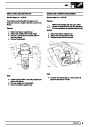
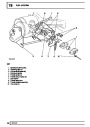
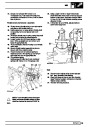
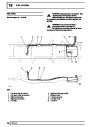
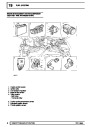
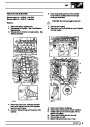
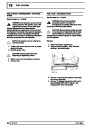
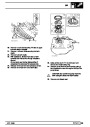
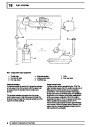
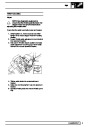
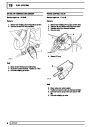
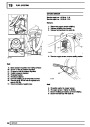
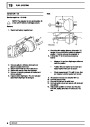
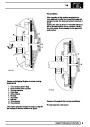
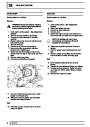
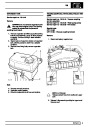
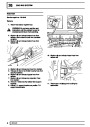
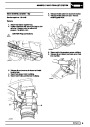
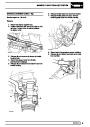
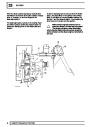
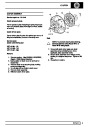
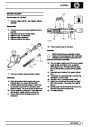
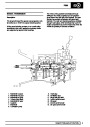
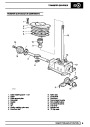
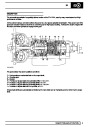
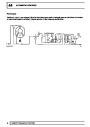
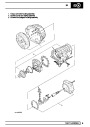
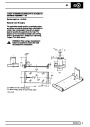
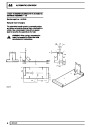
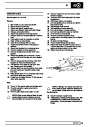
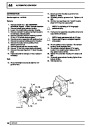
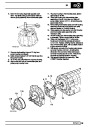
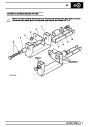
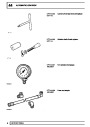
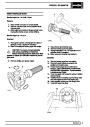
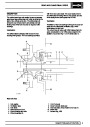
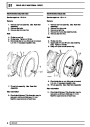
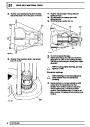
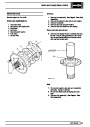
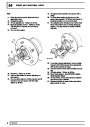
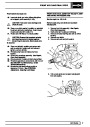
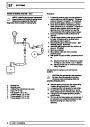
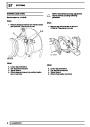
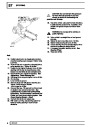
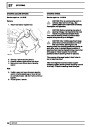
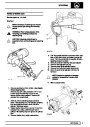
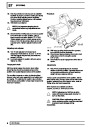
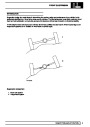
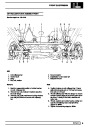
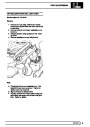
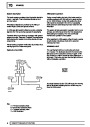
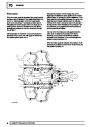
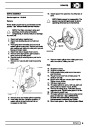
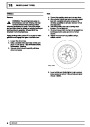
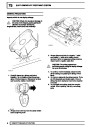
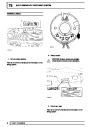
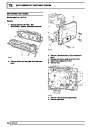
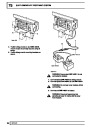
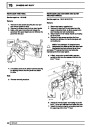
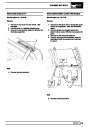
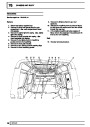
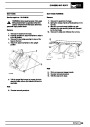
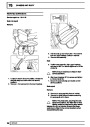
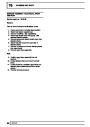
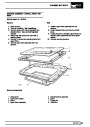
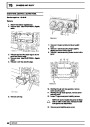
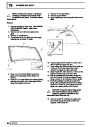
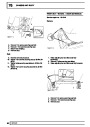
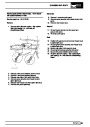
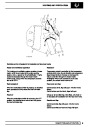
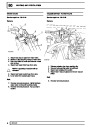
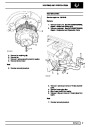
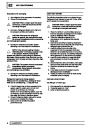
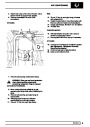
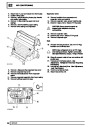
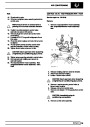
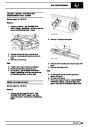
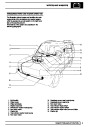
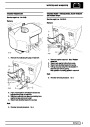
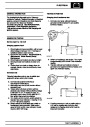
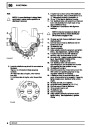
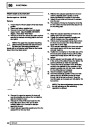
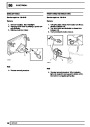
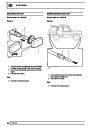
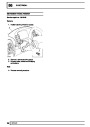
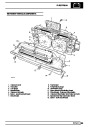
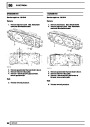
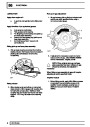
8. Position expansion valve probe to evaporator
pipe and secure with clip.
9. Remove plugs from expansion valve and
connections.
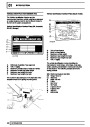
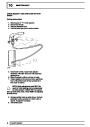
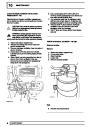
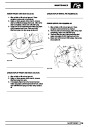
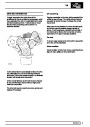
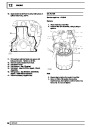
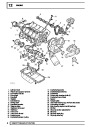
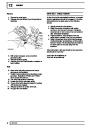
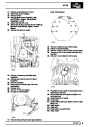
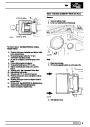
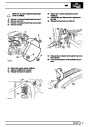
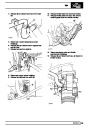
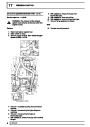
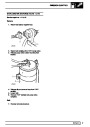
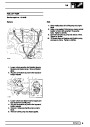
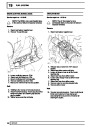
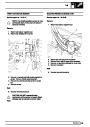
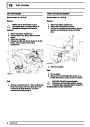
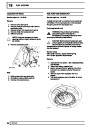
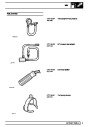
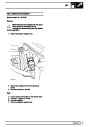
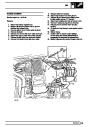
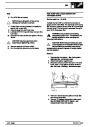
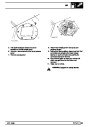
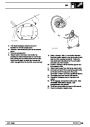
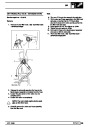
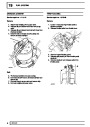
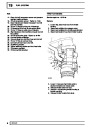
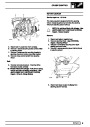
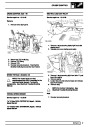
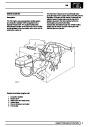
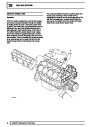
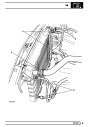
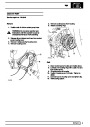
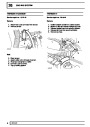
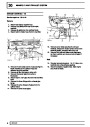
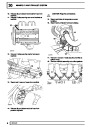
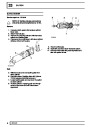
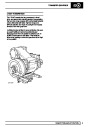
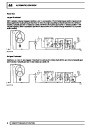
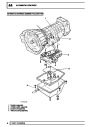
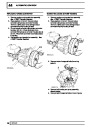
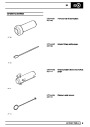
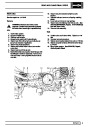
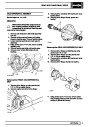
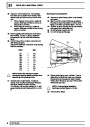
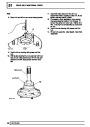
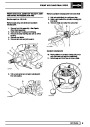
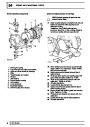
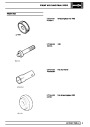
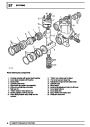
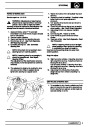
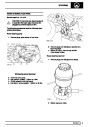
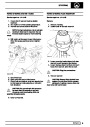
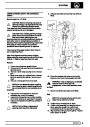
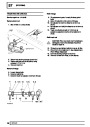
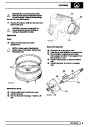
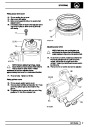
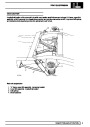
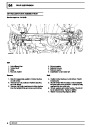
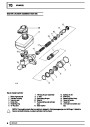
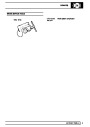
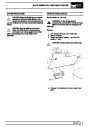
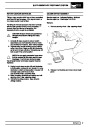
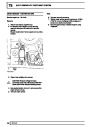
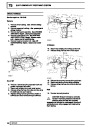
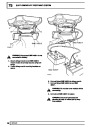
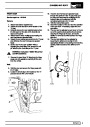
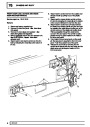
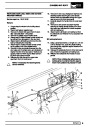
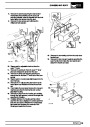
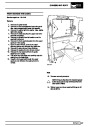
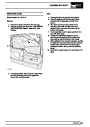
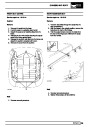
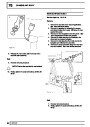
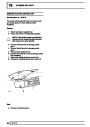
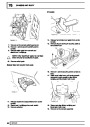
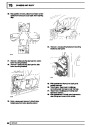
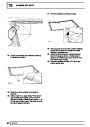
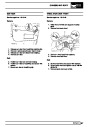
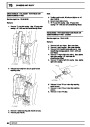
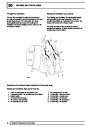
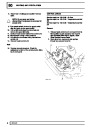
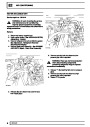
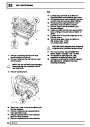
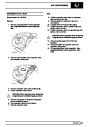
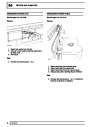
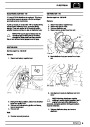
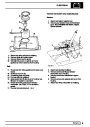
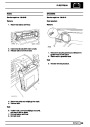
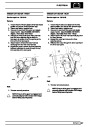
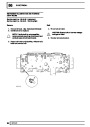
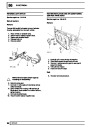
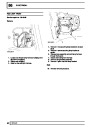
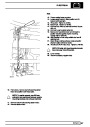
1.
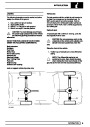
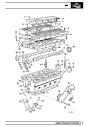
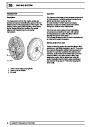
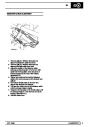
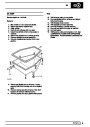
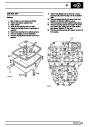
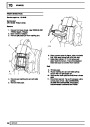
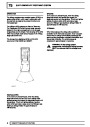
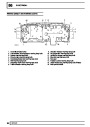
Remove evaporator/blower motor assembly.
See evaporator/blower motor assembly -
rear
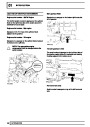
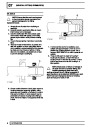
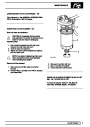
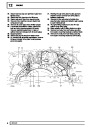
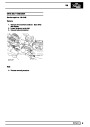
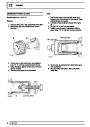
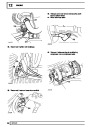
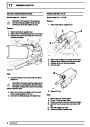
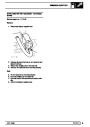
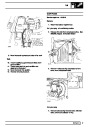
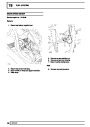
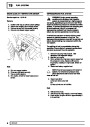
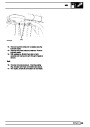
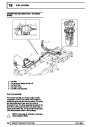
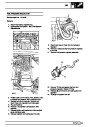
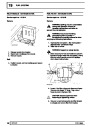
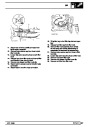
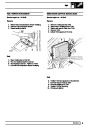
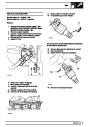
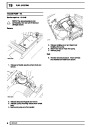
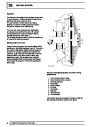
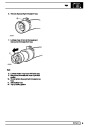
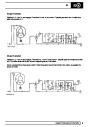
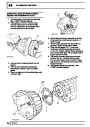
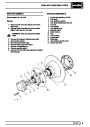
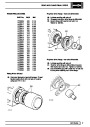
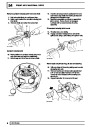
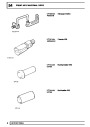
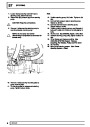
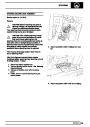
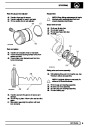
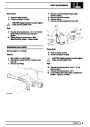
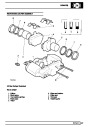
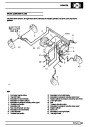
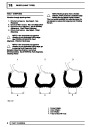
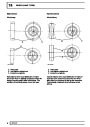
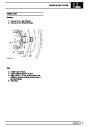
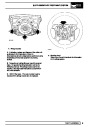
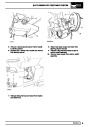
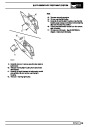
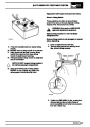
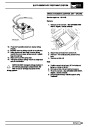
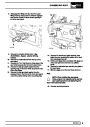
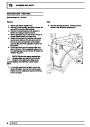
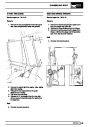
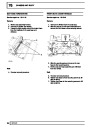
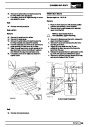
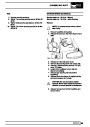
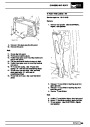
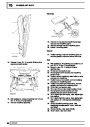
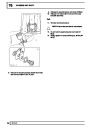
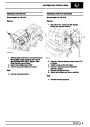
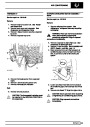
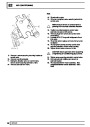
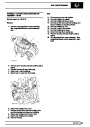
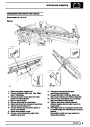
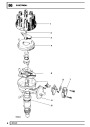
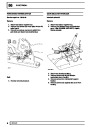
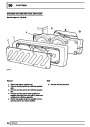
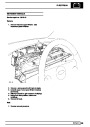
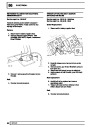
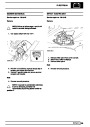
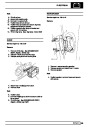
10. Lubricate NEW ’O’ rings and fit to pipes.
11. Position expansion valve to pressure pipe and
tighten union to 14 Nm .
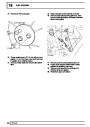
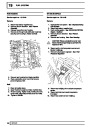
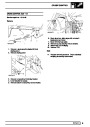
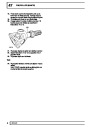
12.
Position expansion valve to evaporator pipe and
tighten union to 22 Nm .
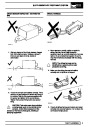
CAUTION: Use 2 spanners when loosening
or tightening air conditioning pipe unions.
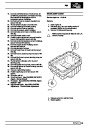
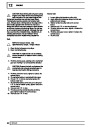
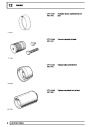
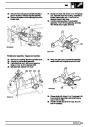
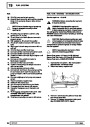
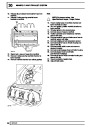
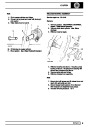
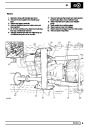
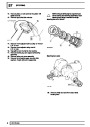
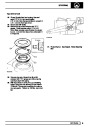
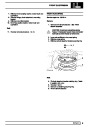
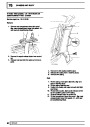
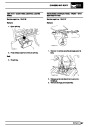
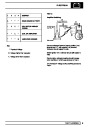
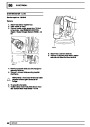
13.
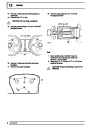
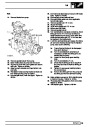
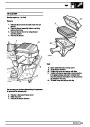
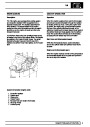
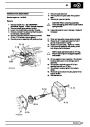
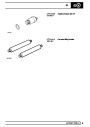
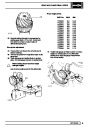
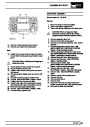
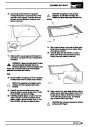
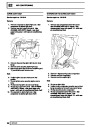
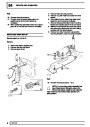
14.
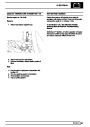
15.
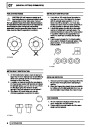
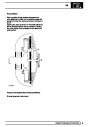
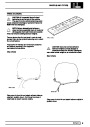
Remove backing paper from NEW foam
insulation.
Fit foam insulation to expansion valve and
expansion valve probe.
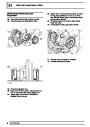
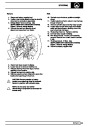
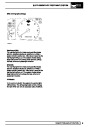
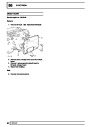
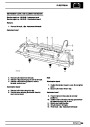
Fit evaporator/blower motor assembly. See
evaporator/blower motor assembly - rear;
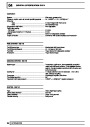
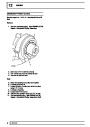
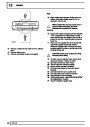
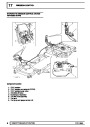
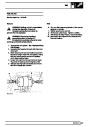
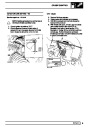
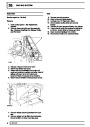
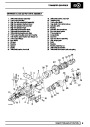
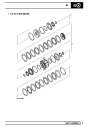
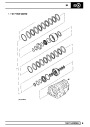
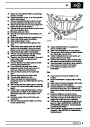
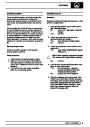
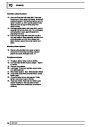
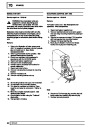
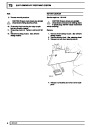
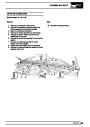
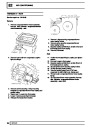
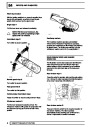
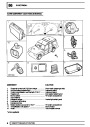
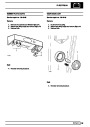
Refit
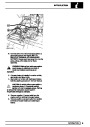
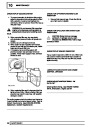
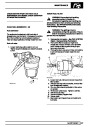
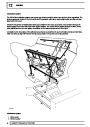
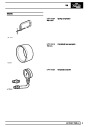
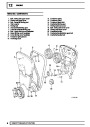
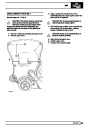
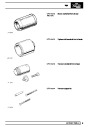
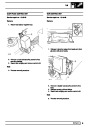
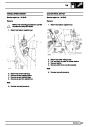
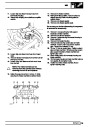
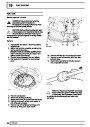
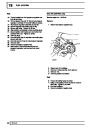
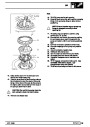
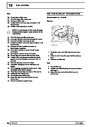
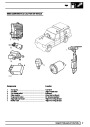
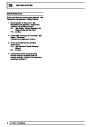
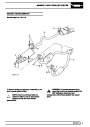
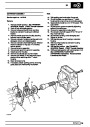
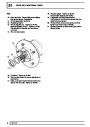
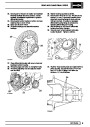
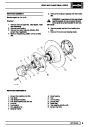
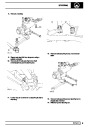
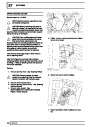
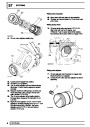
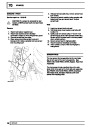
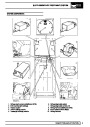
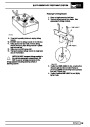
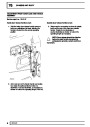
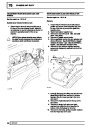
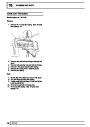
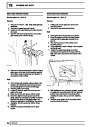
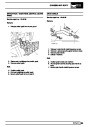
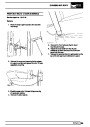
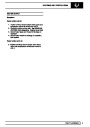
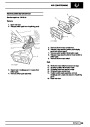
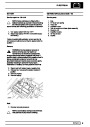
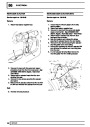
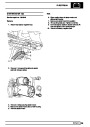
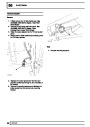
2.
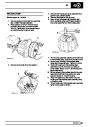
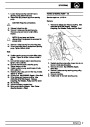
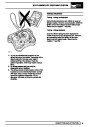
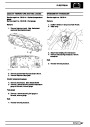
Remove foam insulation from expansion valve
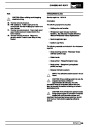
and expansion valve probe.
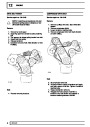
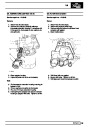
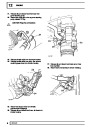
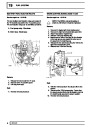
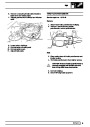
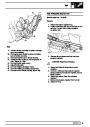
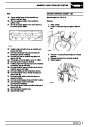
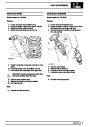
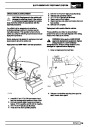
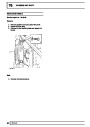
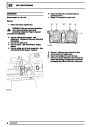
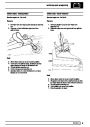
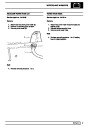
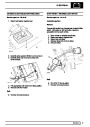
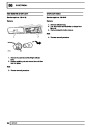
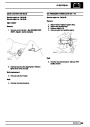
3.
4.
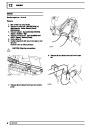
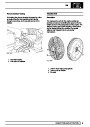
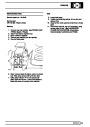
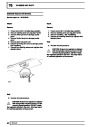
Remove expansion valve probe retaining clip.
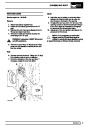
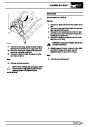
Loosen expansion valve unions.
CAUTION: Use 2 spanners when loosening
or tightening air conditioning pipe unions.
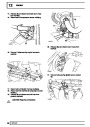
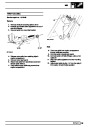
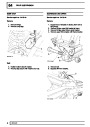
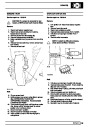
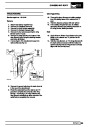
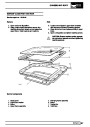
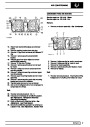
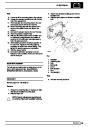
5.
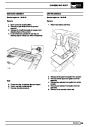
Remove and discard ’O’ rings from evaporator
and air conditioning pipes.
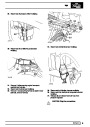
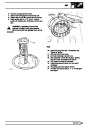
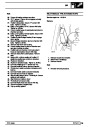
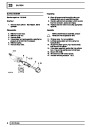
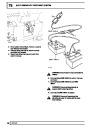
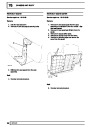
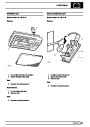
6.
7.
Plug expansion valve and connections.
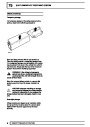
Remove expansion valve.
REPAIR
17
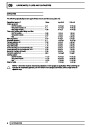
| Categories | Range Rover |
|---|---|
| Tags | Land Rover |
| Model Year | 1998 |
| Download File |
|
| Document Type | Workshop Manual |
| Language | English |
| Product Brand | Land Rover |
| Document File Type | |
| Publisher | landrover.com |
| Wikipedia's Page | http://en.wikipedia.org/wiki/Land_Rover |
| Copyright | Attribution Non-commercial |
(0 votes, average: 0 out of 5)