


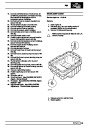


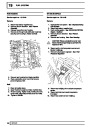


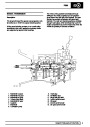
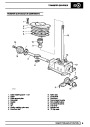
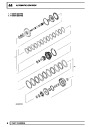


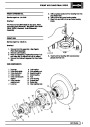


82
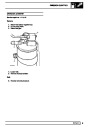
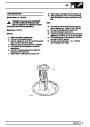
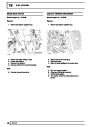
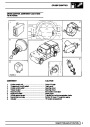
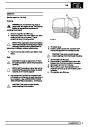
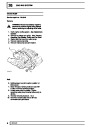
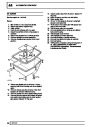
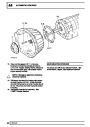
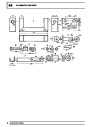
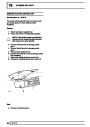
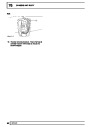
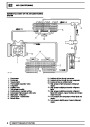
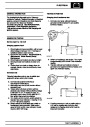
AIR CONDITIONING
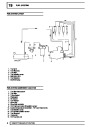
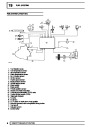
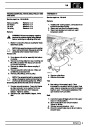
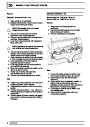
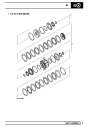
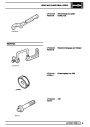
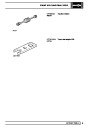
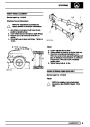
SOLENOID - HIGH PRESSURE PIPE CONTROL
VALVE - REAR
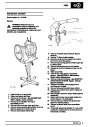
Service repair no - 82.26.05
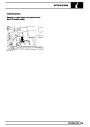
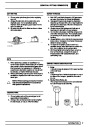
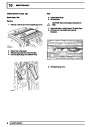
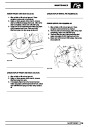
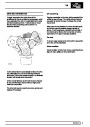
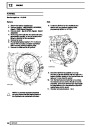
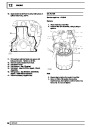
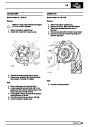
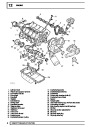
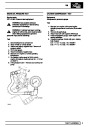
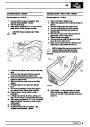
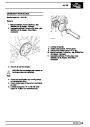
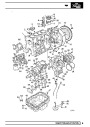
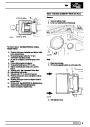
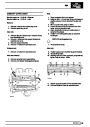
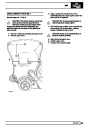
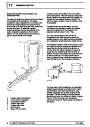
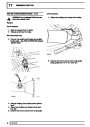
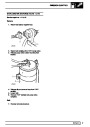
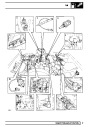
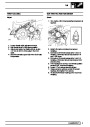
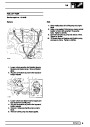
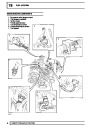
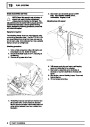
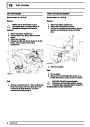
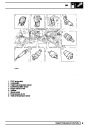
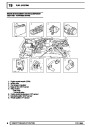
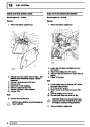
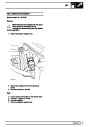
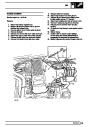
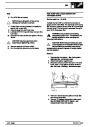
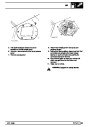
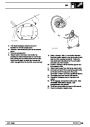
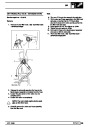
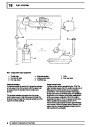
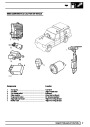
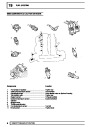
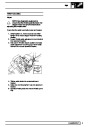
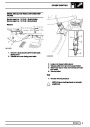
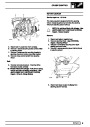
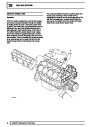
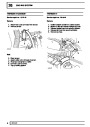
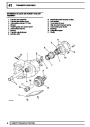
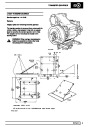
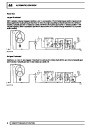
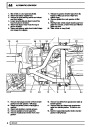
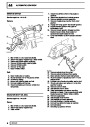
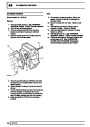
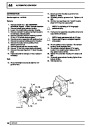
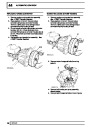
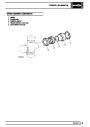
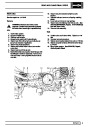
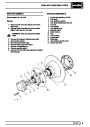
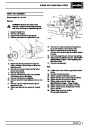
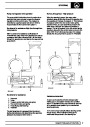
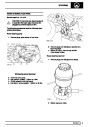
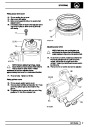
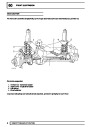
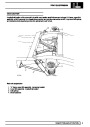
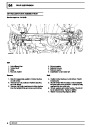
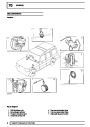
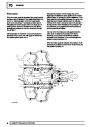
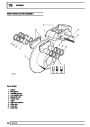
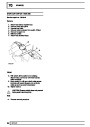
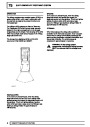
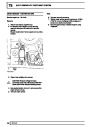
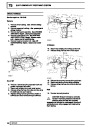
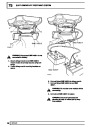
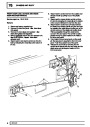
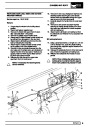
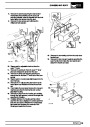
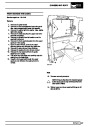
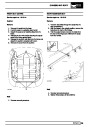
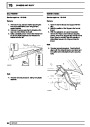
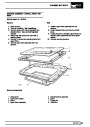
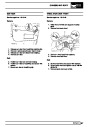
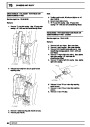
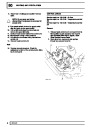
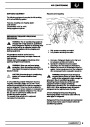
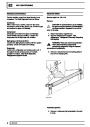
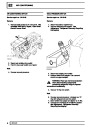
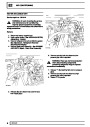
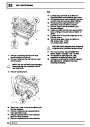
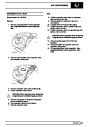
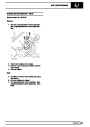
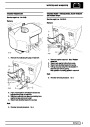
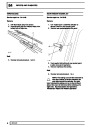
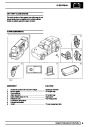
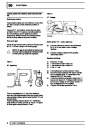
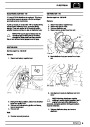
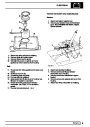
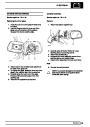
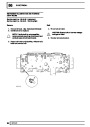
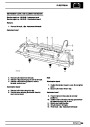
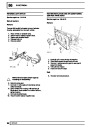
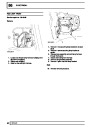
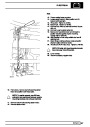
Remove
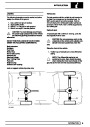
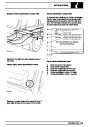
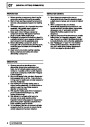
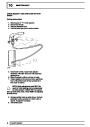
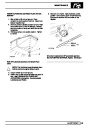
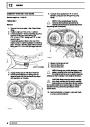
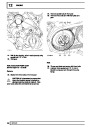
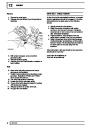
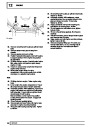
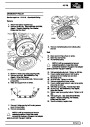
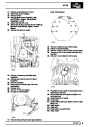
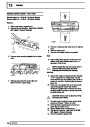
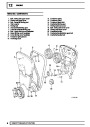
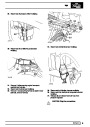
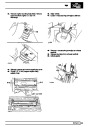
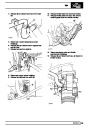
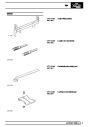
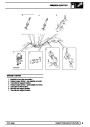
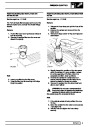
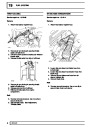
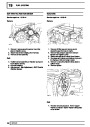
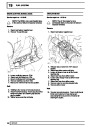
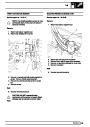
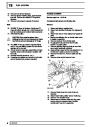
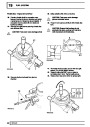
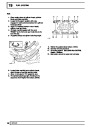
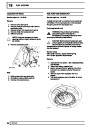
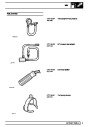
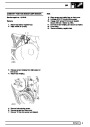
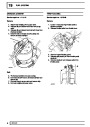
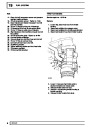
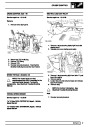
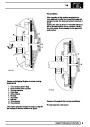
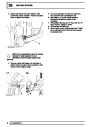
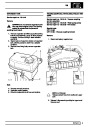
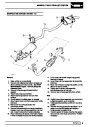
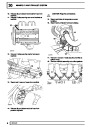
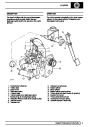
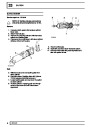
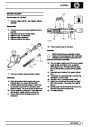
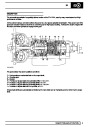
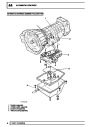
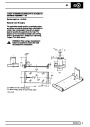
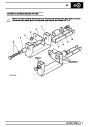
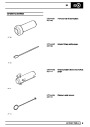
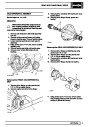
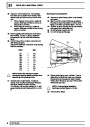
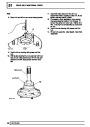
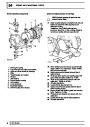
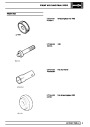
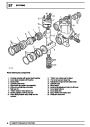
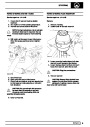
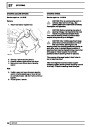
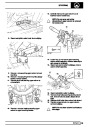
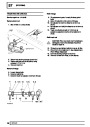
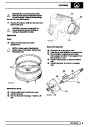
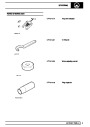
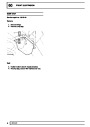
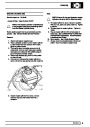
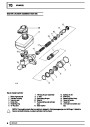
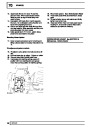
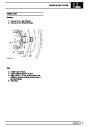
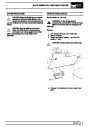
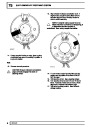
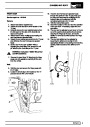
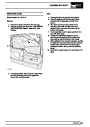
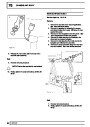
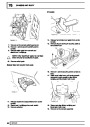
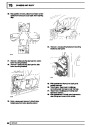
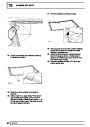
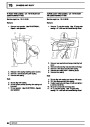
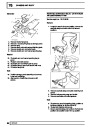
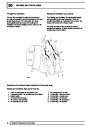
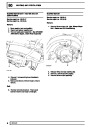
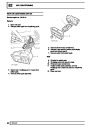
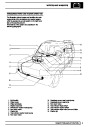
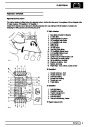
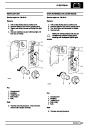
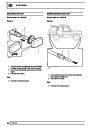
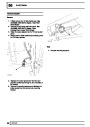
1.
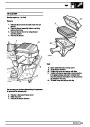
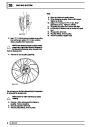
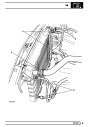
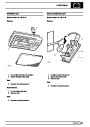
Remove evaporator/blower motor assembly.
See evaporator/blower motor assembly -
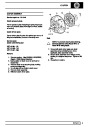
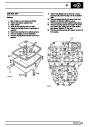
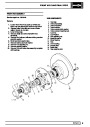
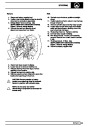
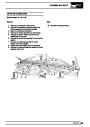
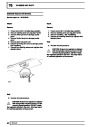
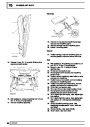
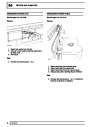
rear
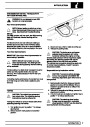
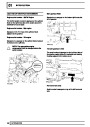
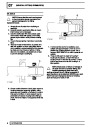
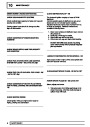
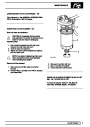
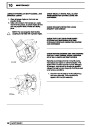
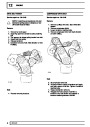
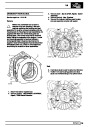
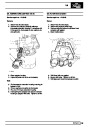
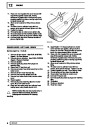
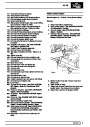
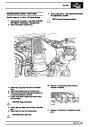
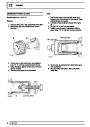
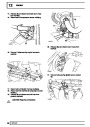
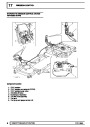
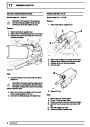
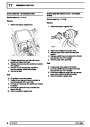
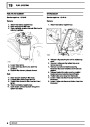
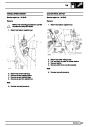
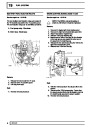
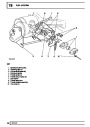
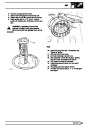
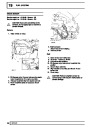
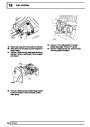
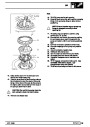
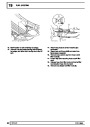
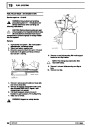
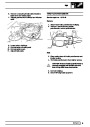
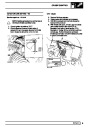
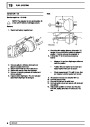
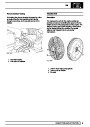
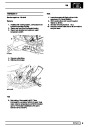
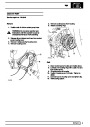
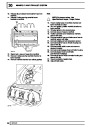
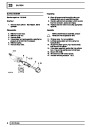
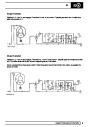
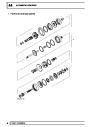
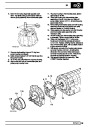
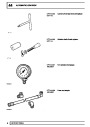
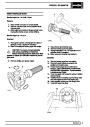
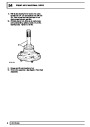
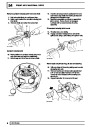
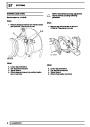
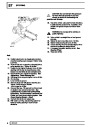
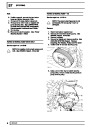
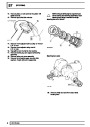
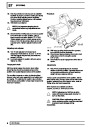
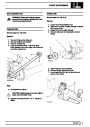
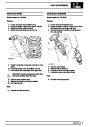
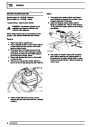
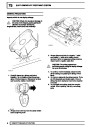
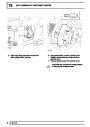
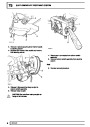
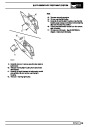
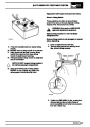
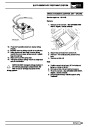
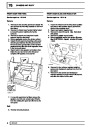
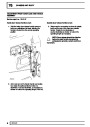
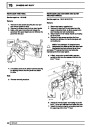
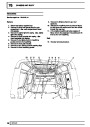
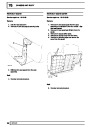
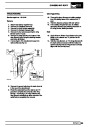
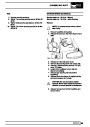
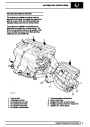
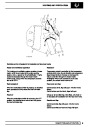
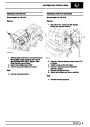
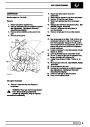
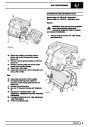
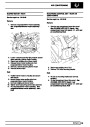
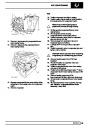
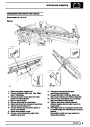
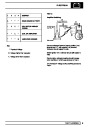
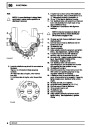
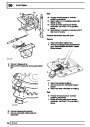
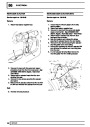
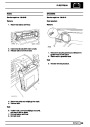
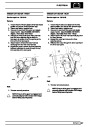
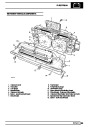
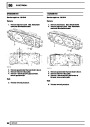
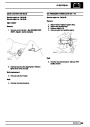
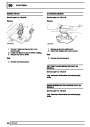
9.
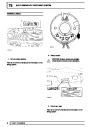
Remove 2 screws securing mounting bracket to
control valve.
10.
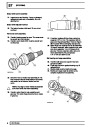
11.
Remove mounting bracket.
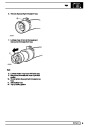
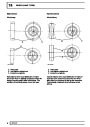
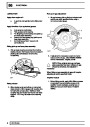
Noting the direction arrow on control valve,
remove screw securing solenoid to valve.
Remove solenoid from valve.
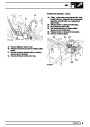
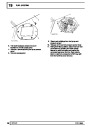
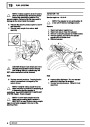
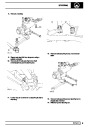
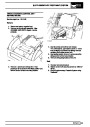
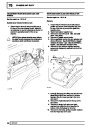
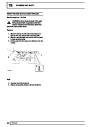
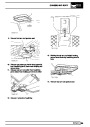
12.
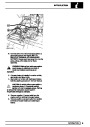
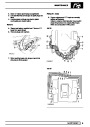
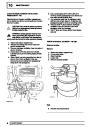
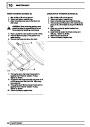
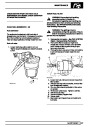
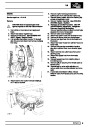
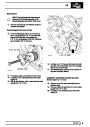
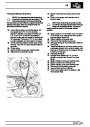
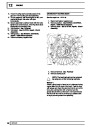
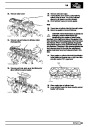
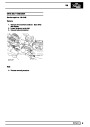
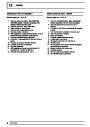
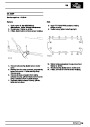
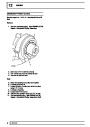
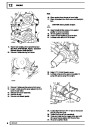
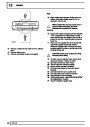
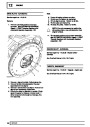
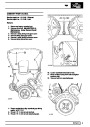
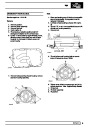
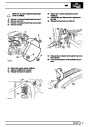
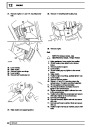
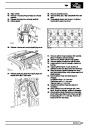
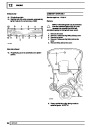
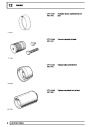
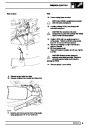
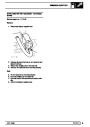
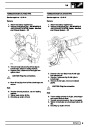
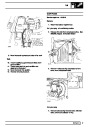
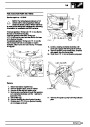
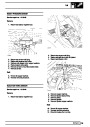
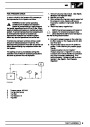
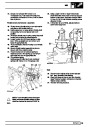
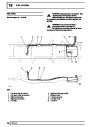
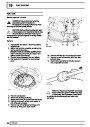
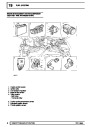
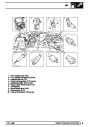
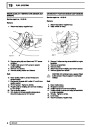
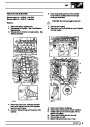
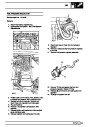
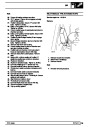
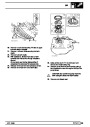
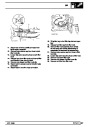
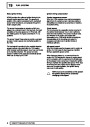
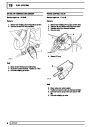
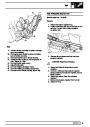
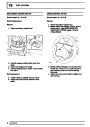
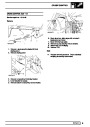
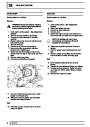
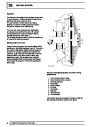
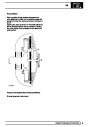
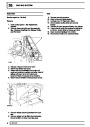
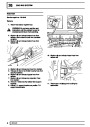
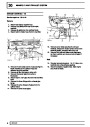
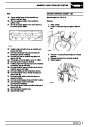
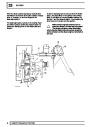
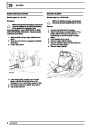
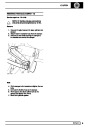
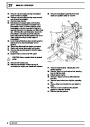
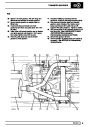
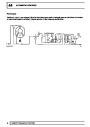
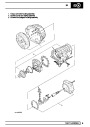
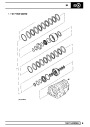
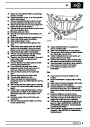
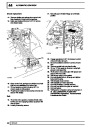
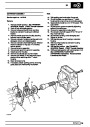
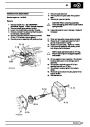
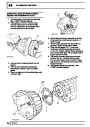
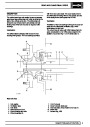
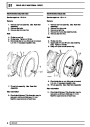
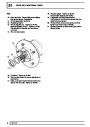
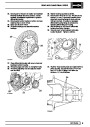
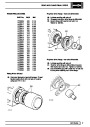
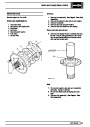
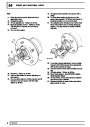
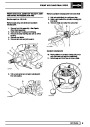
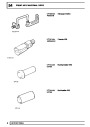
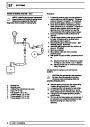
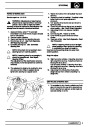
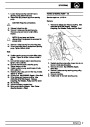
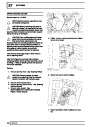
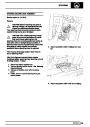
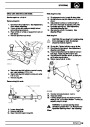
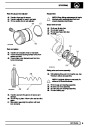
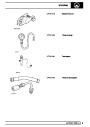
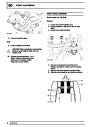
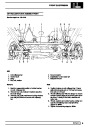
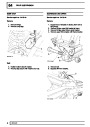
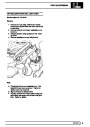
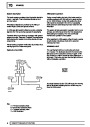
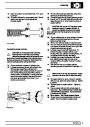
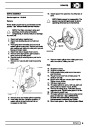
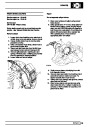
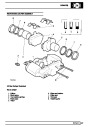
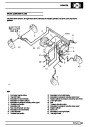
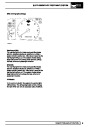
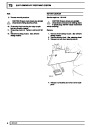
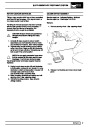
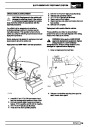
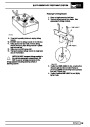
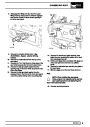
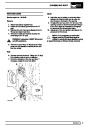
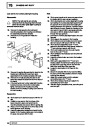
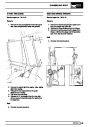
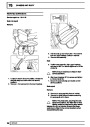
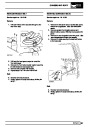
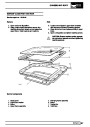
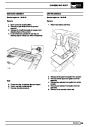
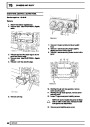
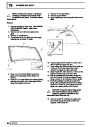
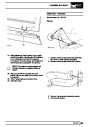
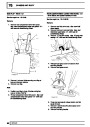
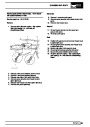
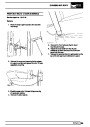
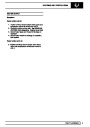
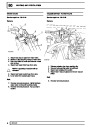
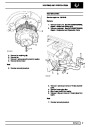
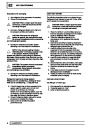
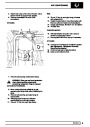
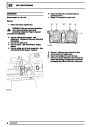
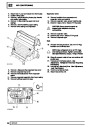
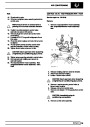
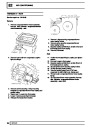
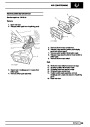
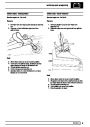
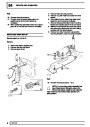
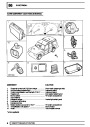
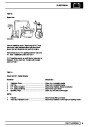
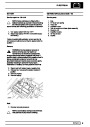
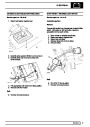
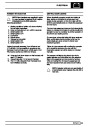
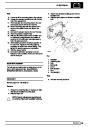
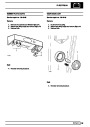
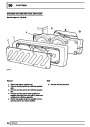
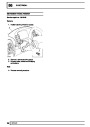
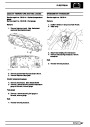
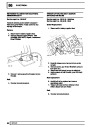
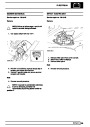
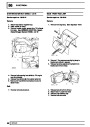
2.
3.
4.
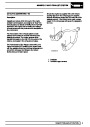
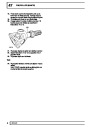
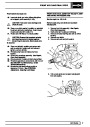
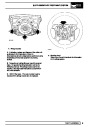
Release multiplug clip from solenoid bracket.
Disconnect solenoid multiplug.
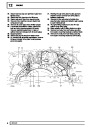
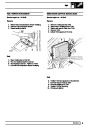
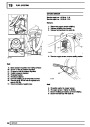
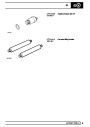
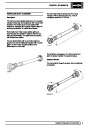
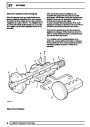
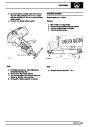
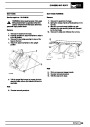
Loosen 2 control valve unions.
CAUTION: Use 2 spanners when loosening
or tightening air conditioning pipe unions.
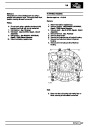
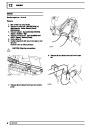
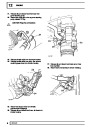
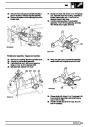
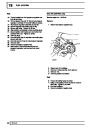
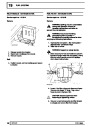
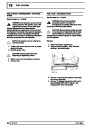
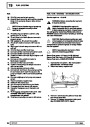
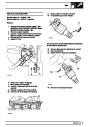
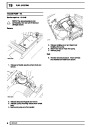
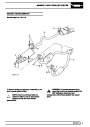
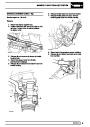
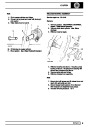
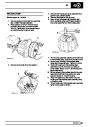
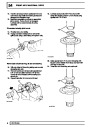
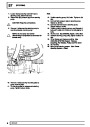
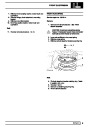
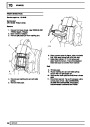
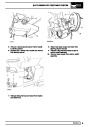
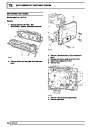
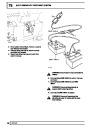
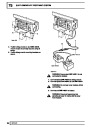
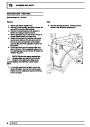
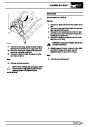
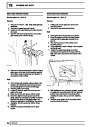
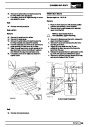
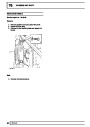
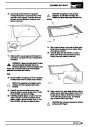
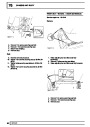
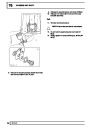
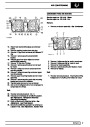
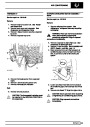
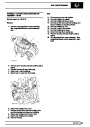
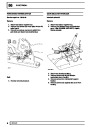
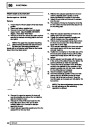
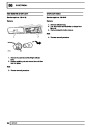
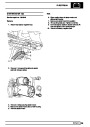
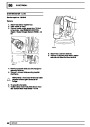
5.
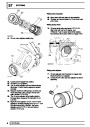
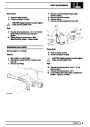
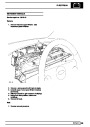
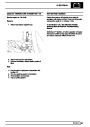
Remove 2 screws securing control valve to
blower motor housing.
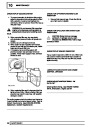
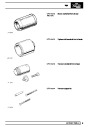
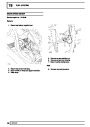
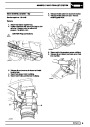
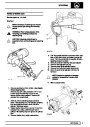
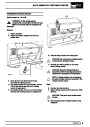
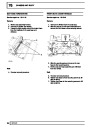
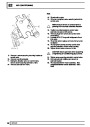
6.
7.
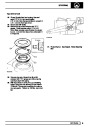
Release unions from control valve.
Remove and discard 2 ’O’ ring seals from control
valve.
CAUTION: Immediately plug air
conditioning connections.
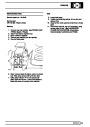
8.
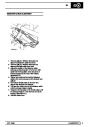
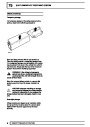
Remove control valve assembly.
14
REPAIR
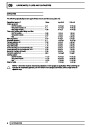
| Categories | Range Rover |
|---|---|
| Tags | Land Rover |
| Model Year | 1998 |
| Download File |
|
| Document Type | Workshop Manual |
| Language | English |
| Product Brand | Land Rover |
| Document File Type | |
| Publisher | landrover.com |
| Wikipedia's Page | http://en.wikipedia.org/wiki/Land_Rover |
| Copyright | Attribution Non-commercial |
(0 votes, average: 0 out of 5)